Photography Guide
Indian Food Photography Guide
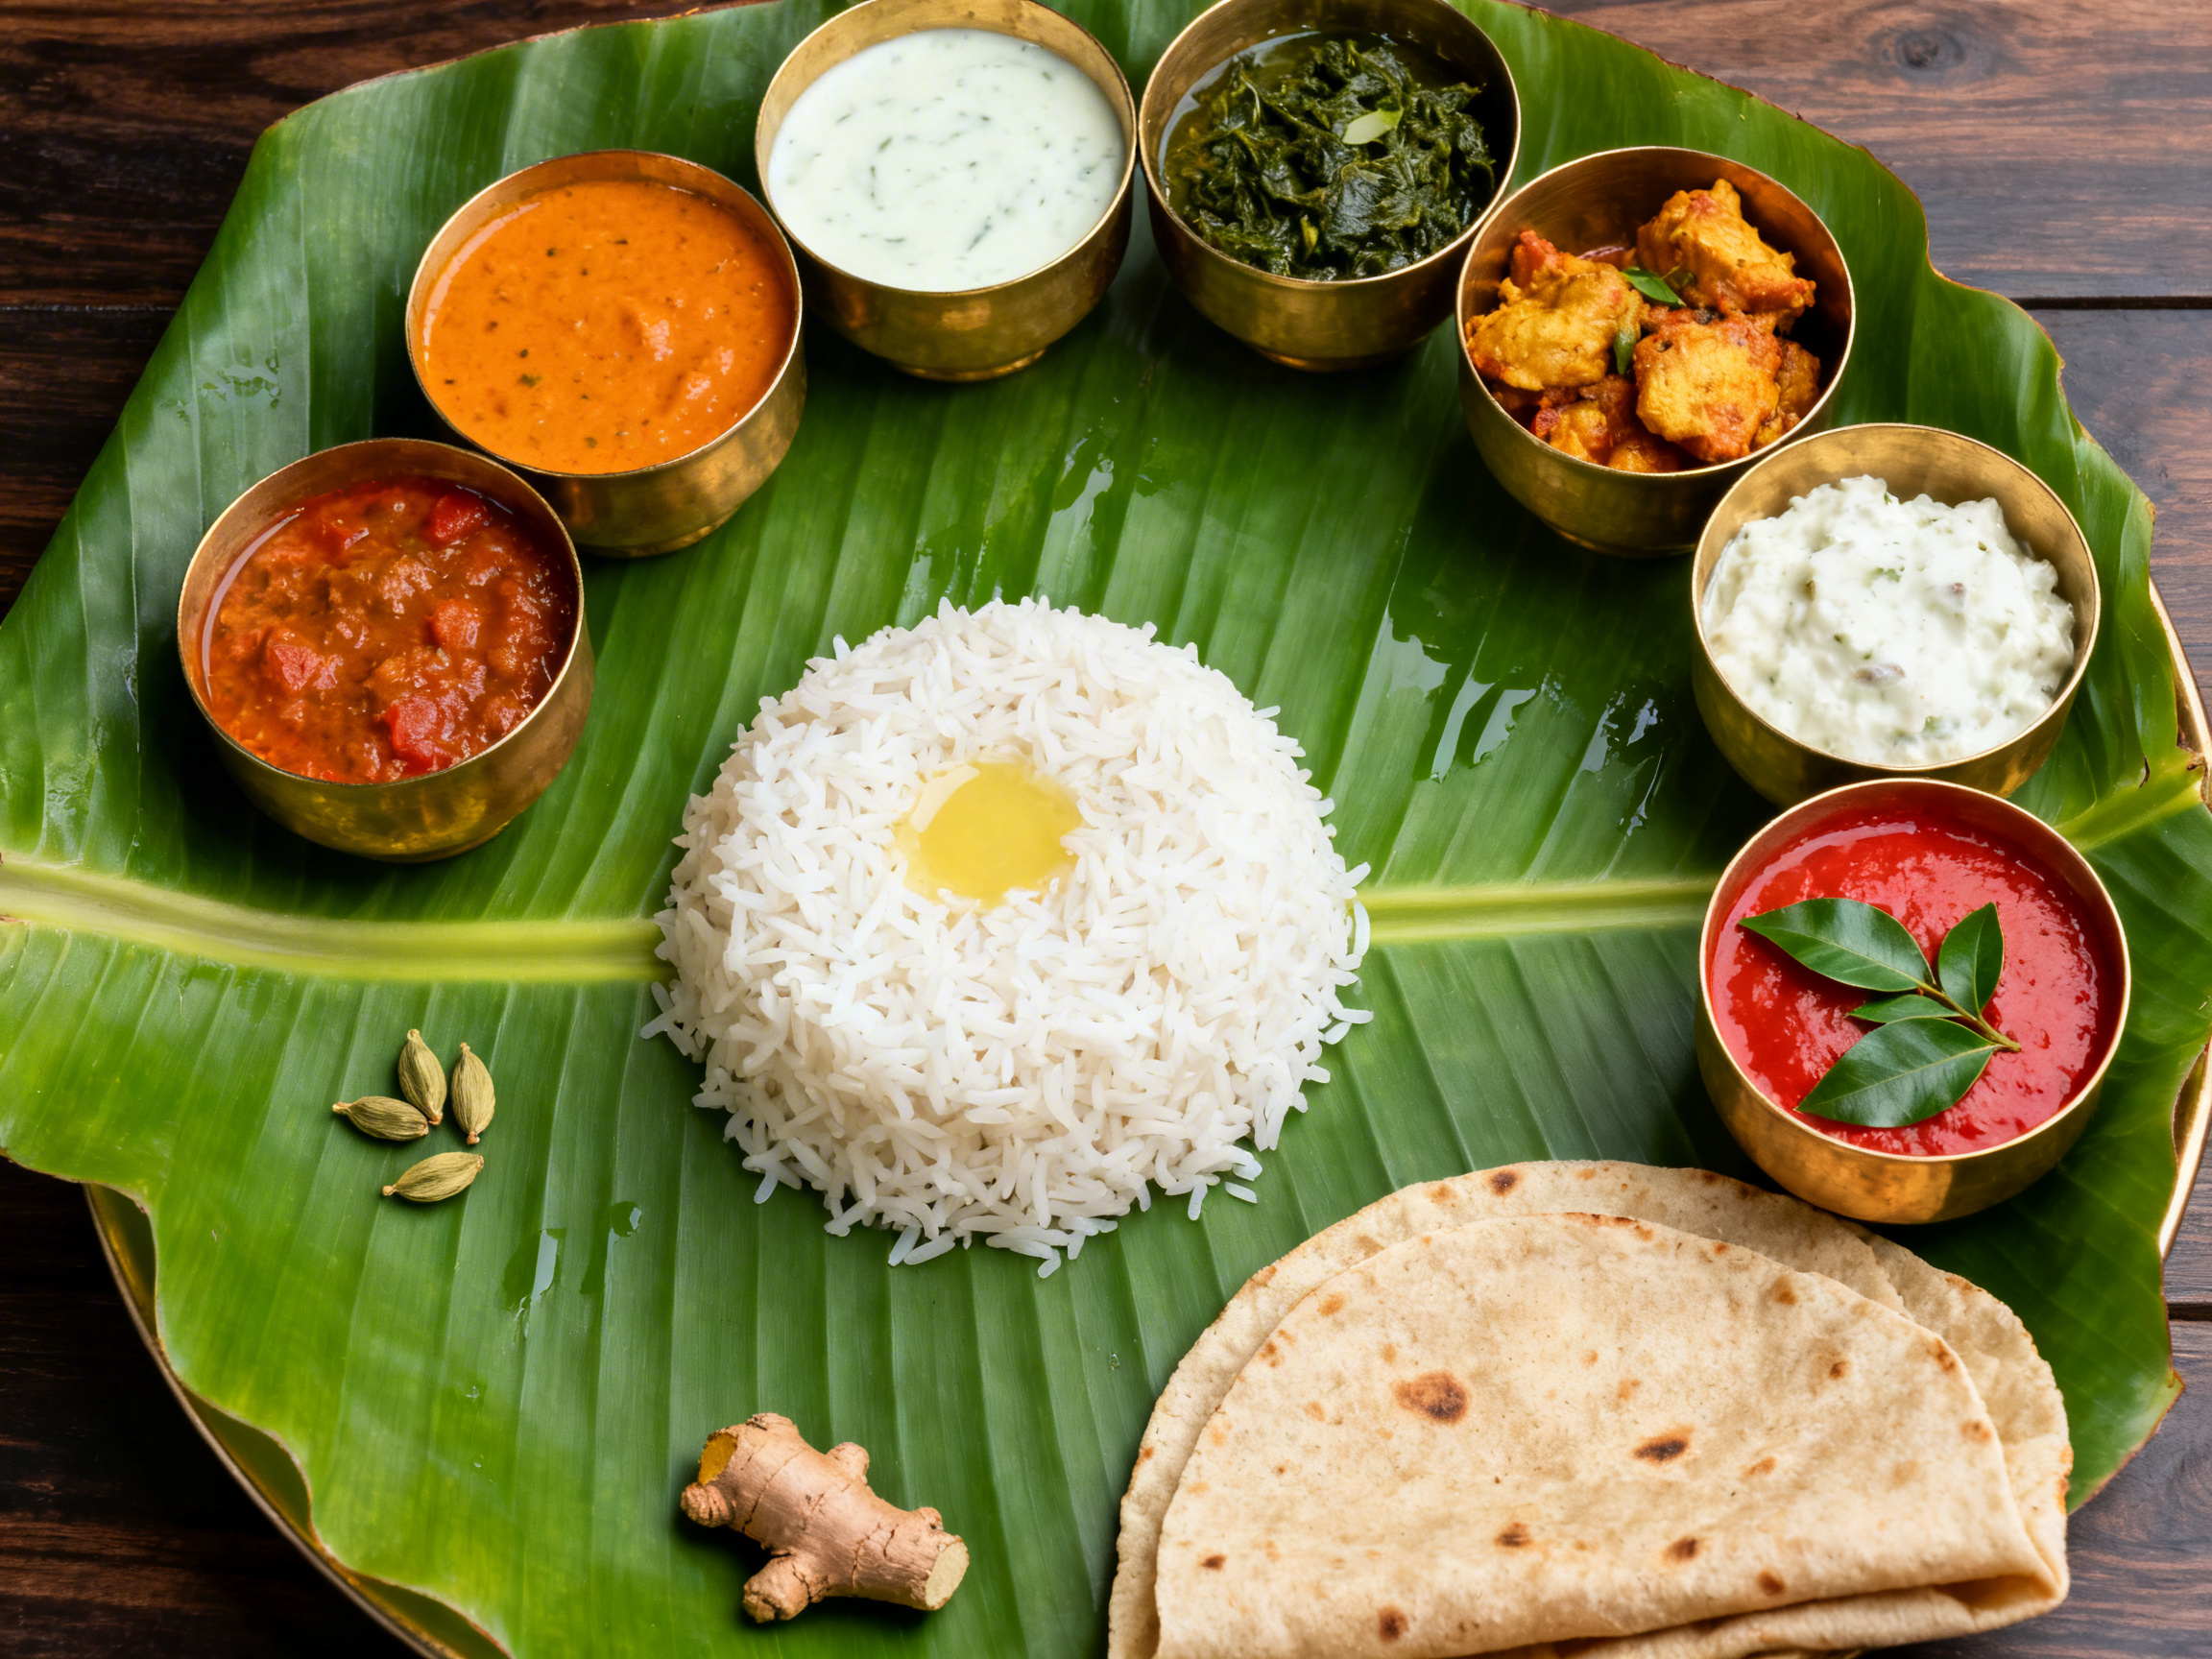
Composing a thali with eight or more bowls while managing oil sheen on curries and saffron color accuracy under artificial light.
Primary Angle
Overhead
Lighting
Diffused overhead natural light for thali layouts; side window light for single dishes
Read time
~8 min
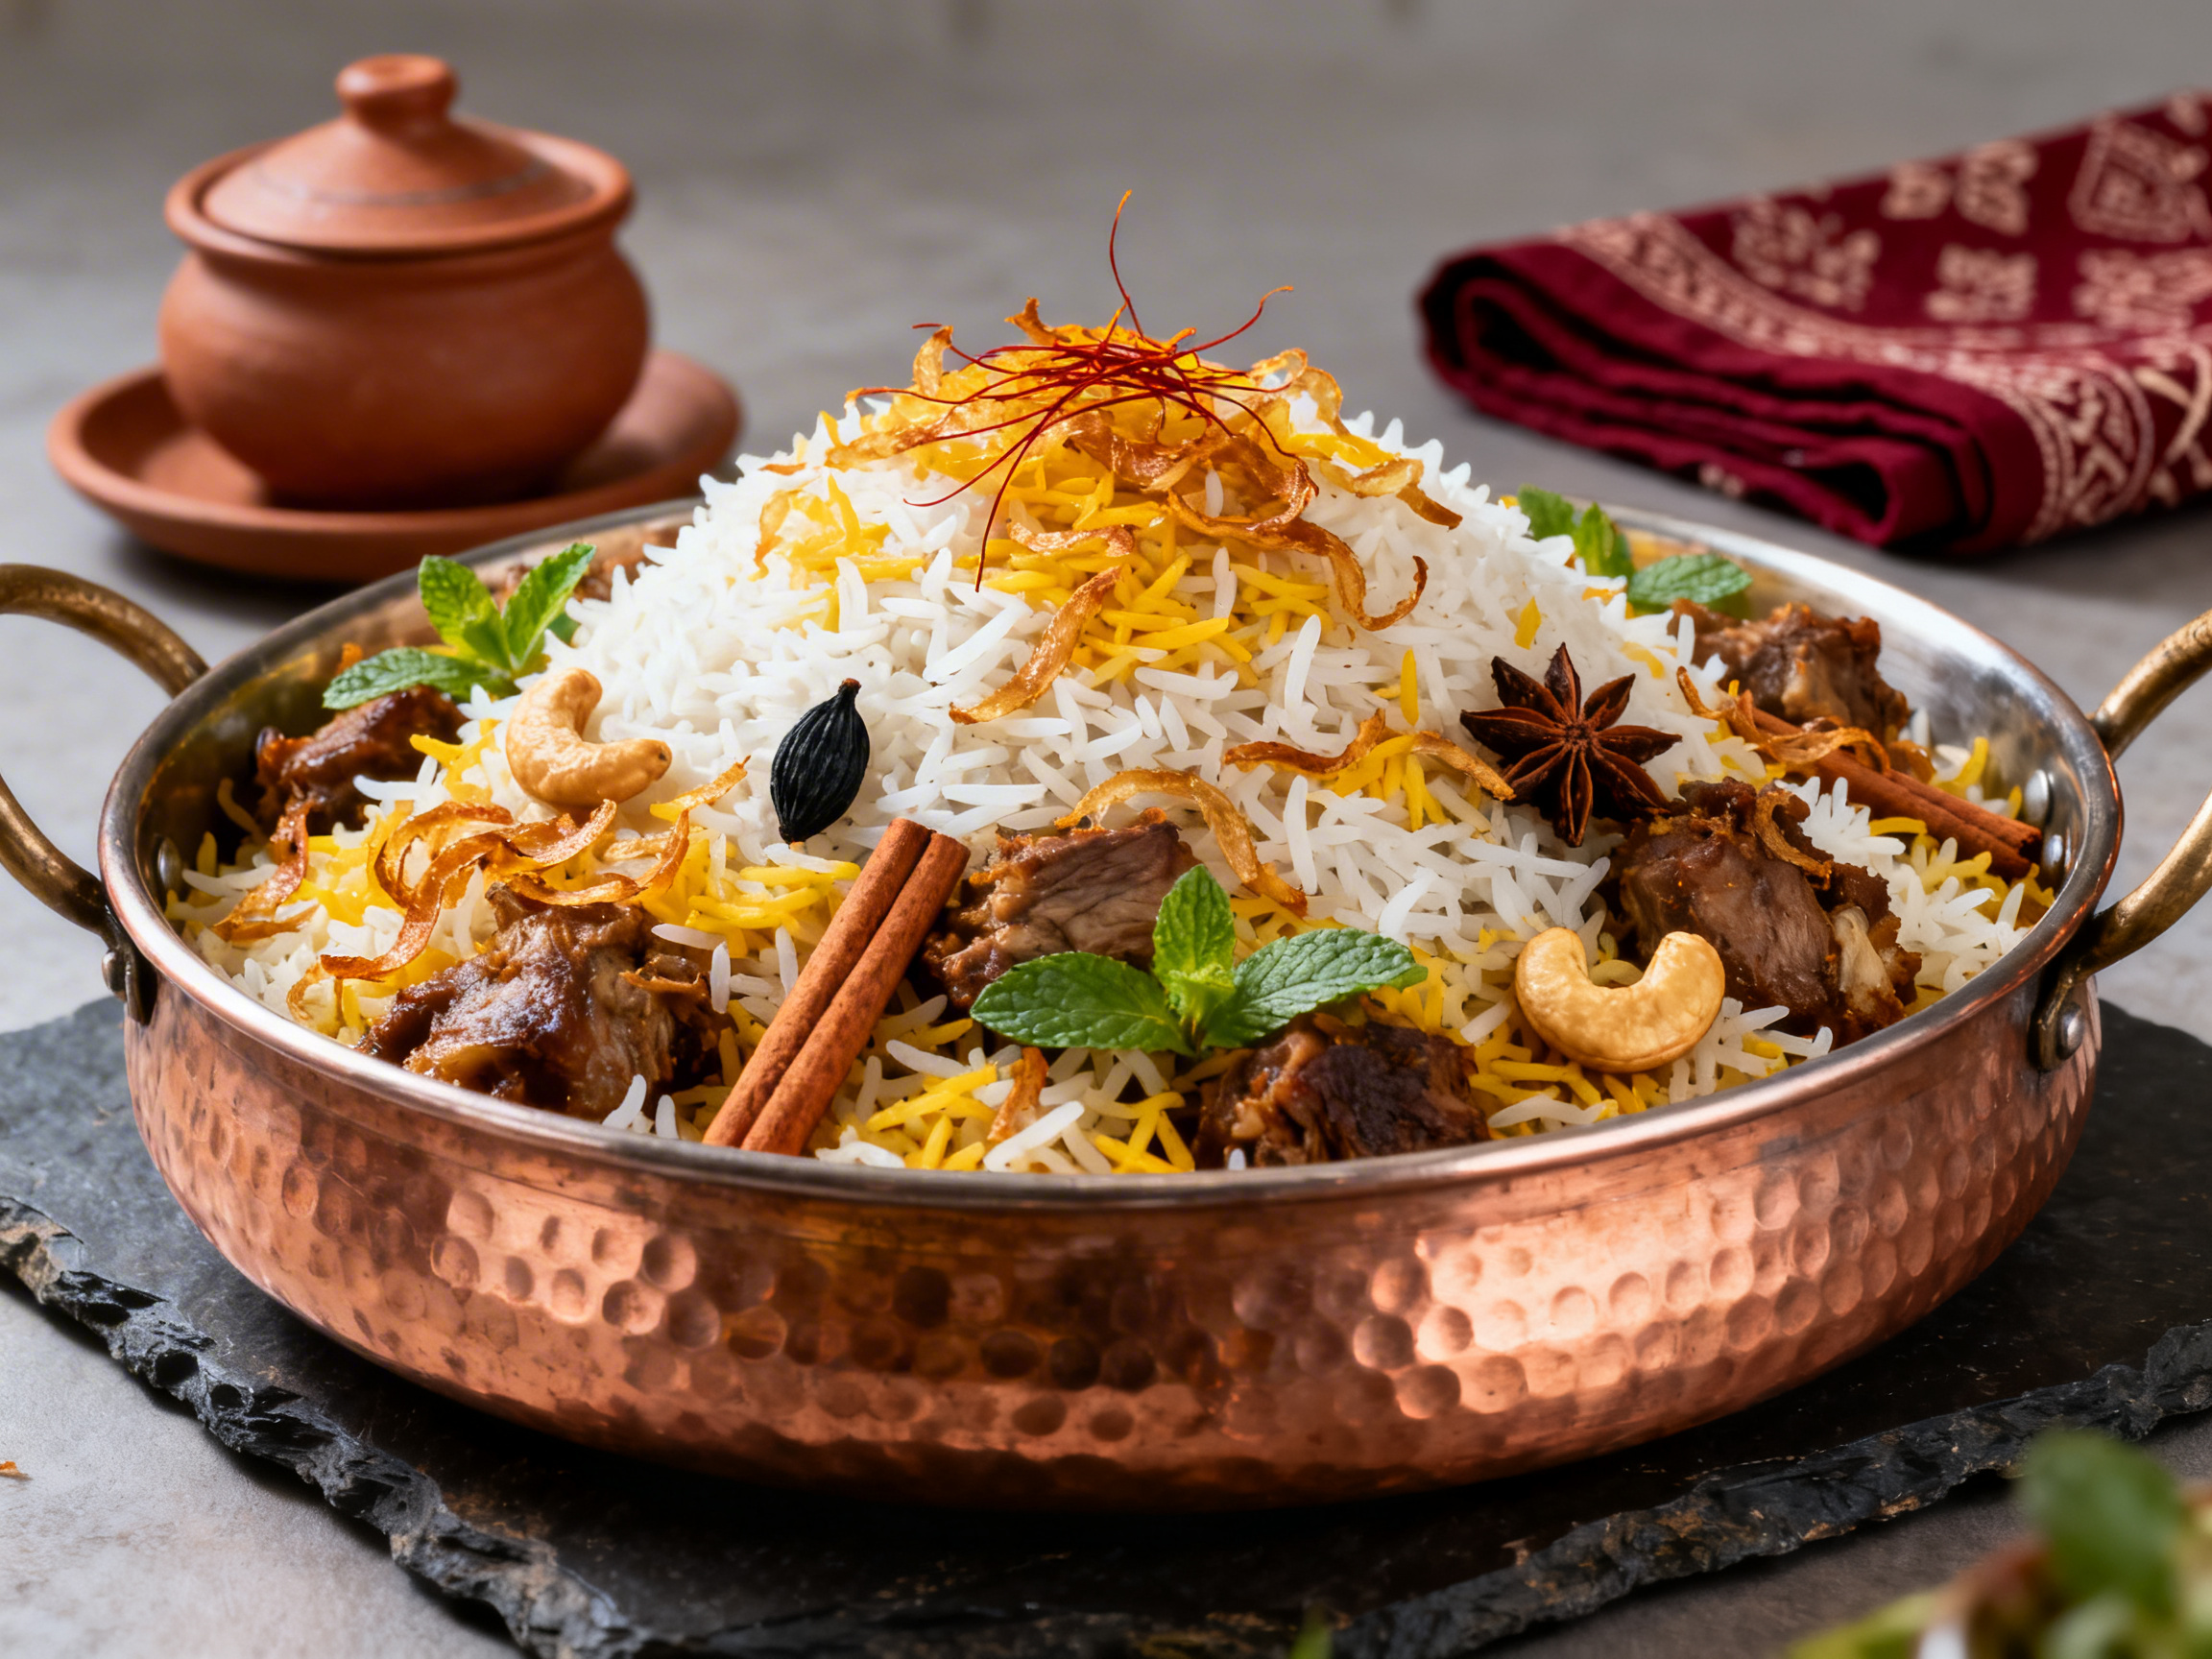
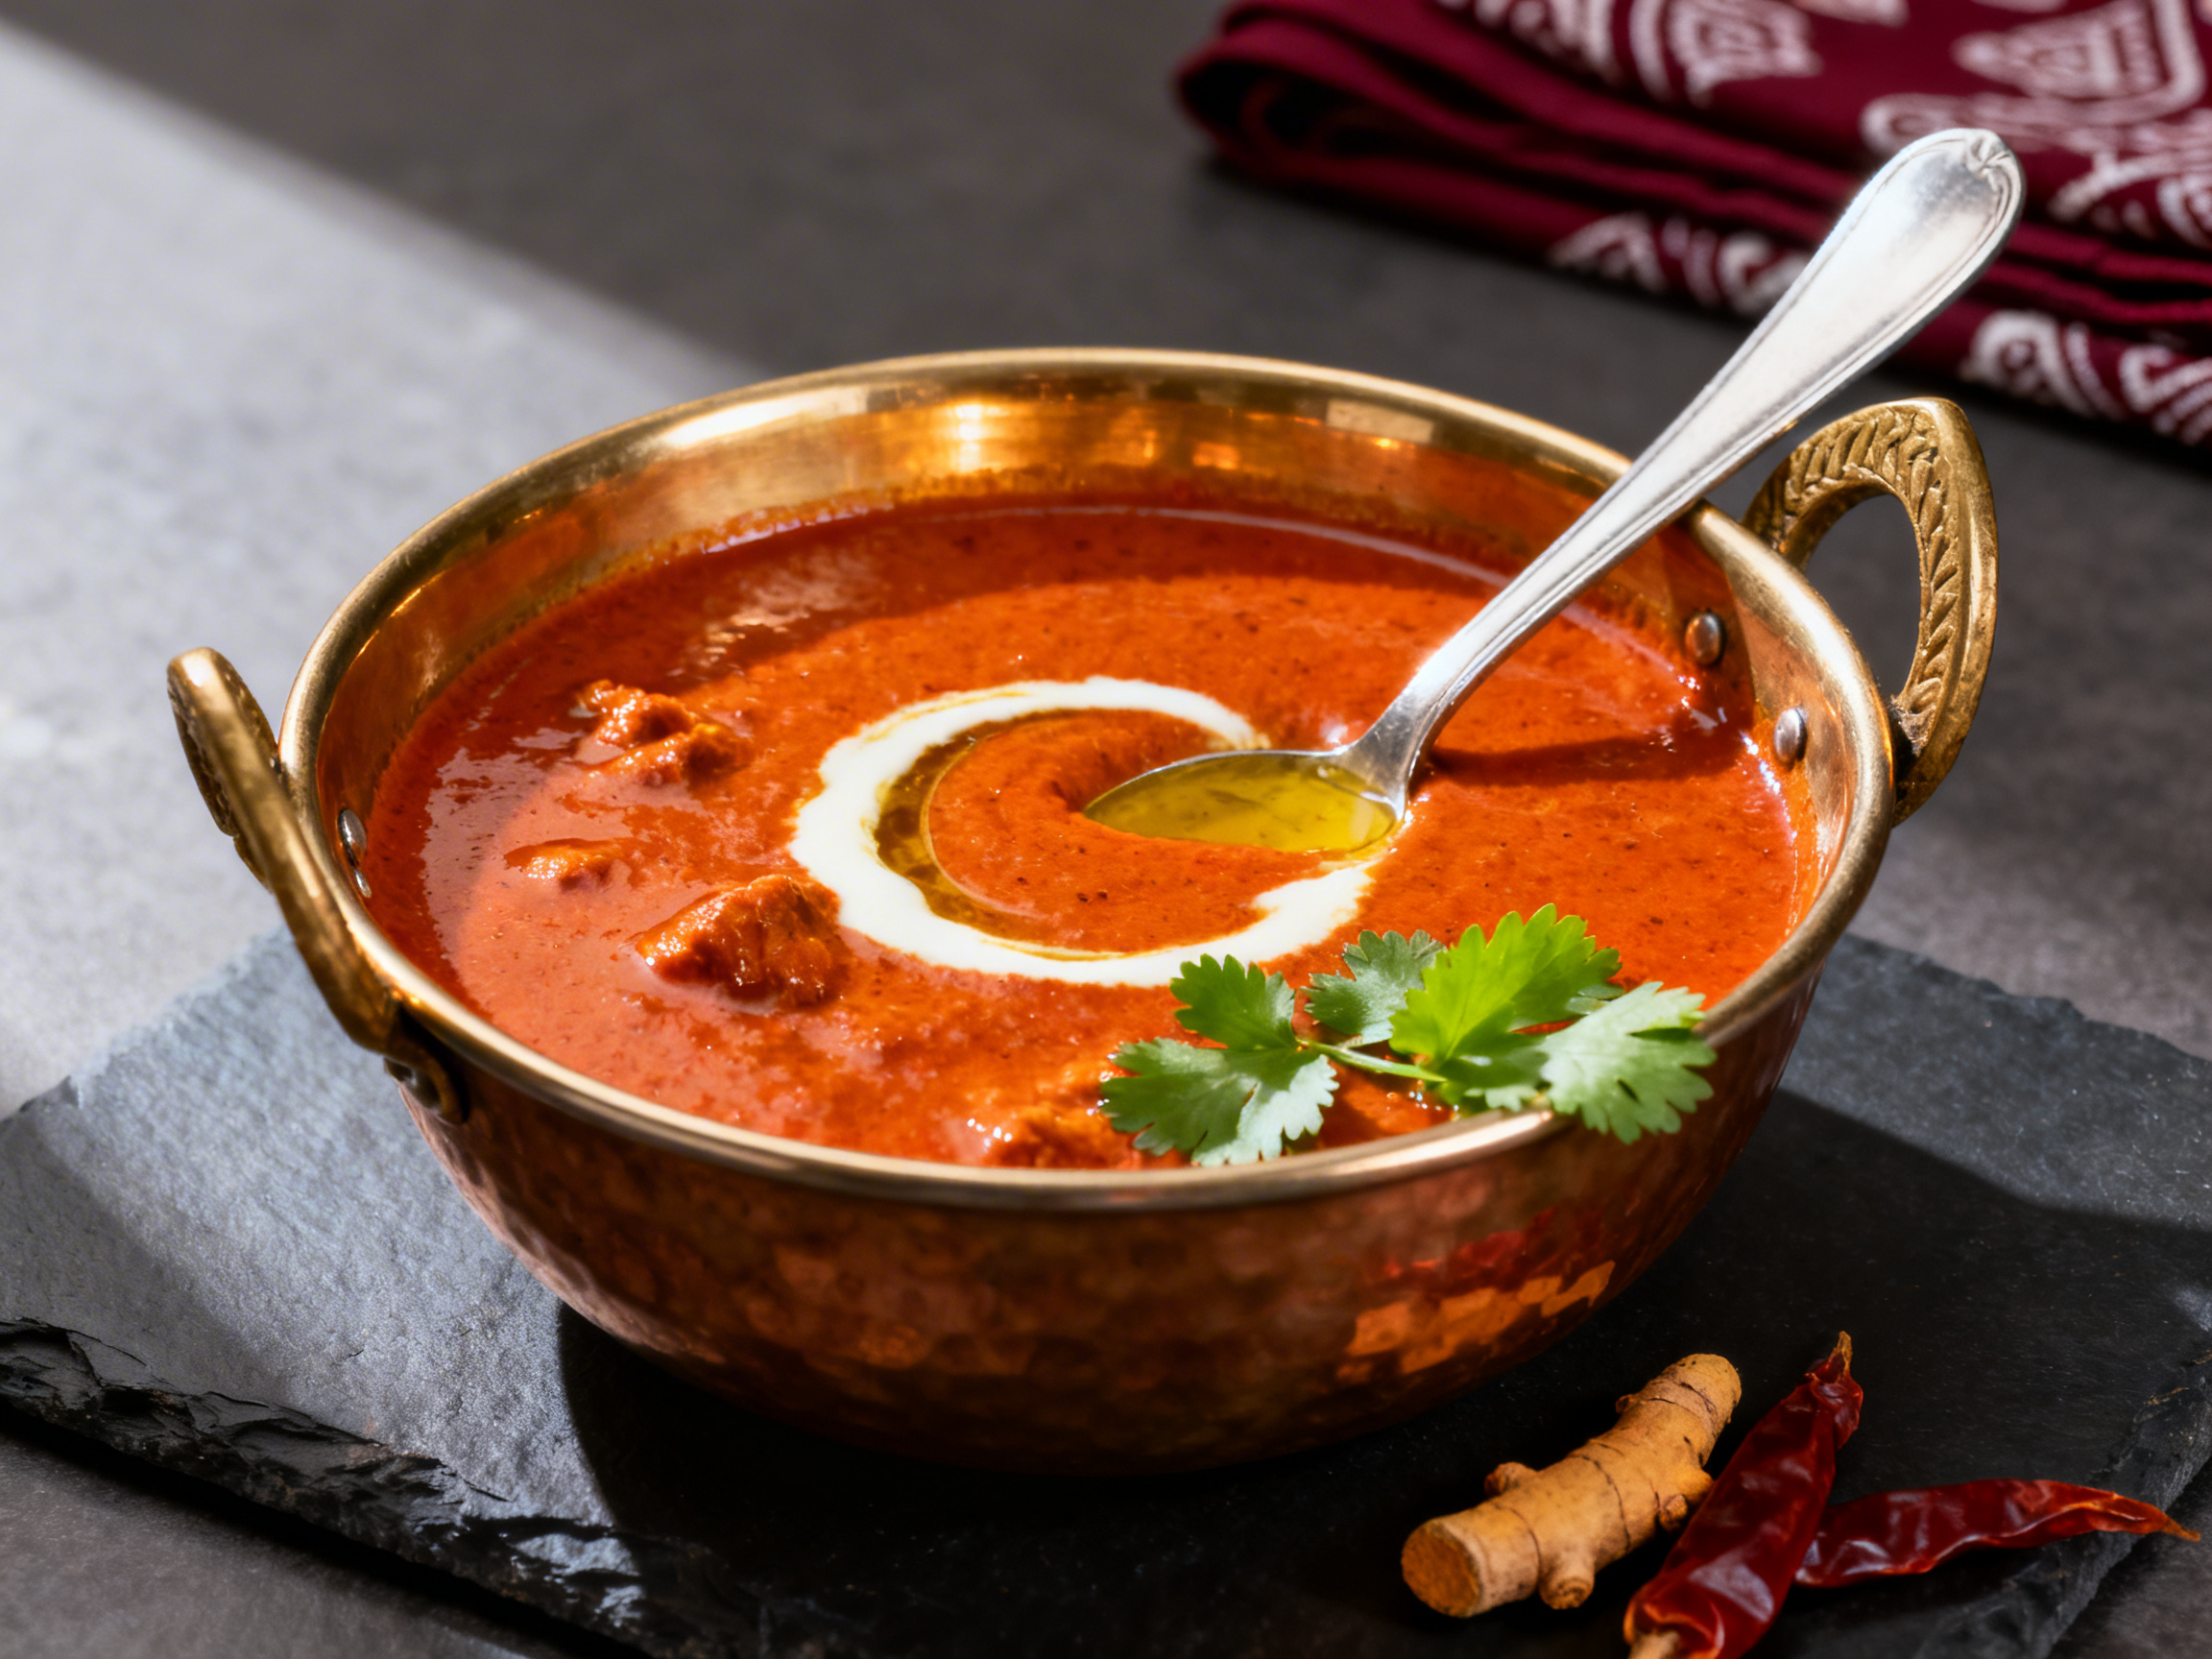
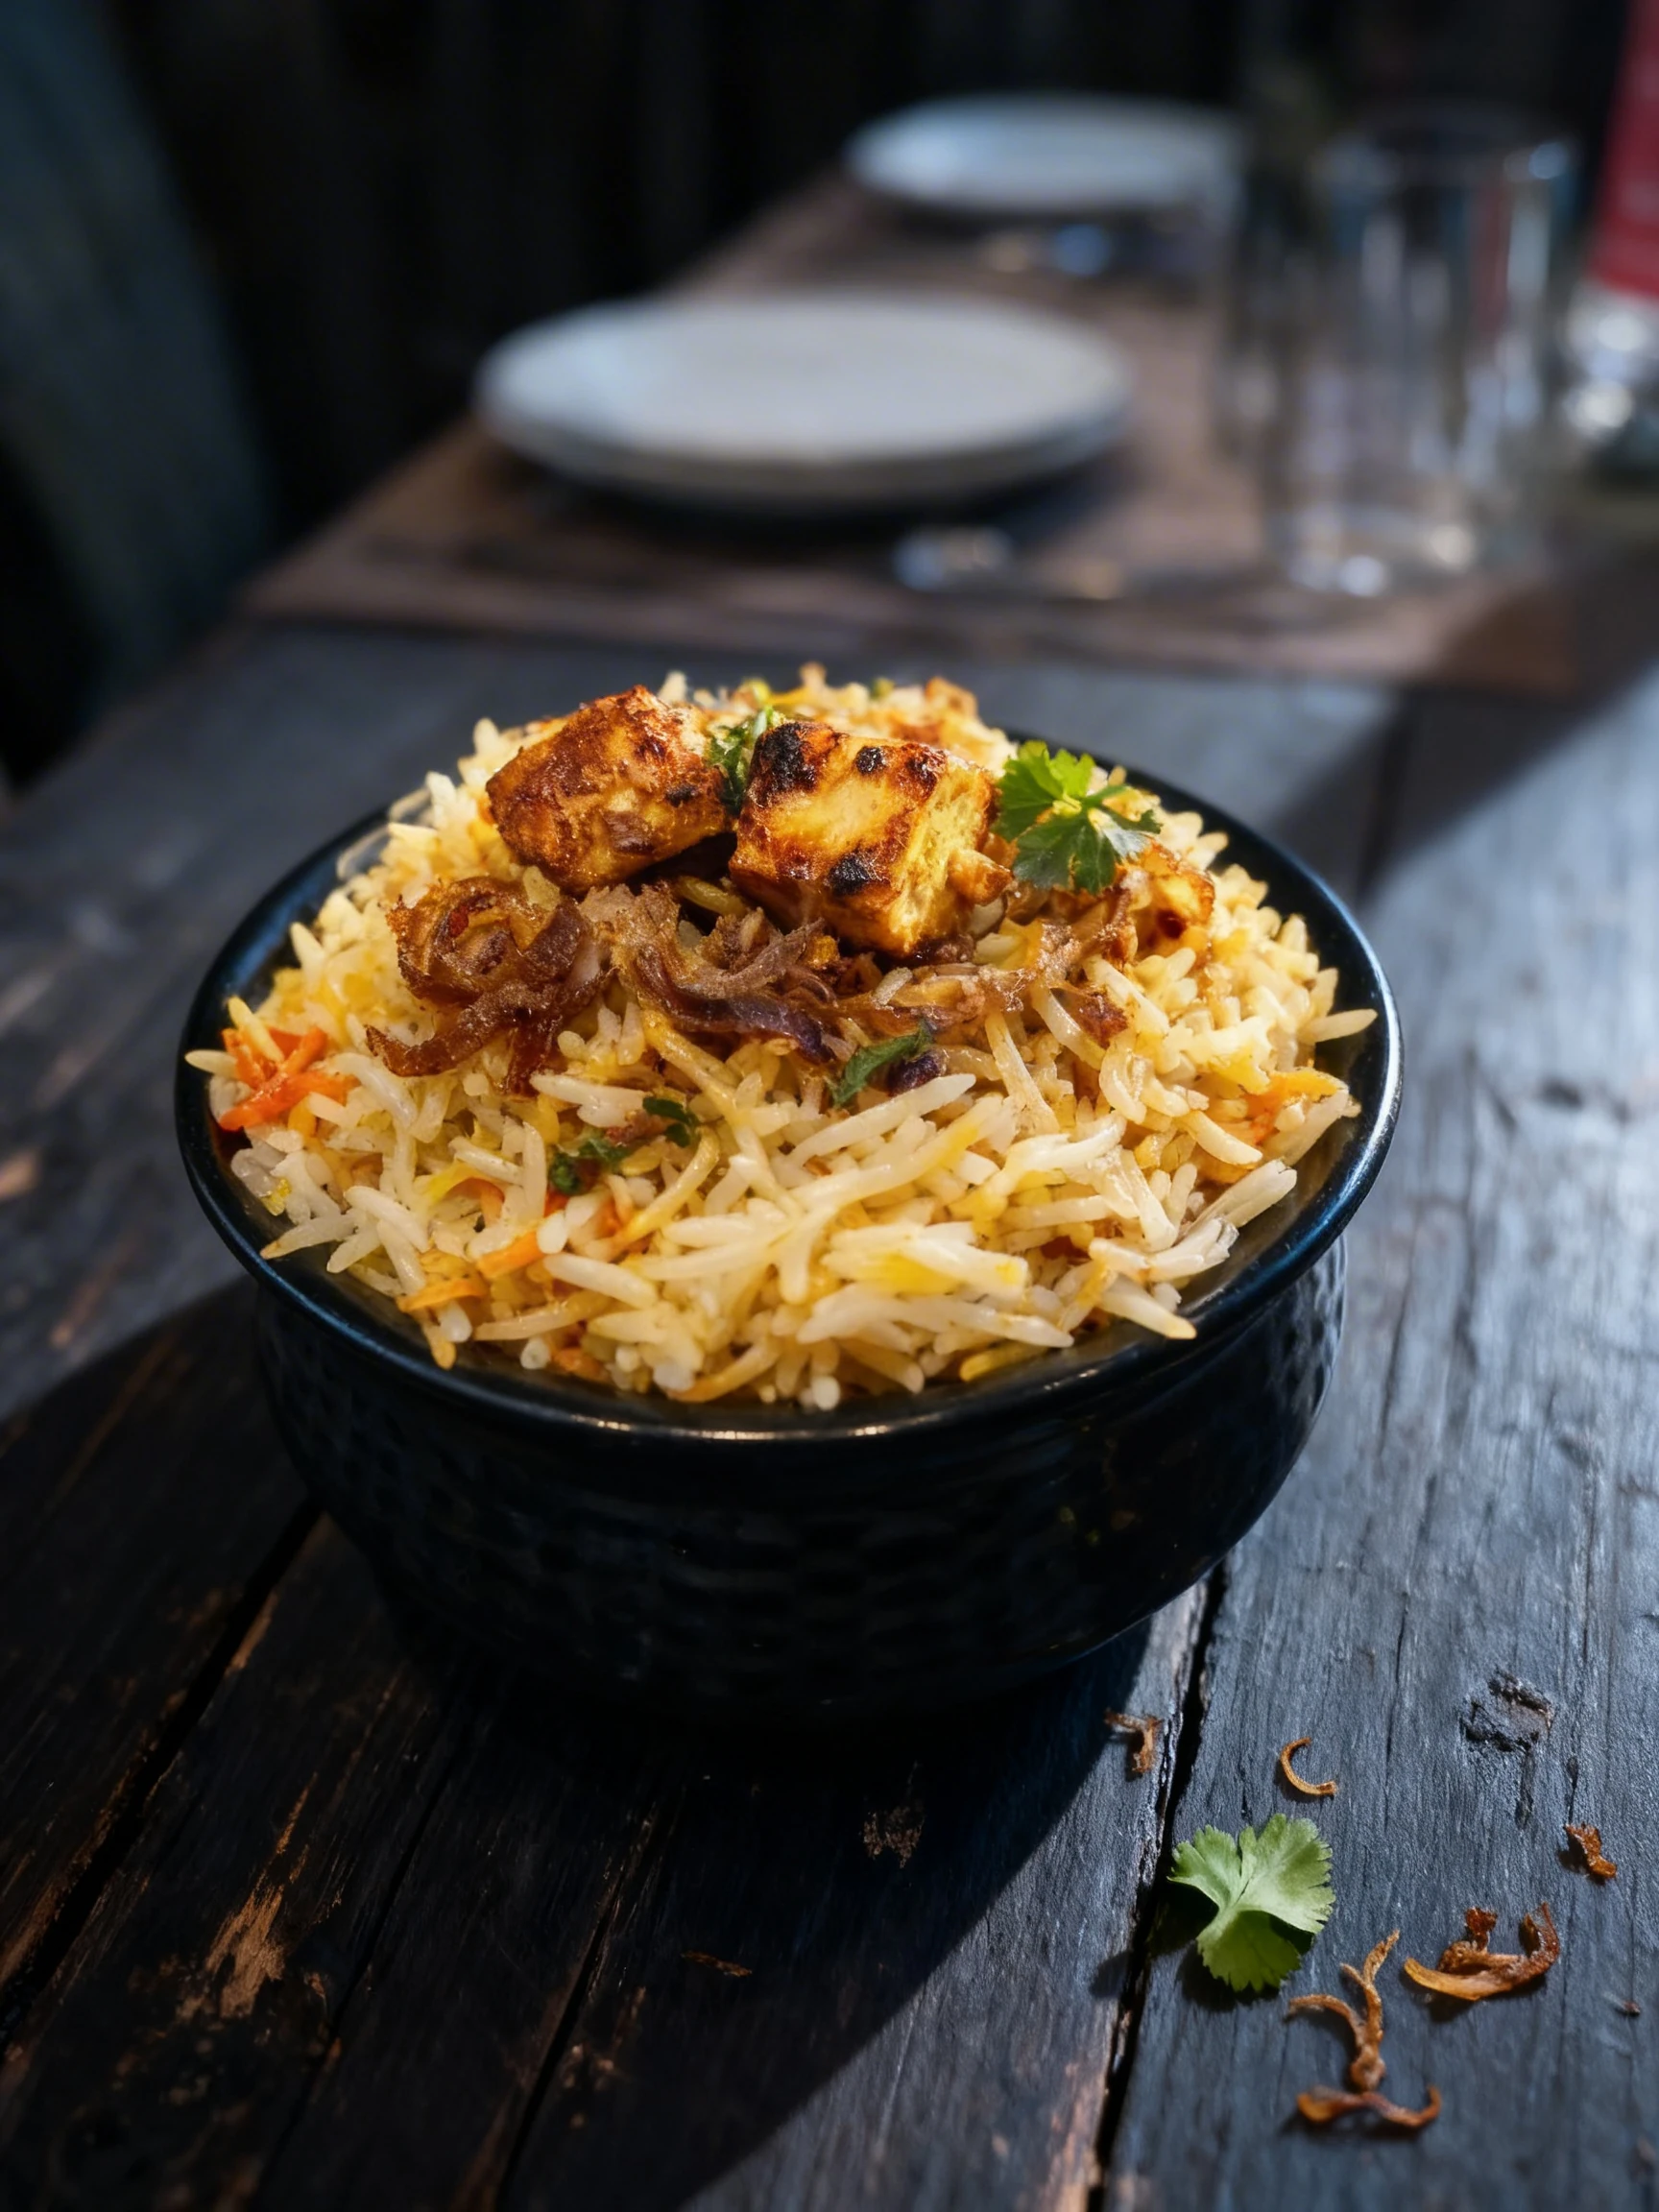
Indian cuisine is one of the most visually complex in the world to photograph well. A single thali platter can contain eight distinct dishes - dal, sabzi, raita, pickle, chutney, rice, roti, and a sweet - each with a different color, texture, and reflectivity. Getting all of them to read individually while composing a cohesive overhead frame is a discipline in itself. Single dishes like butter chicken and dal makhani present a different challenge: rich, glossy sauces that reflect light in ways that can blow out highlights or flatten to a uniform brown. Biryani layered with saffron-tinted rice, fried onions, and whole spices is one of the most photogenic dishes in any cuisine when handled correctly. This guide covers everything from thali bowl positioning to dosa crispness communication, saffron color correction, and which props from traditional Indian kitchenware elevate every shot.
What Makes Indian Challenging to Photograph
The thali composition challenge is unique to Indian food photography. A full thali presents eight to twelve individual katori bowls arranged around a central rice or roti portion, and the photographer must simultaneously manage bowl positioning, height variation, color distribution, and negative space - all in a format where even a two-centimeter shift in one bowl changes the entire visual balance. The rule for thali composition is color opposition: place contrasting colors adjacent to each other rather than grouping similar tones. Rich orange dal makhani next to pale white raita creates separation; dal next to butter chicken creates a muddy orange block. Height variation between bowls prevents the overhead view from reading as a flat grid - taller brass katori for liquids, shorter wider bowls for dry dishes. Oil sheen on curries is the secondary challenge: a thin film of ghee or cooking oil on the surface of butter chicken reflects light as a harsh hotspot that obscures the sauce color beneath. A slight camera position shift or a flag card blocking the reflection point resolves this in camera rather than in post.
Best Lighting for Indian Photography
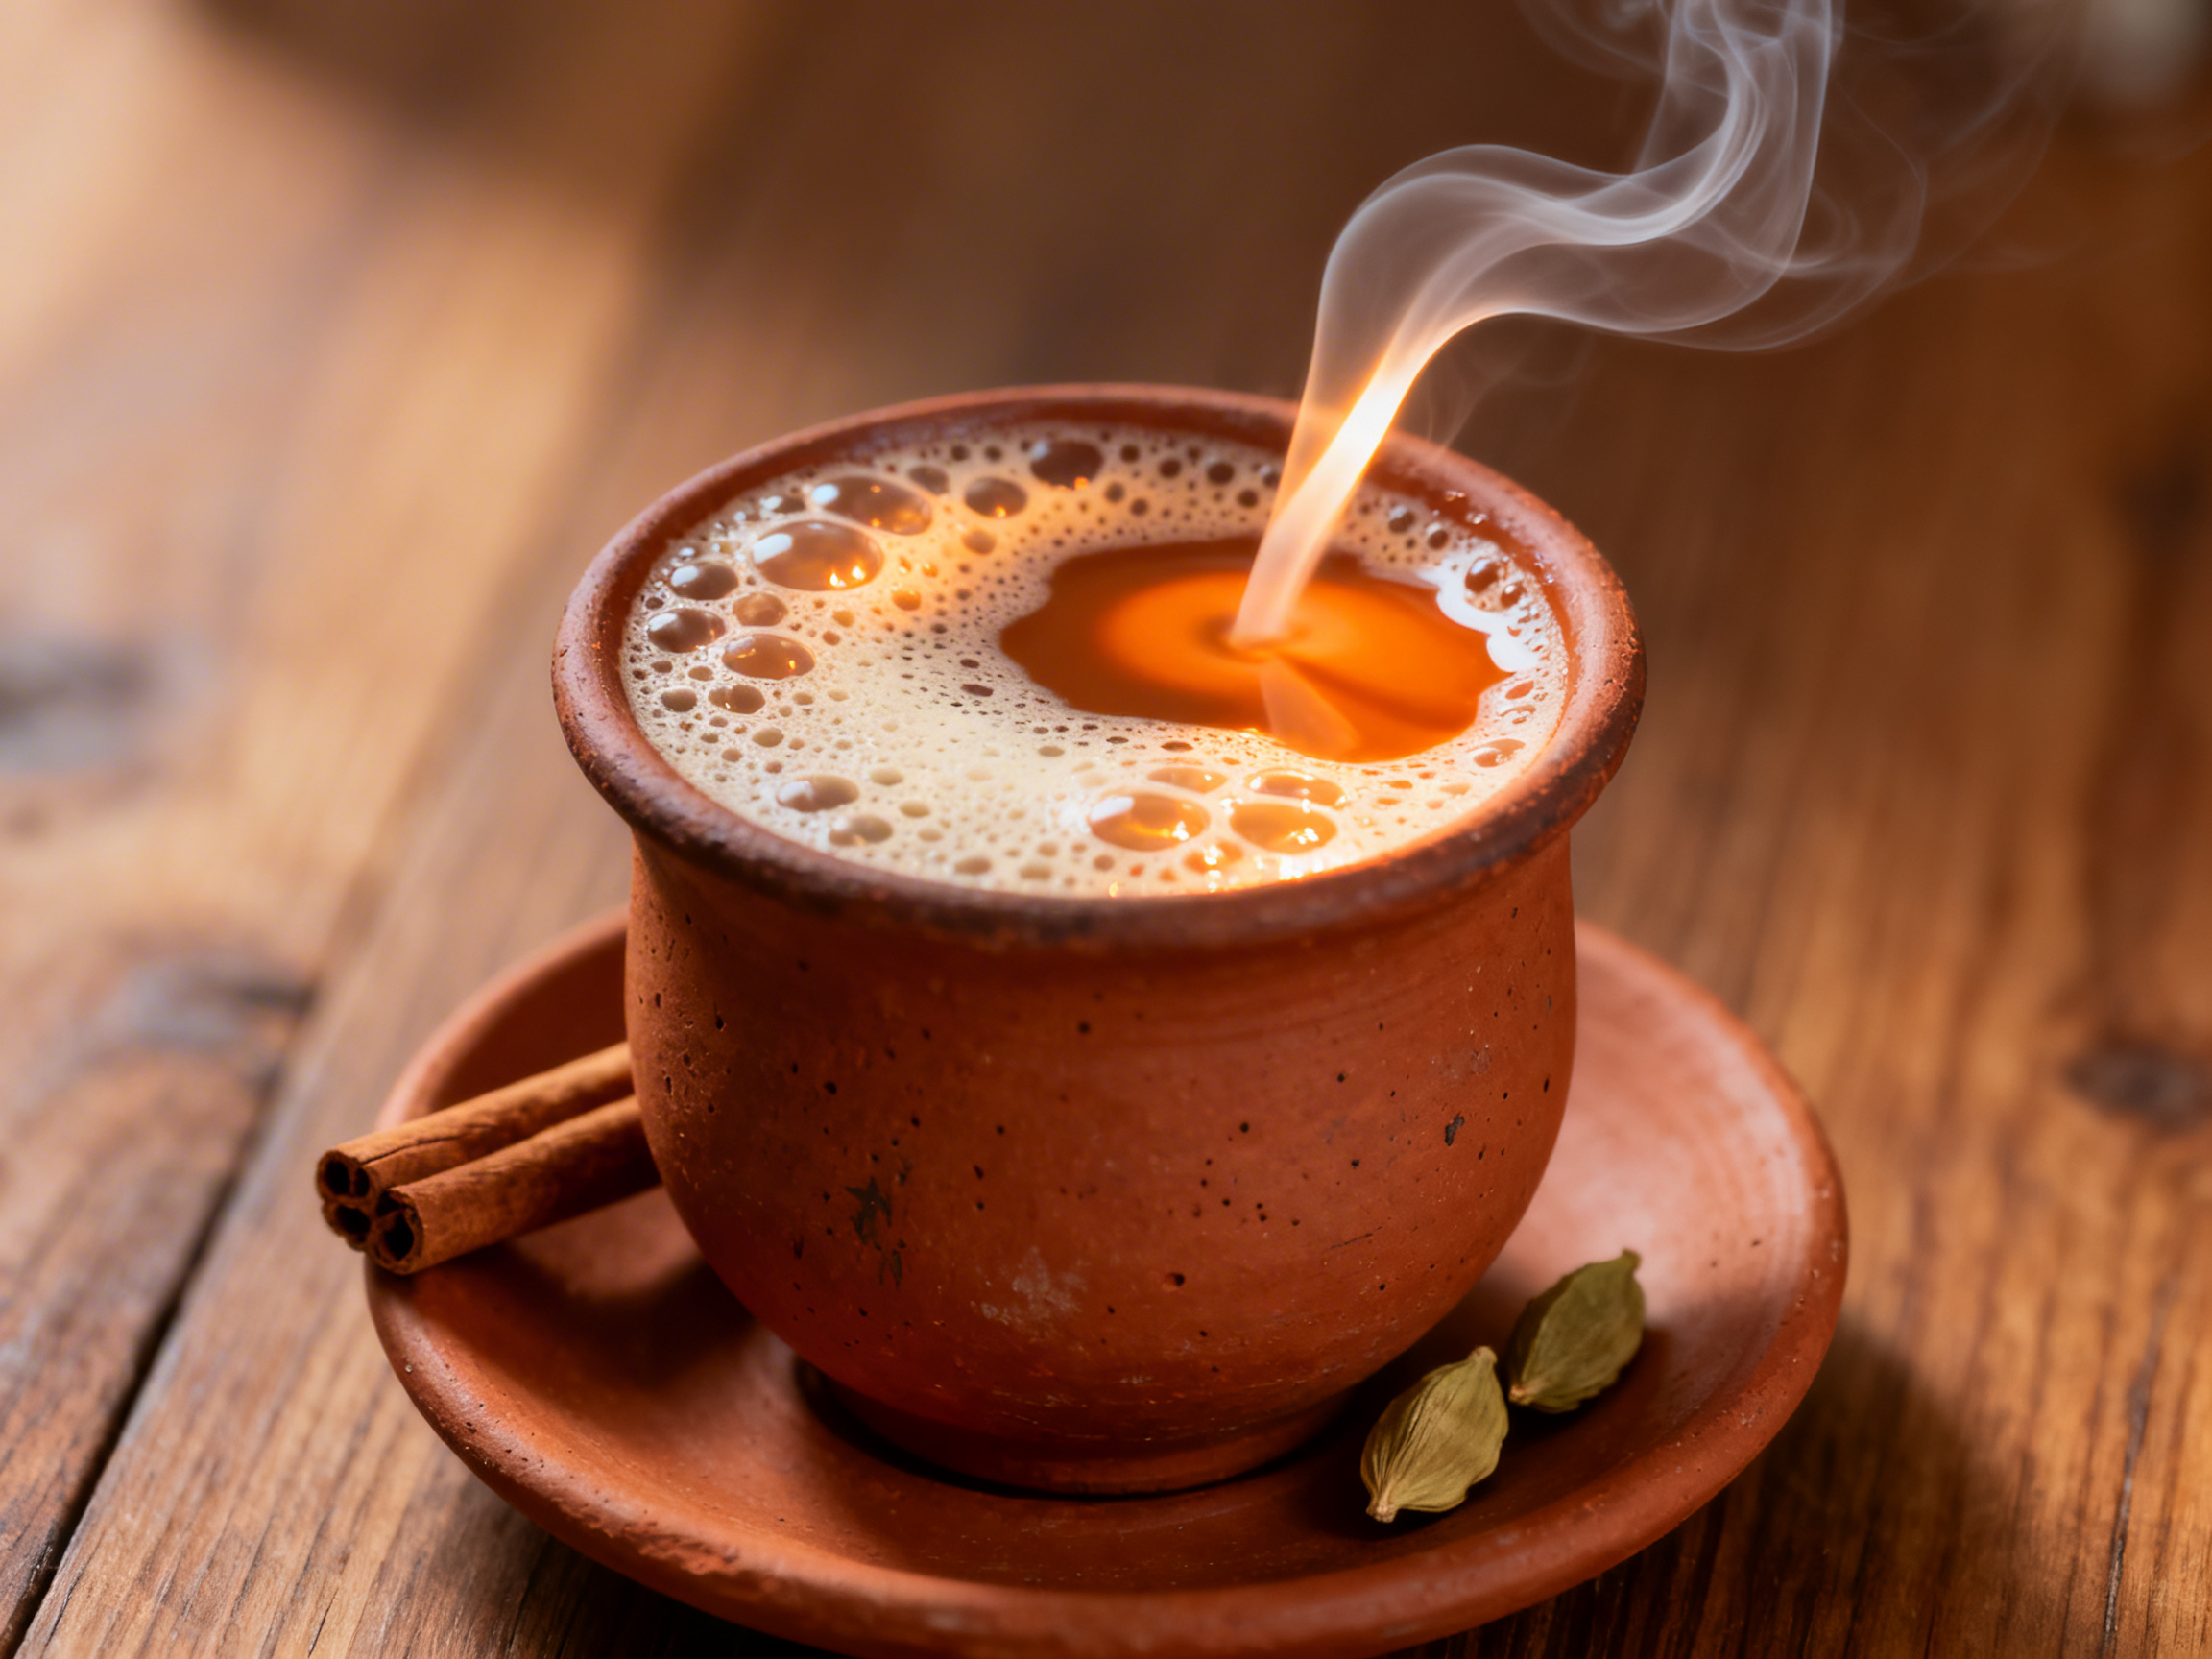
Overhead diffused natural light is the optimal setup for a full thali because it illuminates all bowls evenly from above without casting directional shadows that would make some bowls look deeper and darker than others. A large north-facing window with a sheer curtain is ideal. If shooting under artificial light, use a large softbox positioned directly overhead at 90 degrees rather than at an angle, and add a second fill light at low power to prevent inter-bowl shadows. For single dishes like biryani or paneer tikka, move to side lighting. A window to the left of the dish at 45 degrees creates dimensional shadows between biryani grains and saffron strands, making the layering visible. For dosa, side-backlighting from behind the plate skims across the crisp surface and makes the thin batter texture read as a fine grid - essential for communicating the crispness that distinguishes a good dosa. Avoid warm amber-gelled lights on Indian food; most Indian dishes are already warm-toned, and additional amber pushes curries from golden to overcooked-brown.
Camera Angles for Indian
Overhead is the primary angle for Indian food photography because it is the only angle that can contain the full thali in a single frame while showing every bowl's contents. Shoot at 90 degrees directly above using a camera arm or a step ladder. For a biryani served in a large pot or on a platter, move to 35 degrees elevated - this angle reveals the rice layers, the saffron-tinted grains on top, the fried onions, and the whole spice garnish without losing the sense of depth that distinguishes biryani from plain rice. Paneer tikka and other grilled dishes benefit from a close-up 45-degree angle that shows the char marks and spice crust on each cube, which are the primary quality signals for grilled Indian dishes. A masala chai shot is best at eye level - slightly below the rim of the clay cup - to capture the froth surface texture and the steam rising from the liquid. Dosa can be shot at a 15-degree downward angle to show the fold and the chutneys alongside.
Food Styling and Props
Brass and copper katori bowls are the single most impactful prop choice for Indian food photography. Their warm metallic surfaces complement the turmeric and saffron tones in most Indian dishes, and they signal authenticity for both restaurant menus and food delivery platforms. For a thali, use at least three katori of different heights to create visual rhythm in the overhead frame. A banana leaf under the thali plate adds a traditional South Indian reference and provides a natural green frame around the warm dish colors. Clay pots and earthen bowls communicate slow-cooked richness - position a small clay pot of dal makhani at the edge of a thali frame as an accent. Fresh curry leaves scattered as garnish add green punctuation to an otherwise monochromatic warm frame; they wilt within fifteen minutes under studio lights, so add them immediately before shooting. A small piece of turmeric root placed near a curry dish grounds the color story and tells the viewer what they are tasting before they read the label. Indian textile napkins - block-print cotton in deep reds, blues, or ochres - add cultural context without visual noise. For butter chicken, a small silver spoon resting in the sauce edge creates scale and invites the viewer into the dish.
Recommended props
Equipment Guide
A 35mm wide-angle prime is useful for full thali overhead shots where you need to capture the entire platter plus surrounding props without distortion from a too-low overhead position. A 50mm prime at standard overhead height captures a medium thali cleanly. For close-up curry texture and biryani grain detail, a 90mm macro lens reveals saffron strands, whole spices, and ghee sheen at the level of detail that justifies the dish's price point on a print menu. Shooting overhead requires either a camera arm extended over the surface or a tripod with a horizontal boom - improvising by standing on a ladder with a handheld camera at 1/160s works but introduces the risk of motion blur from instability. Use a remote shutter release for all overhead shots. For clay pot and earthen bowl surfaces, a polarizing filter reduces the matte scatter reflection and brings out the texture of the clay without flattering the surface into a smooth blob.
Skip the photoshoot — enhance the indian photos you already have
The techniques on this page take time to master. MenuPhotoAI applies the same lighting, color, and texture corrections — automatically — to the smartphone photos you already shot. Studio-quality results in 30 seconds.
Try free — 5 credits, no cardCommon Indian Photography Mistakes
Grouping similar curry colors in a thali
Placing butter chicken next to dal makhani next to rajma creates an orange-brown block in the center of the thali that reads as undifferentiated mass. The fix is color opposition: position the raita or green chutney between any two warm-toned dishes to create visual separation. Alternate warm and cool dishes around the thali ring deliberately rather than by default placement.
Letting oil sheen blow out curry highlights
A film of ghee or cooking oil on the surface of a curry creates specular hotspots that blow out to pure white, hiding the sauce color beneath. Shooting from a slightly different angle - moving the camera two to three inches left or right - usually moves the reflection point off the hotspot. Alternatively, use a black flag card to block the specific light beam causing the reflection.
Shooting saffron under warm artificial light
Saffron in biryani should photograph as a distinct golden-yellow strand against white rice. Under warm-tinted artificial light, saffron shifts toward orange and loses its distinctiveness against a warm background. Use cooler natural light for biryani, or set a custom white balance that is slightly cool (around 5000K) to preserve the saffron-yellow separation.
Using a dull banana leaf instead of a fresh one
A banana leaf that has been sitting for more than a few hours darkens and develops brown edges that look wilted in photos. Only use banana leaf sections cut within thirty minutes of shooting. Wipe the surface with a damp cloth to restore the waxy sheen before placing dishes on it. A dull leaf undercuts the freshness signal that makes the prop valuable.
Flat overhead light that collapses biryani layers
Biryani's visual appeal is its layered architecture - saffron rice on top, whole spices, fried onion strands, and the protein beneath. Flat overhead light washes the surface into a uniform plane. Side light at 35 to 45 degrees is essential for biryani: it catches the texture of each grain and makes the layers visible by casting micro-shadows between them.
Editing Tips
Indian food editing centers on managing warm tones without pushing them into orange mud. Separate the orange and yellow HSL channels: pull orange saturation back 10 to 15 points on curries to prevent butter chicken from looking radioactive, but preserve the yellow saturation for saffron strands in biryani. Increase green luminance slightly to keep curry leaf garnishes bright and fresh-looking rather than dark and wilted. Add clarity selectively to biryani and paneer tikka to show grain and char texture, but avoid clarity on smooth sauces where it creates an unnatural bumpy look. For thali overhead shots, use a slight vignette to draw the eye to the center arrangement.
Platform-Specific Tips
For DoorDash and Uber Eats, a thali platter is difficult to read at thumbnail size because the many small bowls become indistinct. For delivery platforms, photograph a single hero dish - butter chicken in a katori, biryani on a plate - in a square crop at 45 degrees. The single dish reads faster and more appetizingly at small sizes. For Instagram, a full thali overhead is one of the best-performing food formats; the grid-like arrangement of bowls creates a satisfying visual pattern that performs well in-feed and as a Reels thumbnail. For print menus, use the 35mm overhead thali shot at full resolution with maximum clarity editing so individual dish textures are identifiable in print. A biryani dum pot with the lid partially lifted - revealing steam and layered rice - is a print menu anchor image that communicates premium quality. MenuPhotoAI can take a smartphone shot of a thali or butter chicken and apply professional color correction and sharpening automatically, making it practical to photograph your full Indian menu between the lunch and dinner service.
Indian Photo Examples
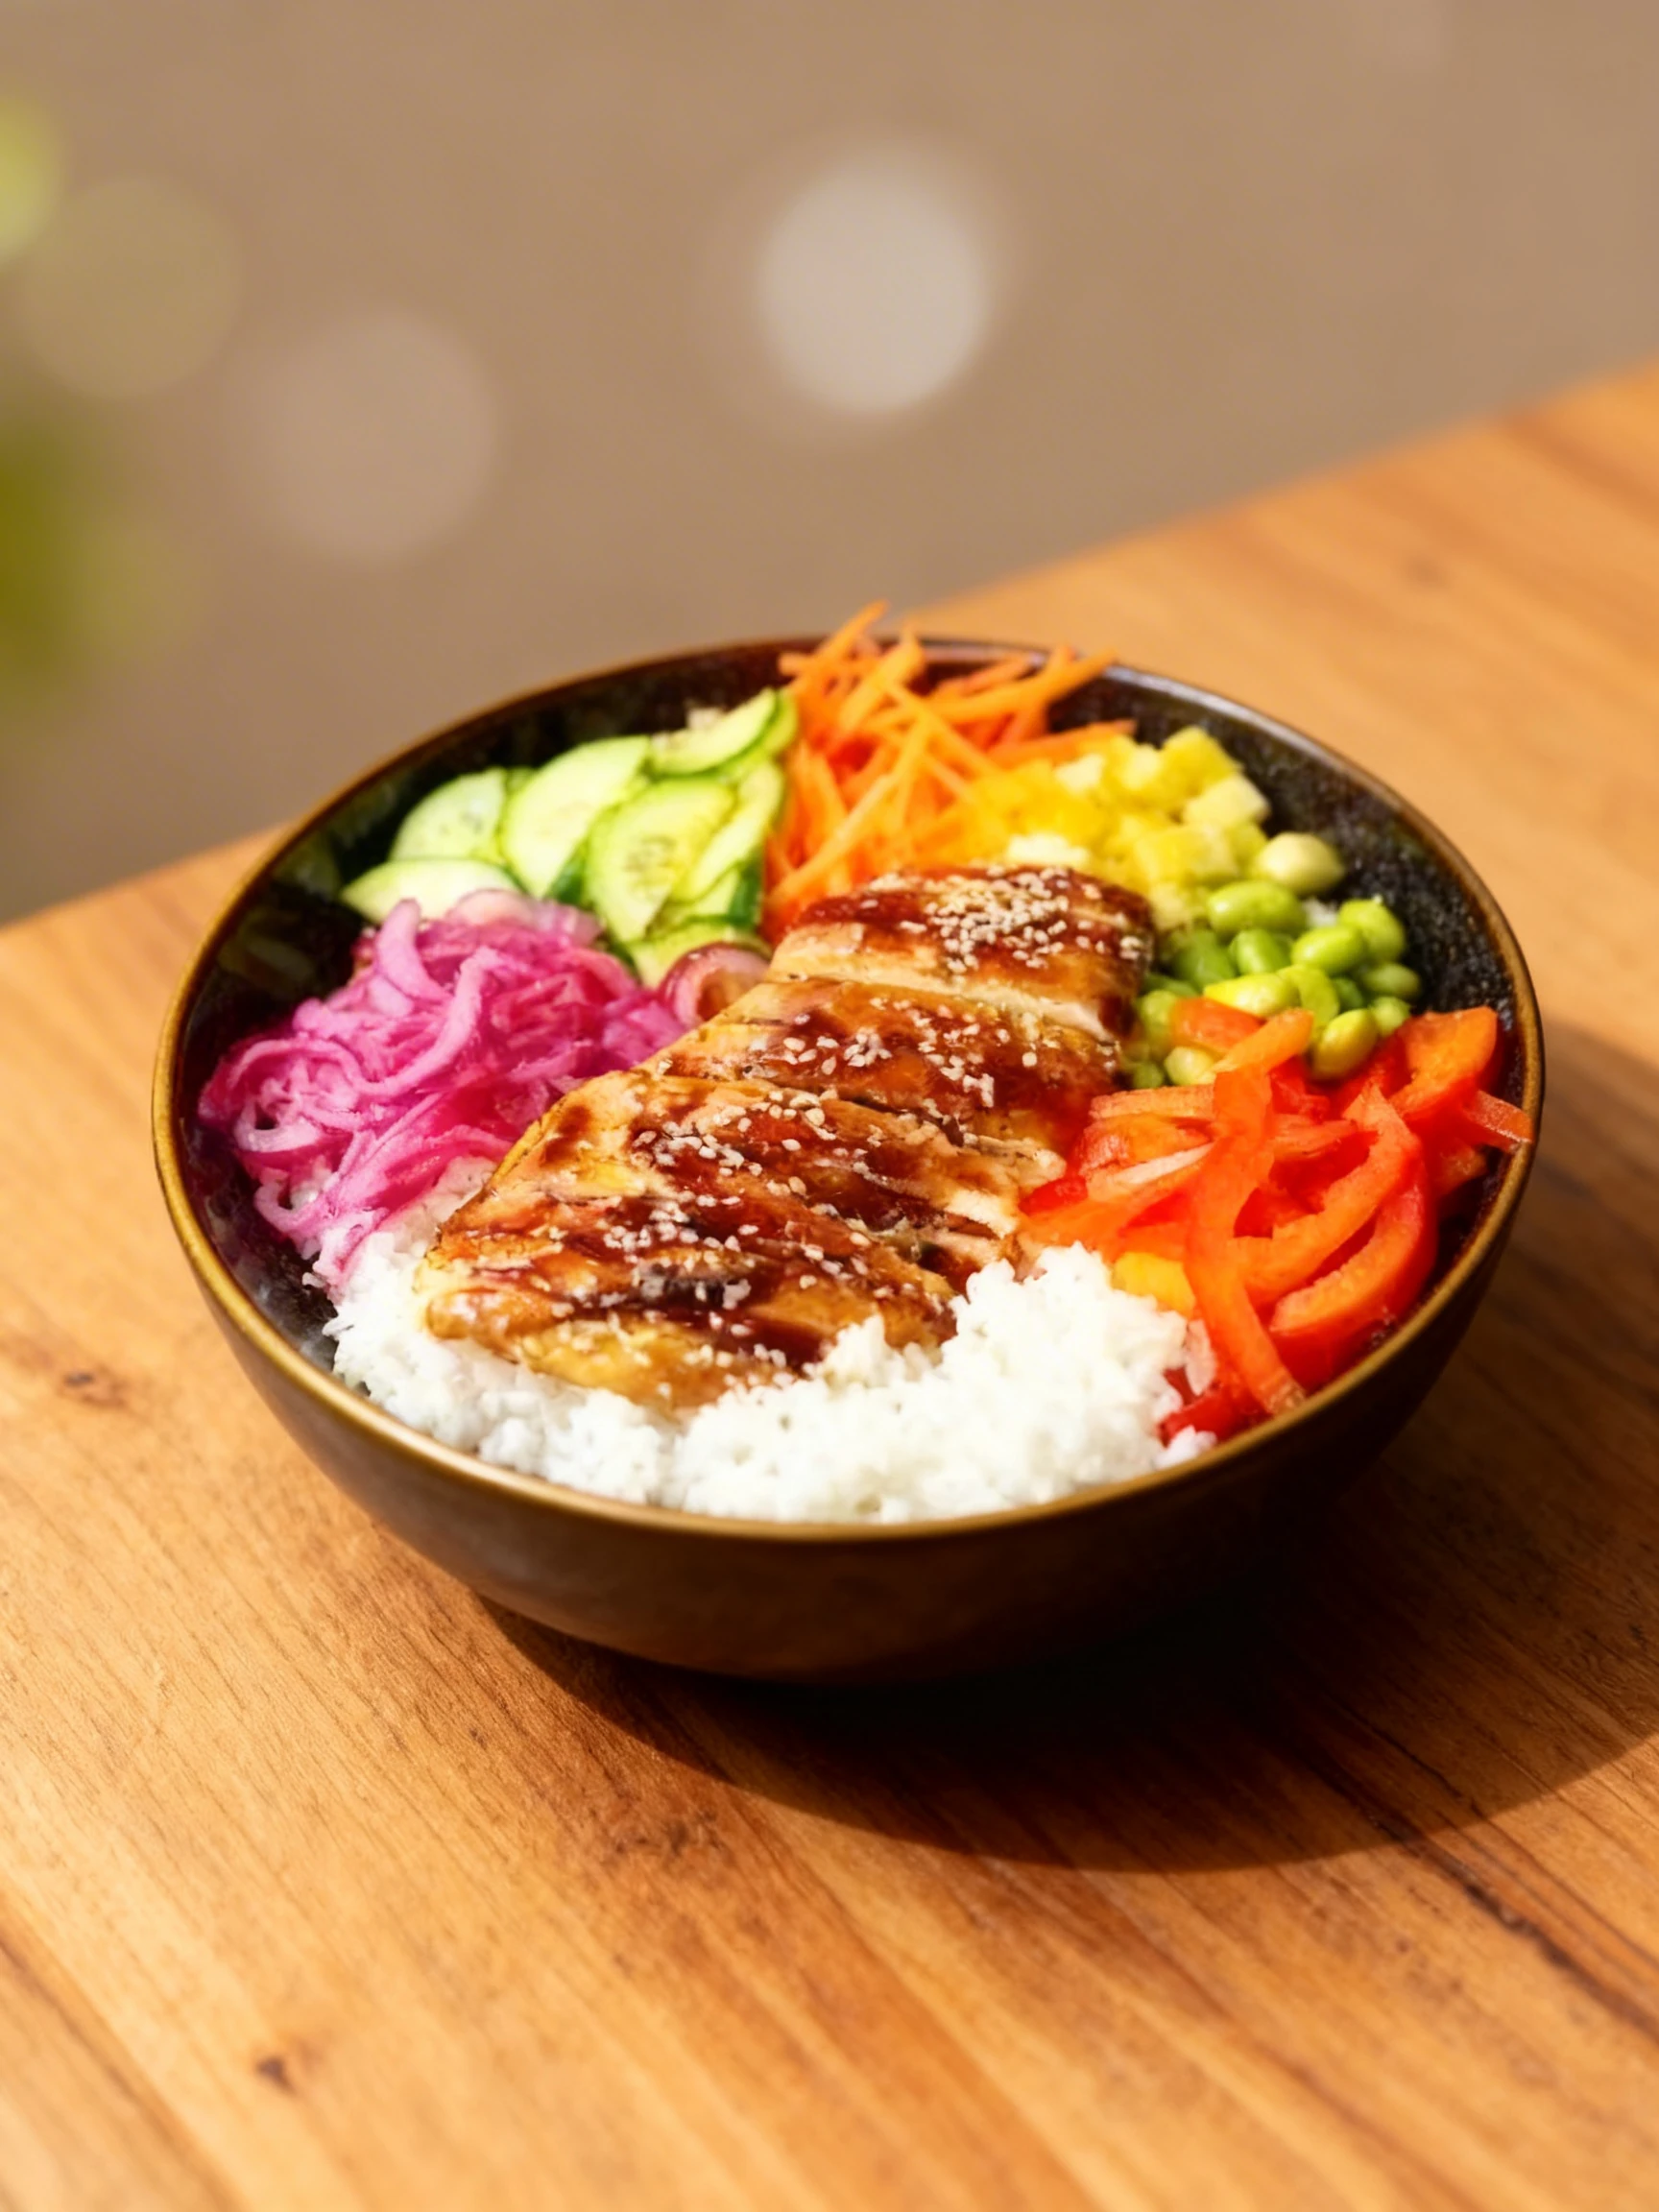
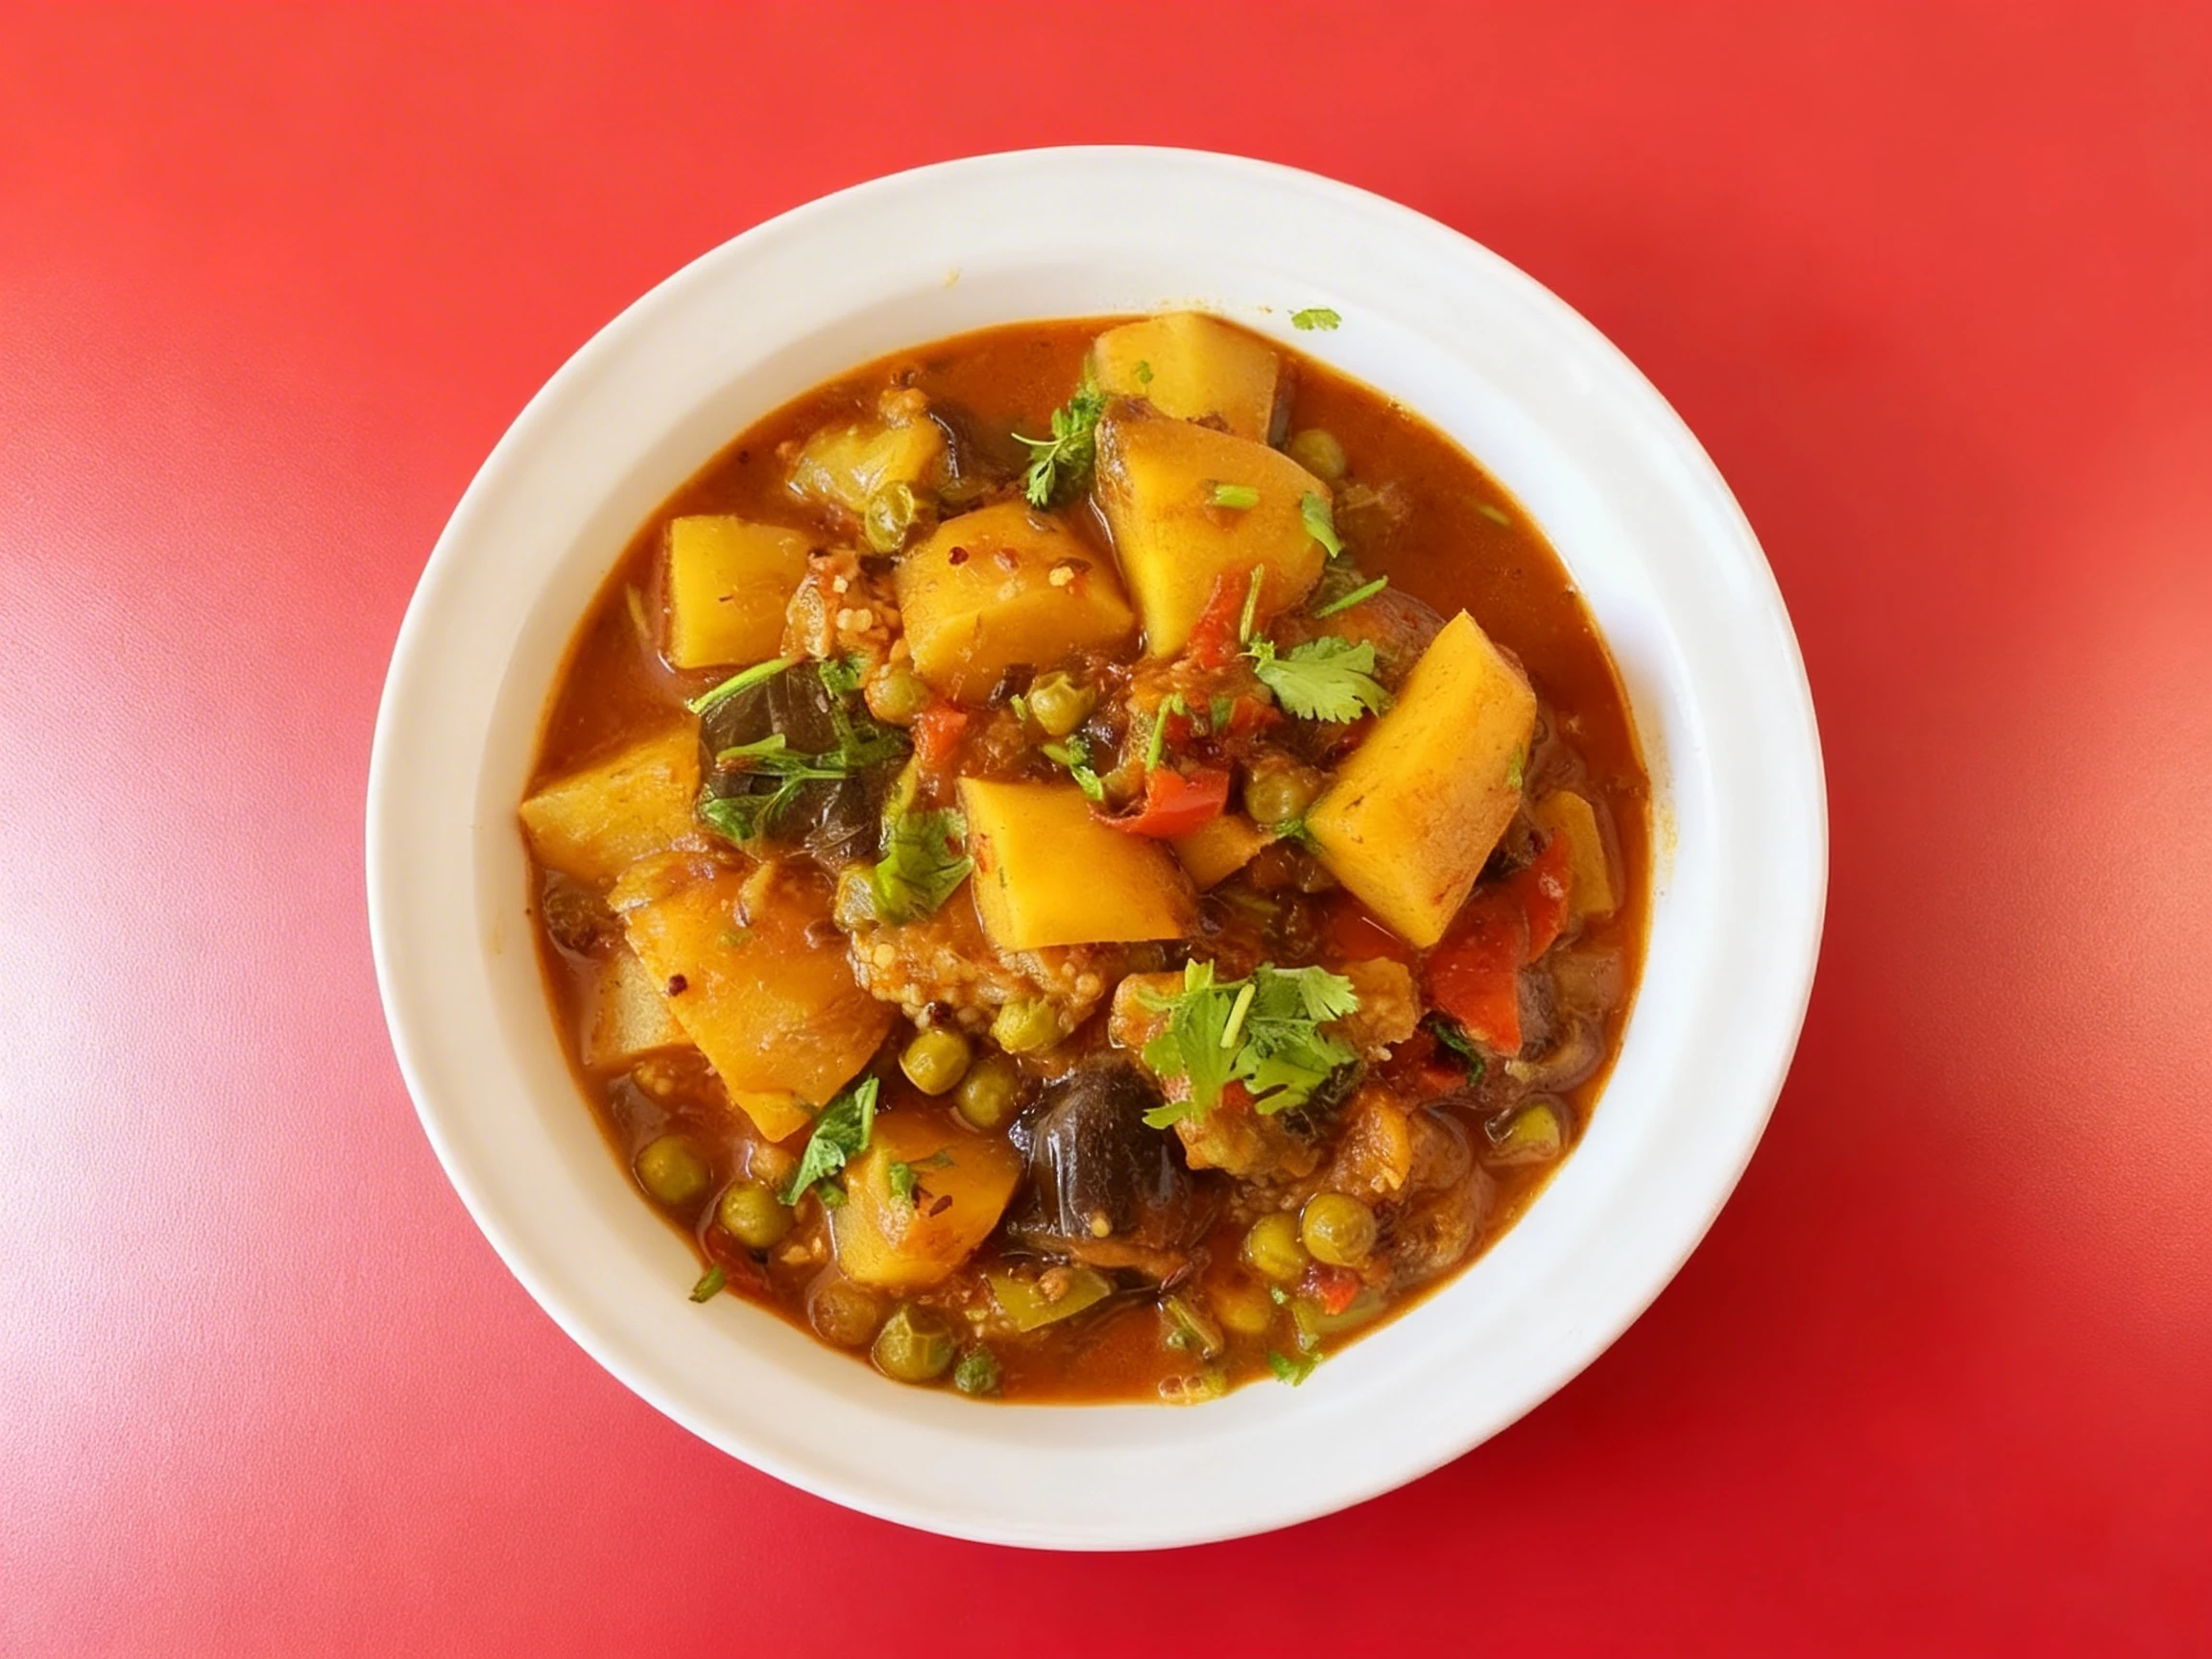
Real indian photos from restaurants using MenuPhotoAI. Tap any category to see the full gallery and the before-and-after view.

Take your Indian photos further with AI
Once you have a solid shot using the techniques above, MenuPhotoAI can handle the finishing work. Our AI removes distracting backgrounds, corrects exposure and white balance, and applies cuisine-appropriate color grading — turning a good smartphone photo into something you'd be proud to put on your menu or delivery app listing. Start with 5 free photos, no credit card required.
Frequently Asked Questions
Skip the photoshoot — enhance the indian photos you already have
The techniques on this page take time to master. MenuPhotoAI applies the same lighting, color, and texture corrections — automatically — to the smartphone photos you already shot. Studio-quality results in 30 seconds.
Try free — 5 credits, no cardMore Cuisine Photography Guides
This guide reflects best practices for Indian food photography as of 2026. Techniques may vary based on specific dishes, equipment, and shooting conditions. MenuPhotoAI is an AI food photo enhancement platform.