Photography Guide
Desserts & Pastry Food Photography Guide
Cutting a layer cake cross-section cleanly without structural collapse or frosting smear before the caramel on the crème brûlée beside it dulls.
Primary Angle
45-degree
Lighting
Soft diffused window light at 1:3 ratio, side position for glaze highlights
Read time
~8 min
Dessert and pastry photography sits at the intersection of precision and indulgence. A layer cake cross-section - with its alternating bands of sponge and buttercream, the structural integrity of which depends entirely on the correct cutting technique - must be executed perfectly in the 5 minutes before gravity and warmth begin to compress the layers. A crème brûlée caramel surface has a 4-minute photography window after the torch before the caramel begins to dull and moisture softens its crunch. Chocolate lava cake must be split within 60 seconds of leaving the oven before the molten interior begins to set. These are not margins of error - they are the constraints that make dessert photography simultaneously the most rewarding and most technically demanding category in food photography. This guide covers every major dessert in the pastry repertoire with specific, timing-precise advice on how to approach each subject from layer cakes and macaron towers to tiramisu and panna cotta.
What Makes Desserts & Pastry Challenging to Photograph
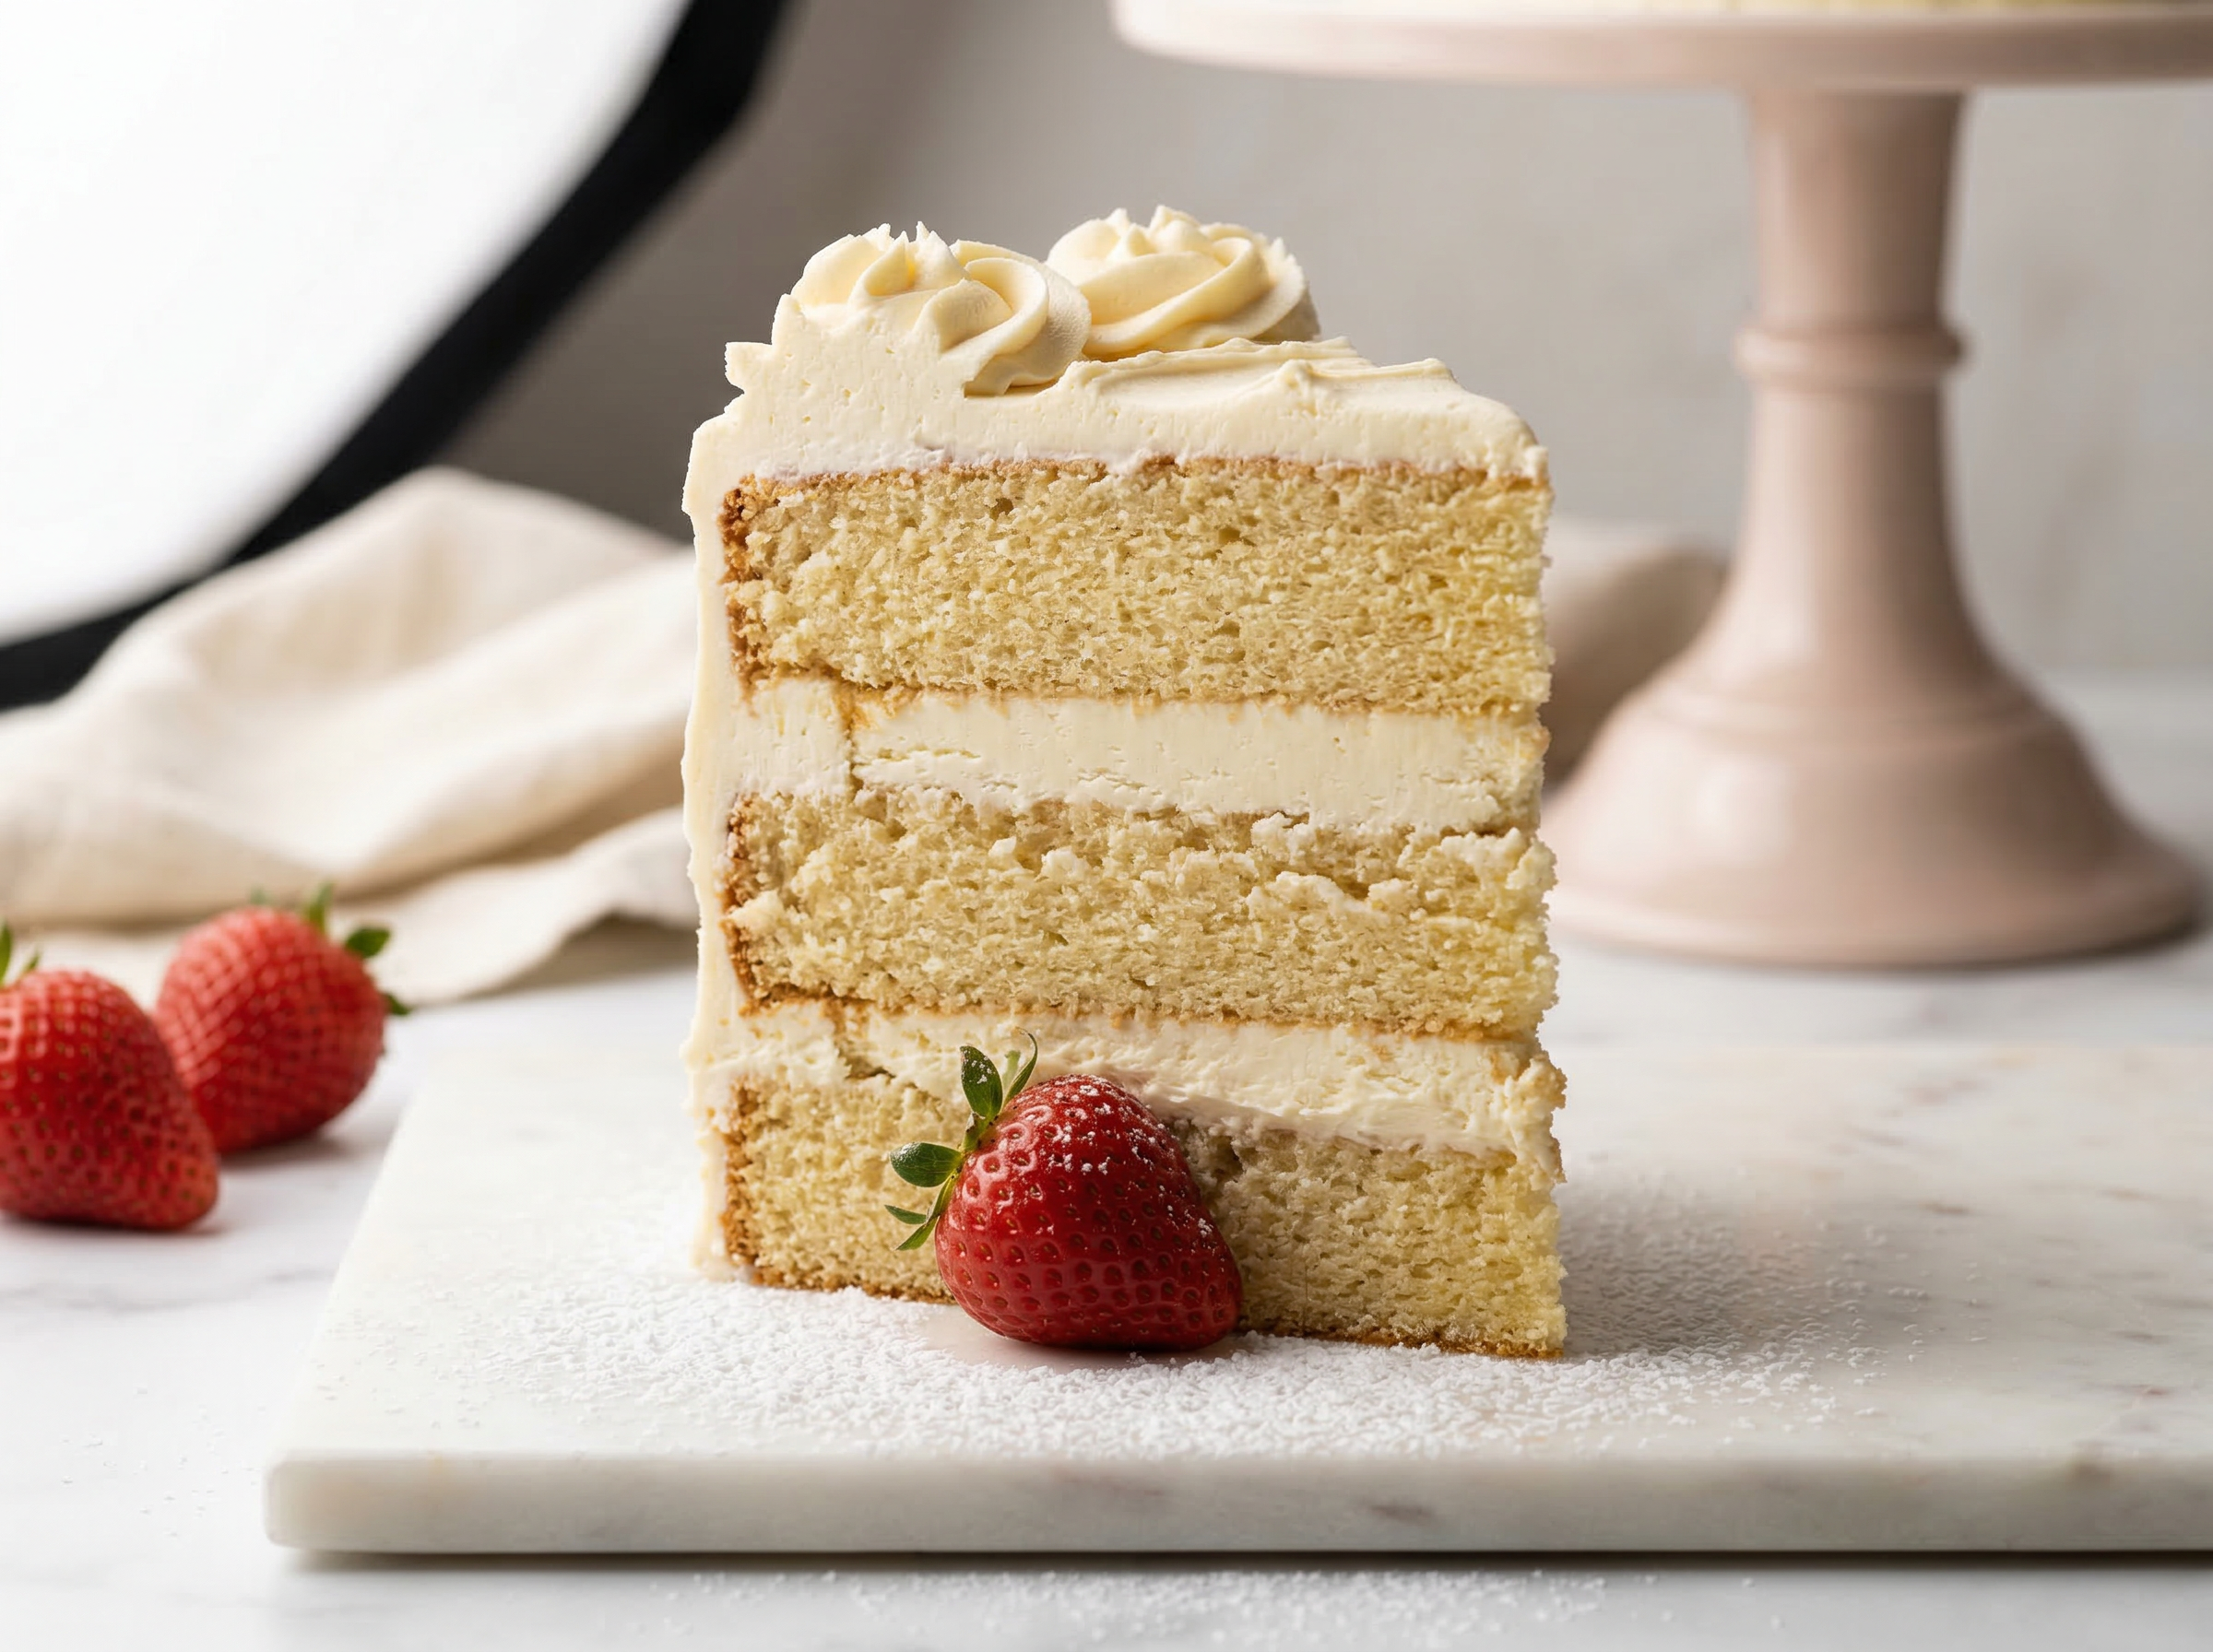
The layer cake cross-section is the most structurally demanding shot in dessert photography. Three compounding challenges occur simultaneously: structural collapse, frosting smear during the cut, and photographic timing. Structural collapse happens when the cake layers are too warm (butter softens) or when the slice is cut too wide (the unsupported sponge sags inward). Frosting smear - the trail of buttercream dragged across the cut sponge face by the knife - is the most visually damaging failure mode, as it fills the negative space between layers and makes the cross-section look compressed.
The correct technique: chill the fully assembled cake for 45 minutes before the shoot to firm the buttercream, then heat a long thin knife under hot running water (not a serrated blade), dry it completely, and cut in a single smooth downward motion without sawing. Wipe the knife between each cut. For a tiered cake, cut through no more than two layers per slice pass.
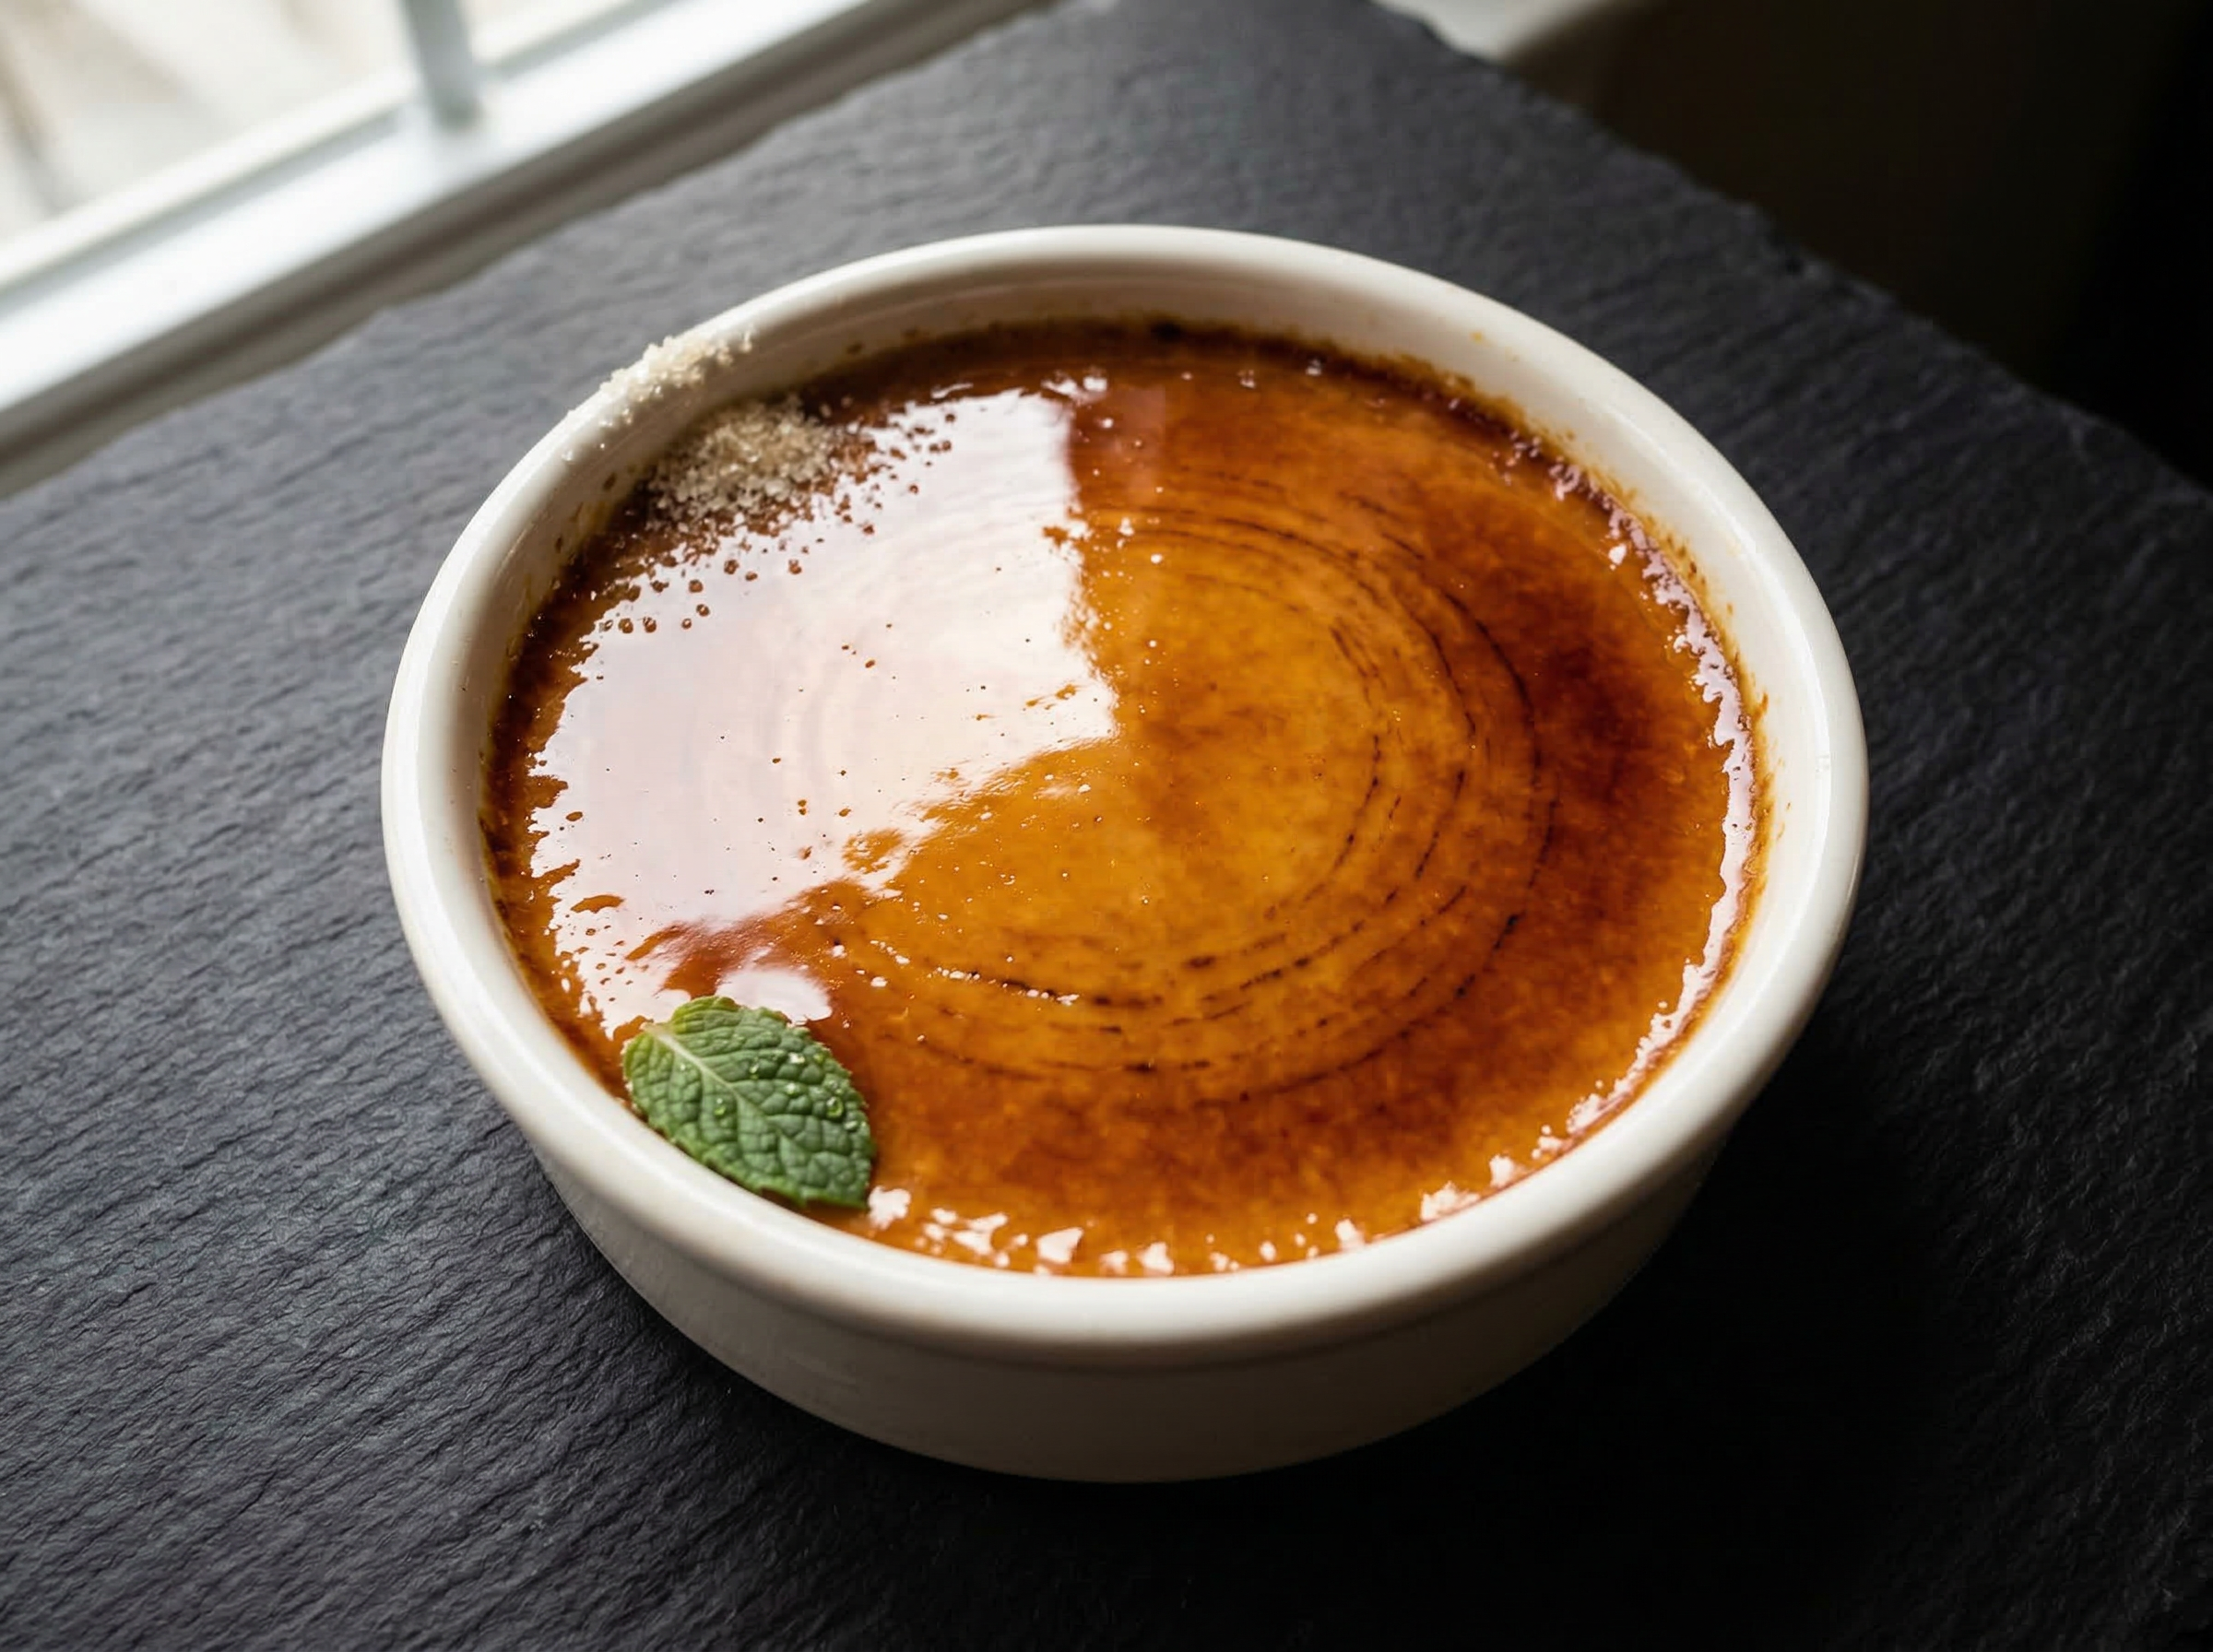
Crème brûlée caramel timing adds a second countdown: after torching, the caramel is at peak gloss and color for approximately 4 minutes. Set up your composition on a dummy prop before the real crème brûlée arrives so you can shoot within the first 60 seconds of placing it on set.
Best Lighting for Desserts & Pastry Photography
Soft, diffused light is the non-negotiable foundation of dessert photography. Harsh direct light - overhead flash, direct midday sun - creates specular hotspots on frosting, chocolate glaze, and caramel that read as overexposed white blobs rather than textural highlights. The ideal setup is a large north-facing or shaded window that provides even, diffused daylight. If using artificial light, a large softbox (minimum 24x36 inches) positioned at 45 degrees to the food at a 1:3 ratio (main to fill) creates the soft, dimensional light that reveals frosting texture without blowing it out.
For a layer cake, position the window or softbox to camera-left so light rakes slightly across the frosting surface - this creates subtle shadow that gives the textured buttercream dimensionality. A reflector on camera-right bounces light back into the shadow side at roughly 1/3 the intensity of the main source.
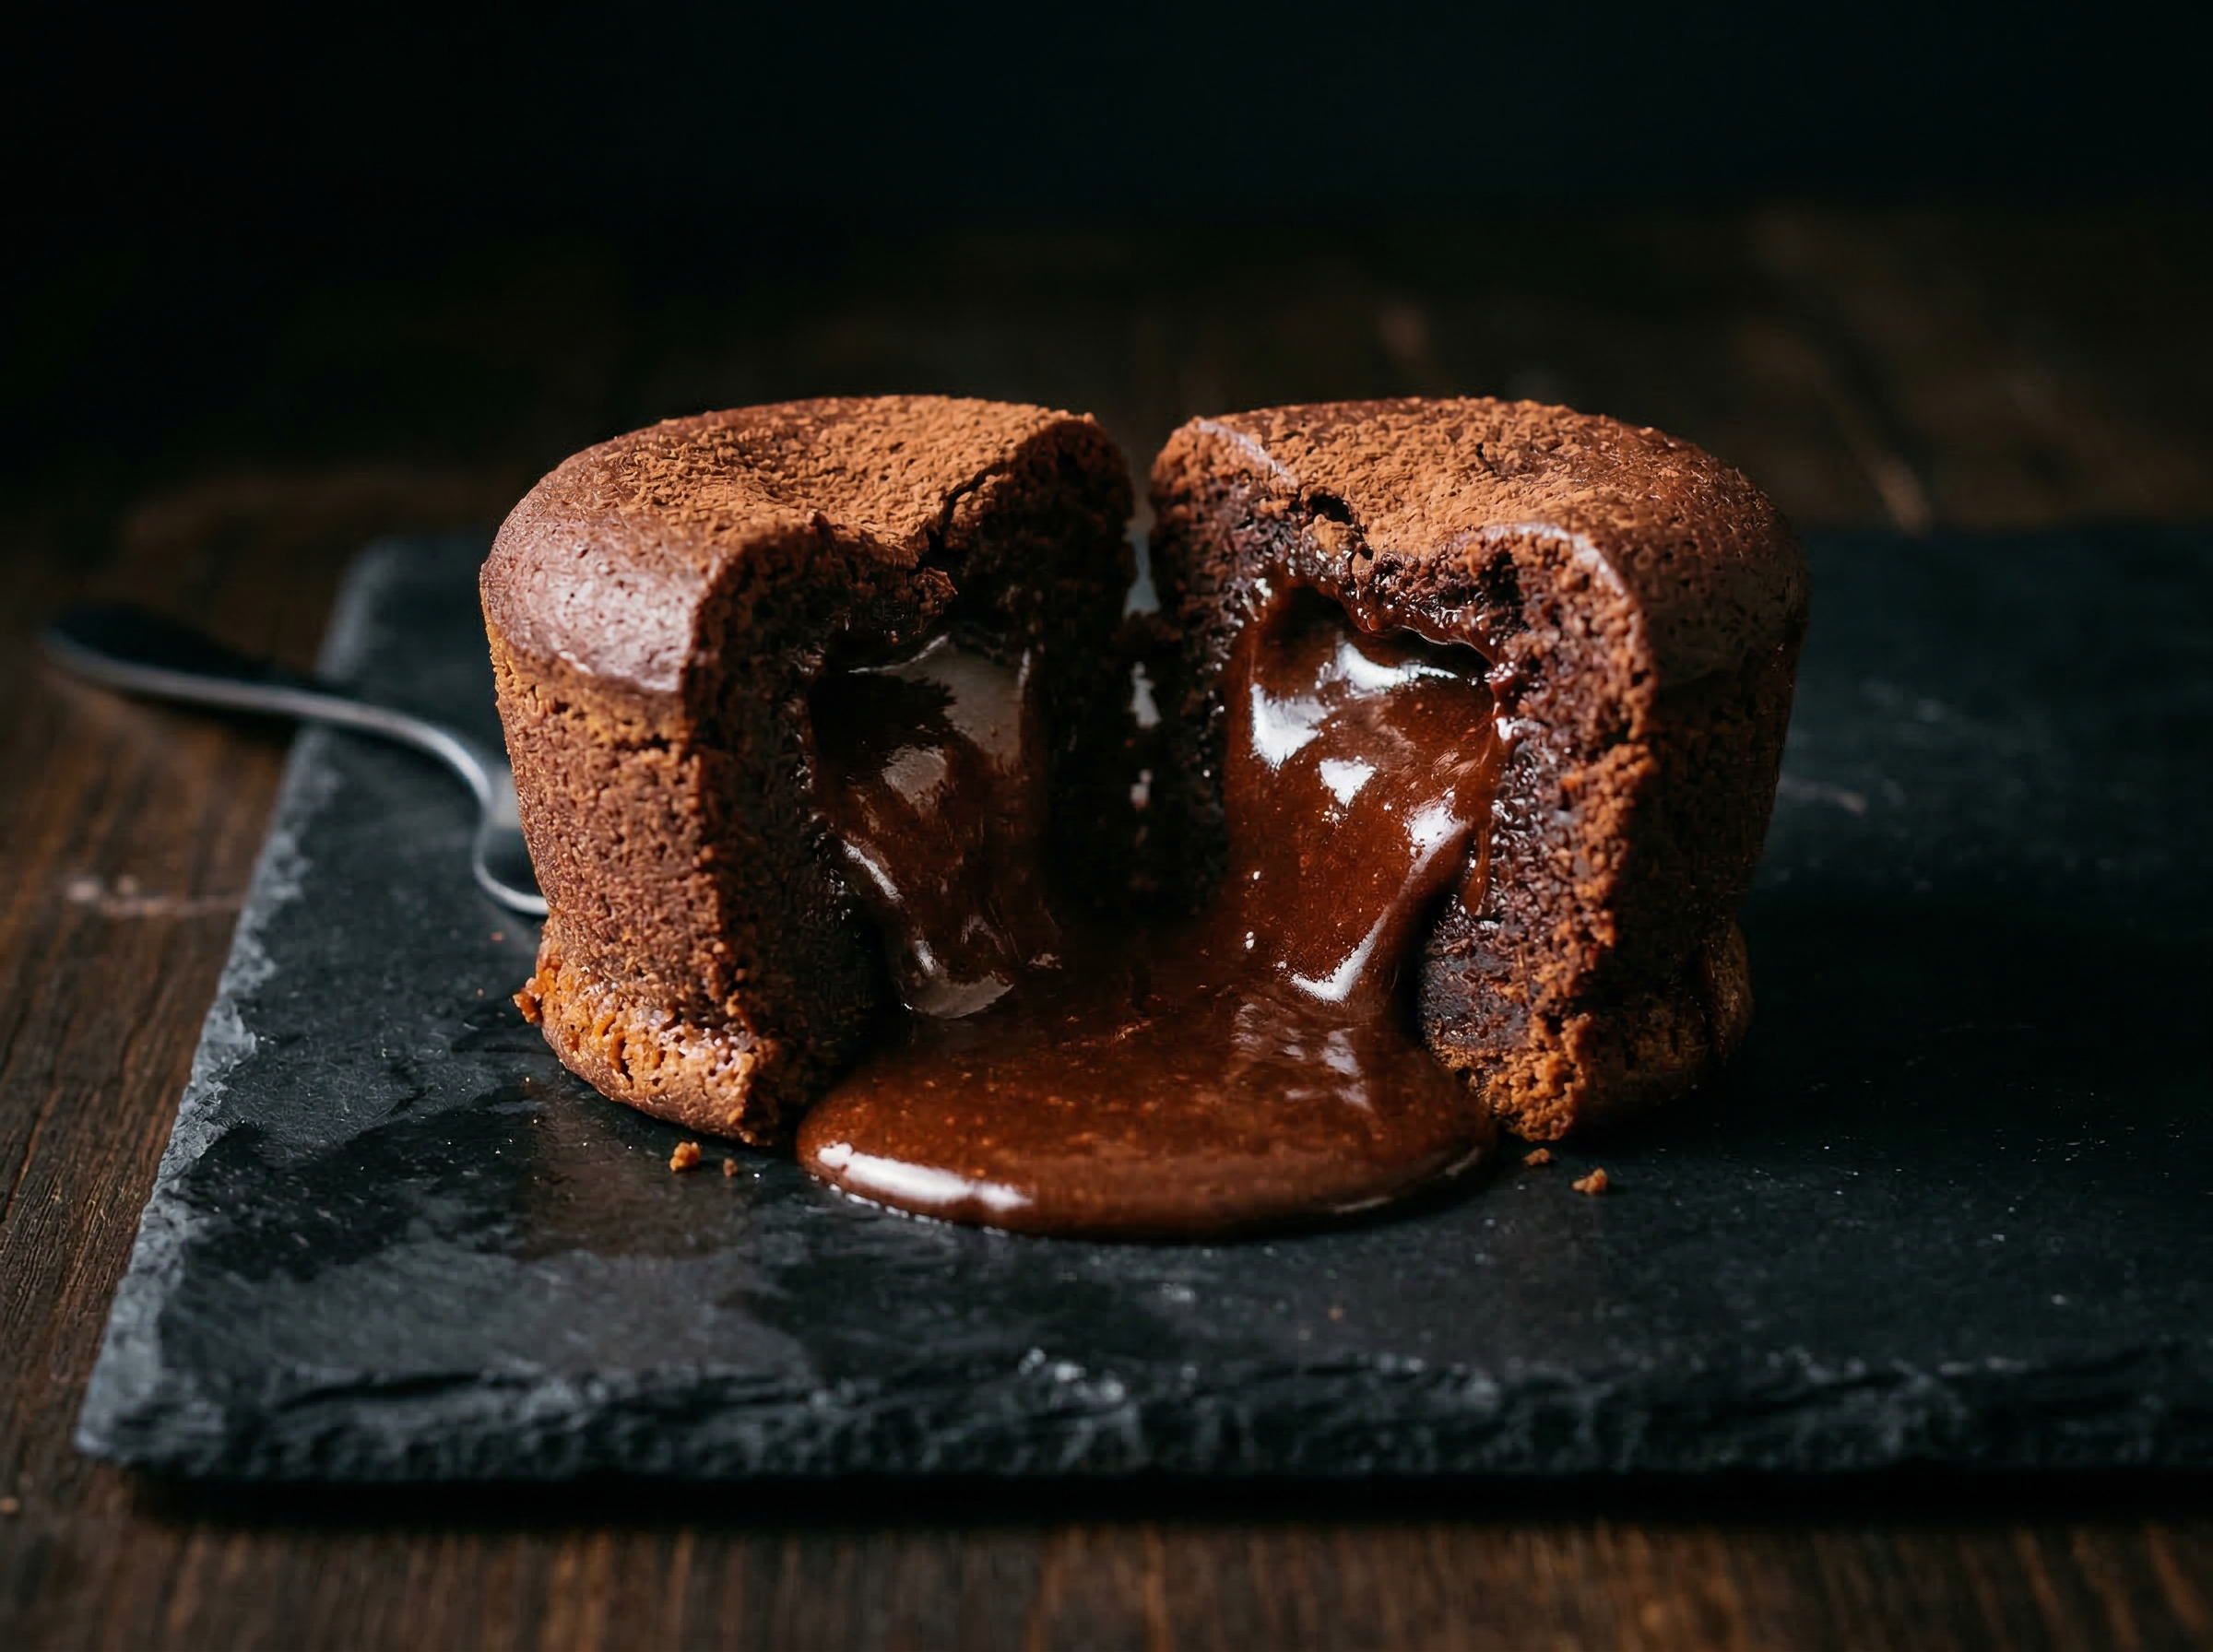
For crème brûlée, side window light skimming across the caramel surface creates highlights that emphasize the glassy, reflective quality of the caramelized sugar. Avoid top light for crème brûlée, as it creates a flat disc. For chocolate lava cake, slightly reduce the reflector fill to allow more shadow contrast - the dark chocolate exterior benefits from moodier, lower fill ratios.
Camera Angles for Desserts & Pastry
The 45-degree angle is the defining perspective for desserts because it simultaneously reveals the height, the internal structure (through the cross-section), and the garnish on top - three pieces of visual information that no other angle communicates in a single frame.
For layer cakes, position the cut face of the slice squarely toward the camera at exactly 45 degrees. Ensure the slice is wide enough that all layers are visible but narrow enough that it can stand independently. Place a toothpick discreetly into the sponge behind the cut face if the slice leans.
Crème brûlée is the exception in the dessert category: shoot it overhead. The entire visual appeal of crème brûlée is its amber caramel surface - the brûlée - which is only fully visible from directly above. A slightly overhead angle (80 degrees) shows the caramel surface at its fullest while still revealing the ramekin rim depth.
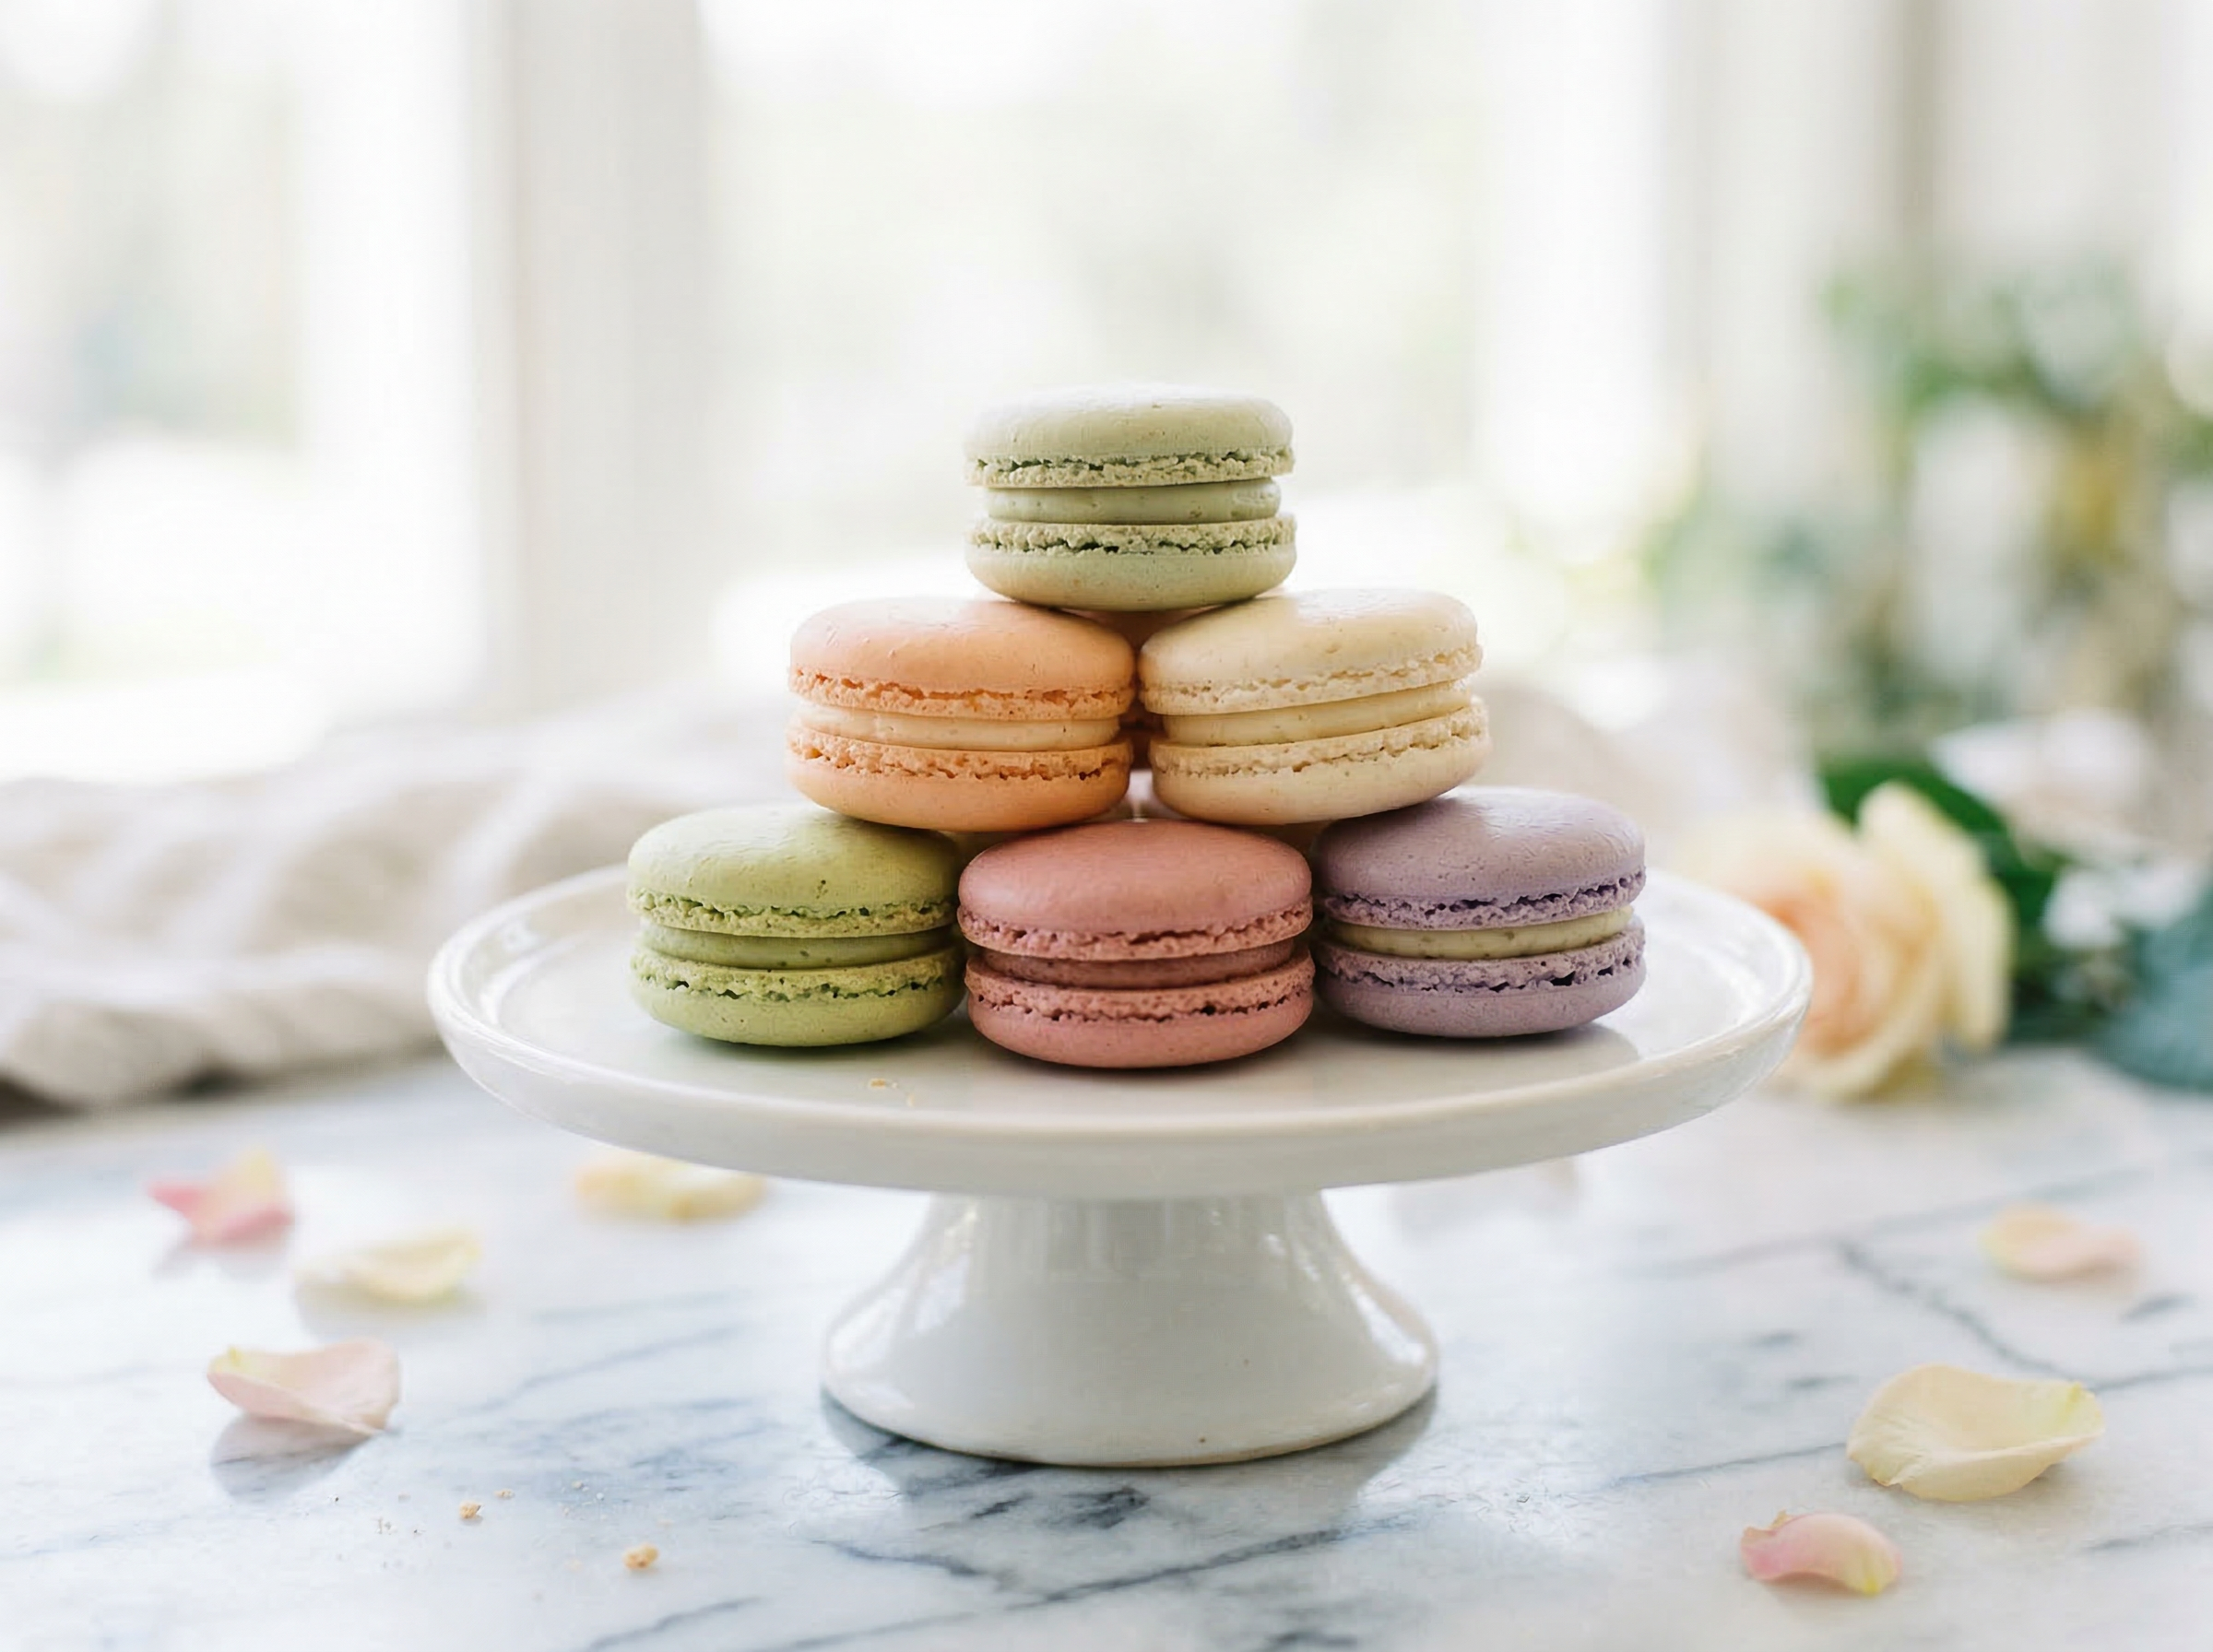
Macaron towers are best at strict eye-level (0 degrees). The tower's visual power comes from its vertical repetition of pastel colors - shooting from above collapses this into a circle of undifferentiated tops. At eye-level, the tower reads as a column with visible color progression and the side filling of each macaron is visible.
Food Styling and Props
Dessert styling is built on restraint and precision. The instinct to add multiple garnishes - berries, mint, powdered sugar, chocolate shavings, gold leaf - all at once results in a cluttered image where nothing reads clearly. Commit to a maximum of three garnish elements per shot and make each one earn its place.
For layer cakes, the cross-section face is the star - do not obscure it with side garnishes. Place fresh berries at the base of the slice on the plate, not on top of the cake. A light dusting of powdered sugar through a small sieve adds texture without obscuring structure. A single whole berry placed against the cut face where two layers meet draws the eye into the interior.
For crème brûlée, the styling is minimal by design: a tiny pinch of fine sugar at the ramekin rim edge (to imply the torching process) and one small mint leaf at the edge of the ramekin. Nothing on the caramel surface itself - it should be unobstructed and glossy.
For macaron towers, the tower itself is the prop - add only a small scatter of fresh flower petals at the base on the marble or cake stand. For tiramisu, dust cocoa powder through a fine mesh sieve in a controlled cloud, and place a single espresso bean and a small mascarpone quenelle at the front edge of the dish. Panna cotta is best styled with a glossy fruit coulis poured from a squeeze bottle in a controlled arc, and two small fresh fruit pieces placed with tweezers.
Recommended props
Equipment Guide
An 85mm or 100mm macro lens is the preferred choice for dessert photography. The 85mm provides comfortable working distance from the subject (important when dealing with heat-sensitive items like chocolate lava cake), while the 100mm macro allows you to move in for extreme close-up detail shots of frosting texture or caramel surface without the camera casting shadow on the food.
For layer cake cross-section shots, a tripod is non-negotiable - the shot requires precise framing that must remain constant across multiple takes as you adjust the slice or garnish. Use a remote shutter release or the camera's 2-second self-timer to eliminate camera shake.
A marble slab that can also serve as a reflector surface is one of the most versatile pieces of dessert photography equipment - the white marble bounces diffused fill light upward into the underside of overhanging elements (frosting ruffles, macaron shells) and serves as a clean background surface simultaneously. A dedicated set of offset spatulas (small, medium) and a pair of fine-point tweezers allow precise placement and adjustment of individual garnish elements without fingerprints or smearing.
Skip the photoshoot — enhance the desserts & pastry photos you already have
The techniques on this page take time to master. MenuPhotoAI applies the same lighting, color, and texture corrections — automatically — to the smartphone photos you already shot. Studio-quality results in 30 seconds.
Try free — 5 credits, no cardCommon Desserts & Pastry Photography Mistakes
Cutting layer cake with a serrated knife that tears the sponge face
A serrated bread knife drags through sponge layers and pulls frosting across the cut face, creating a smeared, compressed cross-section that hides the layer definition you are trying to show. Always use a long, thin bladed knife heated under hot water and wiped dry between cuts. A single smooth downward stroke - not a sawing motion - produces a clean cross-section face.
Torching crème brûlée and then spending 4 minutes adjusting props
The caramel on crème brûlée is at peak gloss and color for 4 minutes after torching. Using that time to adjust props, reposition the ramekin, or fetch a garnish means shooting a dull, softening caramel surface. Pre-build the entire composition before torching. Have the torch, brûlée, and garnish elements ready at arm's reach. Torch, place, and shoot within 90 seconds.
Using overhead light on a layer cake cross-section that flattens frosting texture
Overhead light hits the top of the cake but does not rake across the frosting surface, which means the textured swirls and peaks of buttercream appear flat and undifferentiated. Side window light or a 45-degree softbox creates the shadow necessary to make frosting texture three-dimensional. A frosting surface that reads as flat looks mass-produced rather than hand-crafted.
Over-garnishing desserts with more than three elements
The instinct to add berries, mint, powdered sugar, chocolate shavings, and gold leaf simultaneously creates visual noise that overwhelms the dessert itself. Pick three elements maximum, and ensure each one serves a specific visual purpose: height, color contrast, or texture. A mint leaf that does nothing compositionally should be removed regardless of how it tastes as a pairing.
Shooting chocolate lava cake after the molten center has set
Chocolate lava cake must be split and photographed within 60 seconds of leaving the oven. The molten center sets into a solid brownie texture in 2–3 minutes at room temperature, eliminating the flowing chocolate that makes the dish visually distinctive. Pre-set your composition and exposure on a dummy prop before baking, so the only action required when the cake arrives is placement and splitting.
Editing Tips
Dessert editing should enhance without distorting. White frosting is the most challenging element: it must remain visually white while retaining textural shadow detail. In Lightroom, reduce Highlights by -30 and boost Shadows by +20 to open up the shadow detail in frosting folds without blowing the highlights. Reduce Whites slightly to -15. For chocolate elements, boost Clarity by +20 and Texture by +15 to make the chocolate surface appear rich and dimensional. In the HSL panel, warm the orange/yellow channel to enrich caramel tones, and boost red saturation by +10 to make berry garnishes vivid. For macaron colors, use targeted HSL adjustments per hue rather than global saturation boosts to keep colors accurate and separate.
Platform-Specific Tips
On Instagram, the layer cake cross-section is one of the highest-performing food photography formats in the dessert category - saves rates on cross-section shots consistently outperform whole-cake shots by a significant margin. Shoot in portrait (4:5) format for Instagram feed to maximize screen real estate. For DoorDash and Uber Eats, dessert thumbnail photography must communicate the serving size and primary flavor at a 3-inch phone screen size - this means the cross-section face or the caramel surface of the crème brûlée must fill at least 60% of the frame. Avoid wide-angle dessert-table shots for delivery platforms, as individual items become unreadably small. For print menus, the crème brûlée overhead and layer cake 45-degree angle both reproduce beautifully in offset printing - the warm amber and pastel tones are well within the CMYK gamut. Chocolate lava cake and tiramisu can appear muddy in print if the dark tones are not lifted slightly before sending to press.
Desserts & Pastry Photo Examples
Real desserts & pastry photos from restaurants using MenuPhotoAI. Tap any category to see the full gallery and the before-and-after view.
Take your Desserts & Pastry photos further with AI
Once you have a solid shot using the techniques above, MenuPhotoAI can handle the finishing work. Our AI removes distracting backgrounds, corrects exposure and white balance, and applies cuisine-appropriate color grading — turning a good smartphone photo into something you'd be proud to put on your menu or delivery app listing. Start with 5 free photos, no credit card required.
Frequently Asked Questions
Skip the photoshoot — enhance the desserts & pastry photos you already have
The techniques on this page take time to master. MenuPhotoAI applies the same lighting, color, and texture corrections — automatically — to the smartphone photos you already shot. Studio-quality results in 30 seconds.
Try free — 5 credits, no cardMore Cuisine Photography Guides
This guide reflects best practices for Desserts & Pastry food photography as of 2026. Techniques may vary based on specific dishes, equipment, and shooting conditions. MenuPhotoAI is an AI food photo enhancement platform.