Photography Guide
Brunch Food Photography Guide
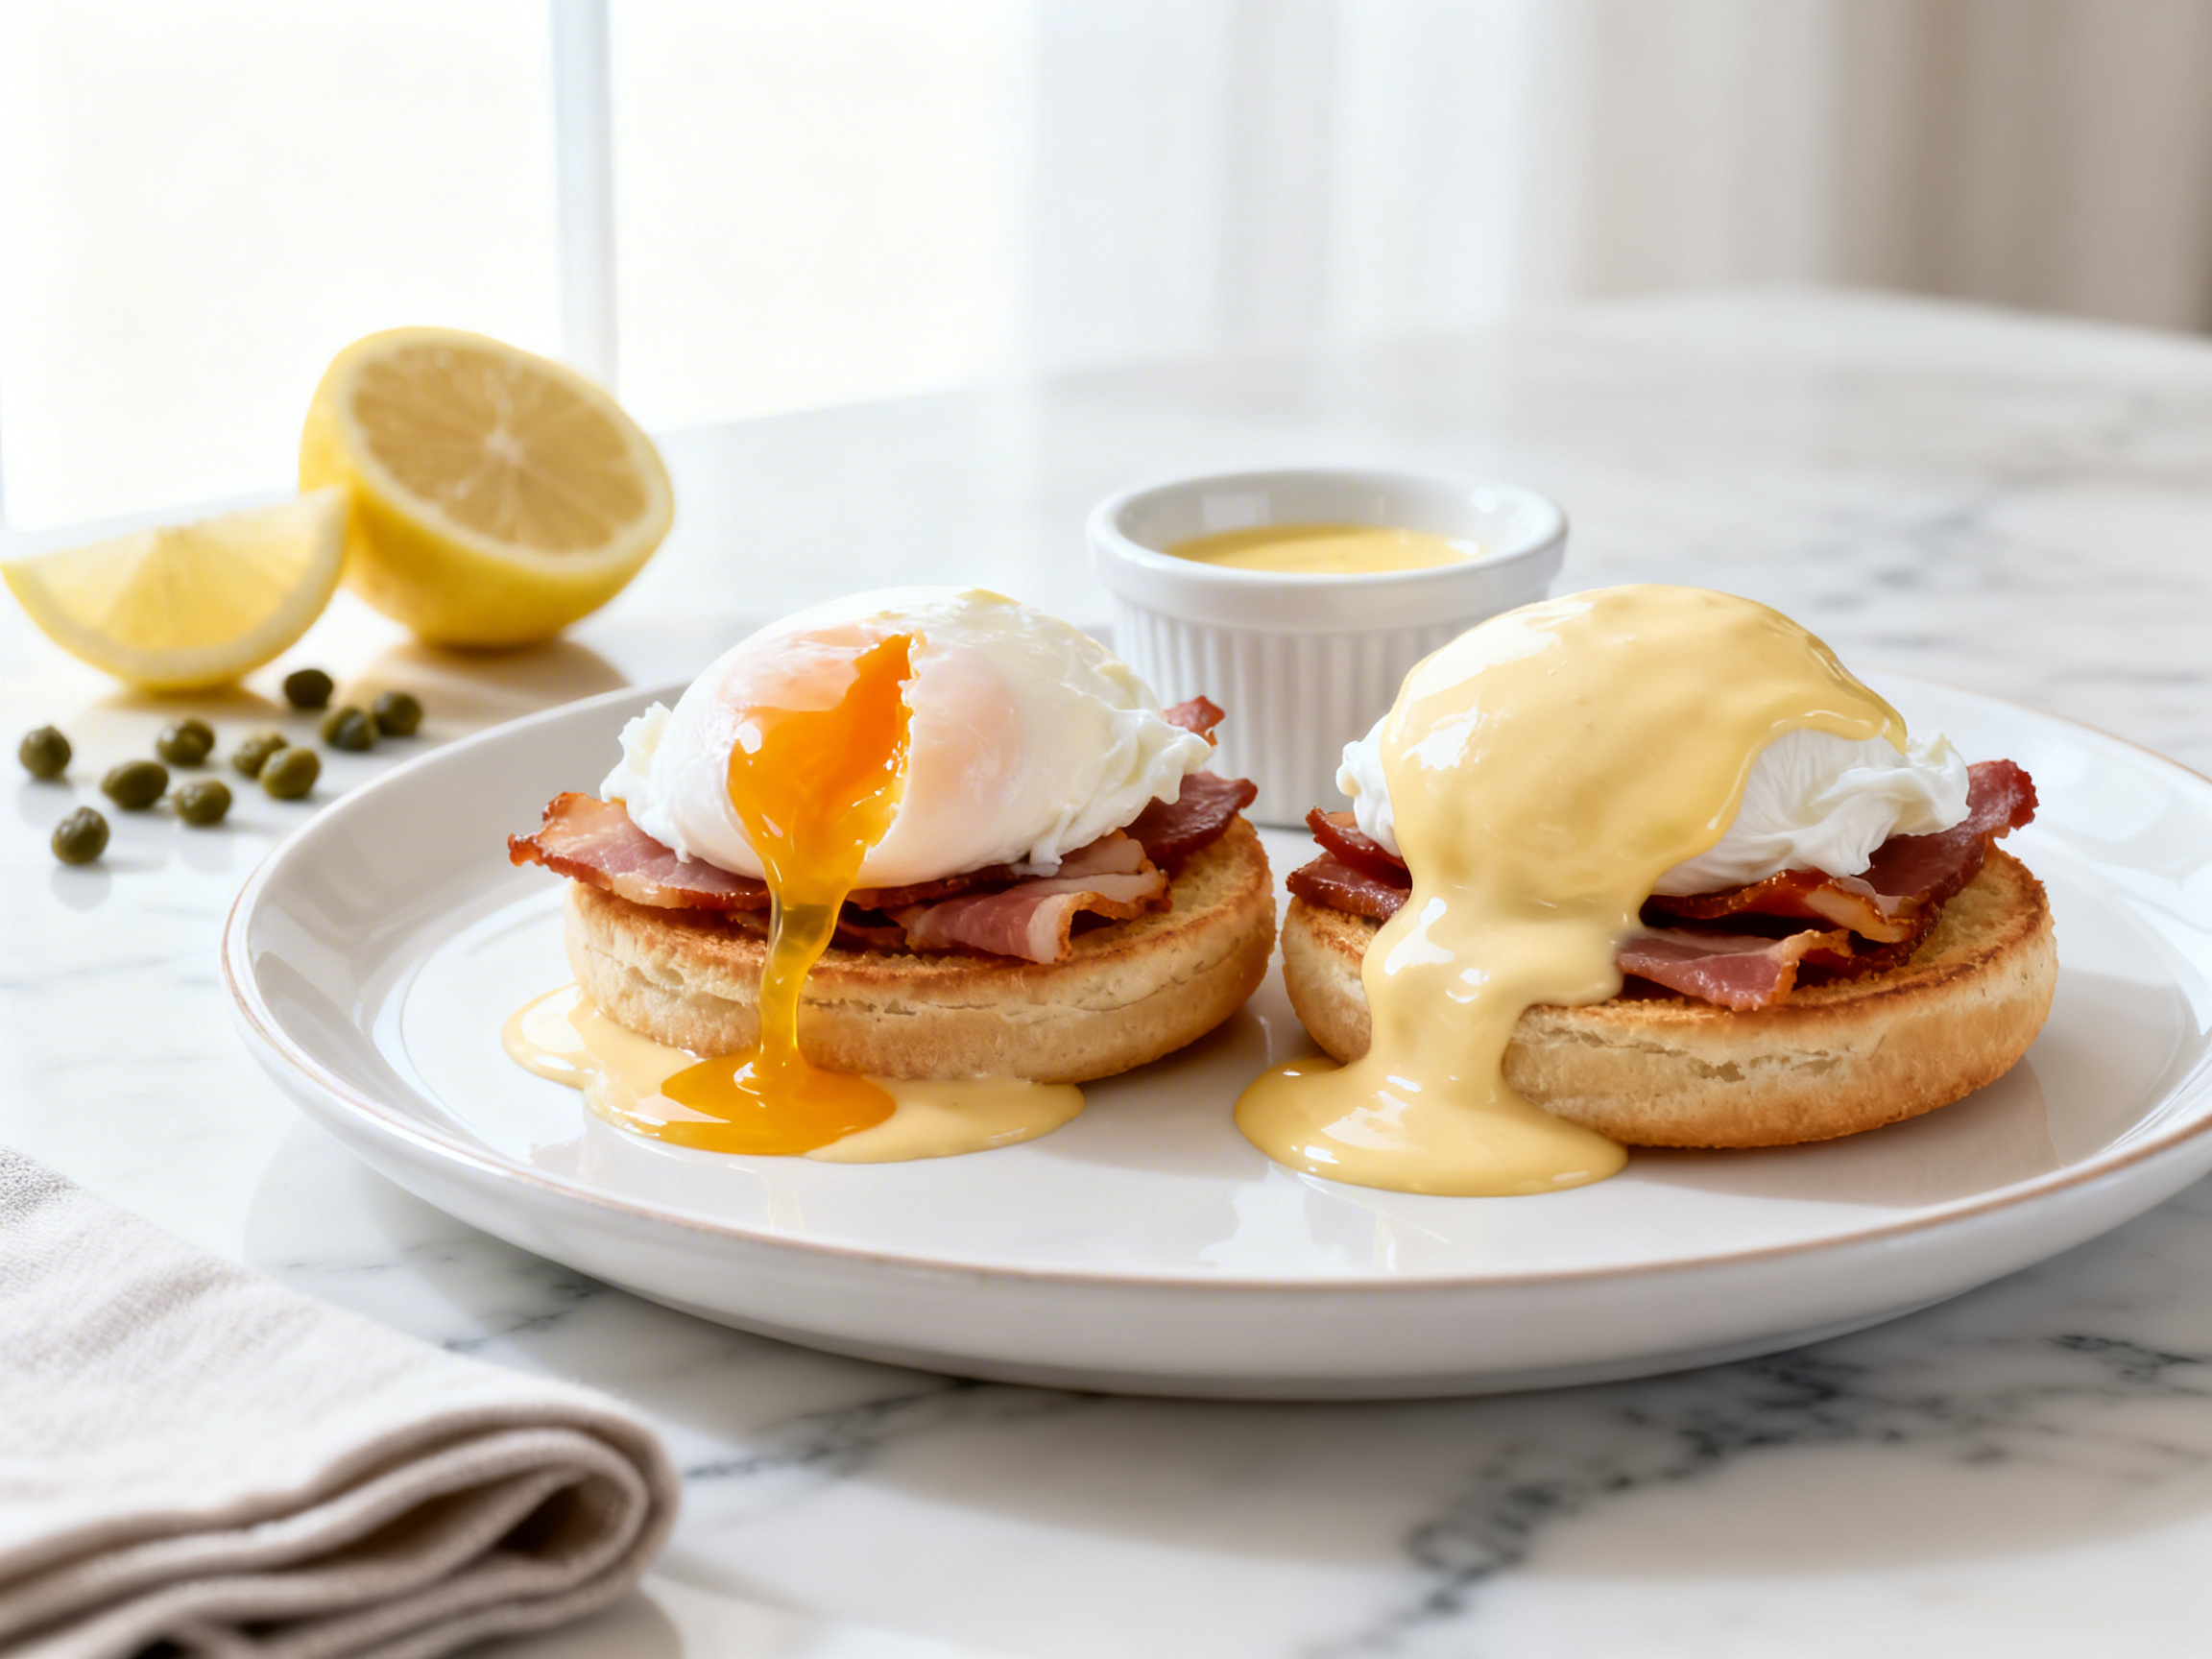
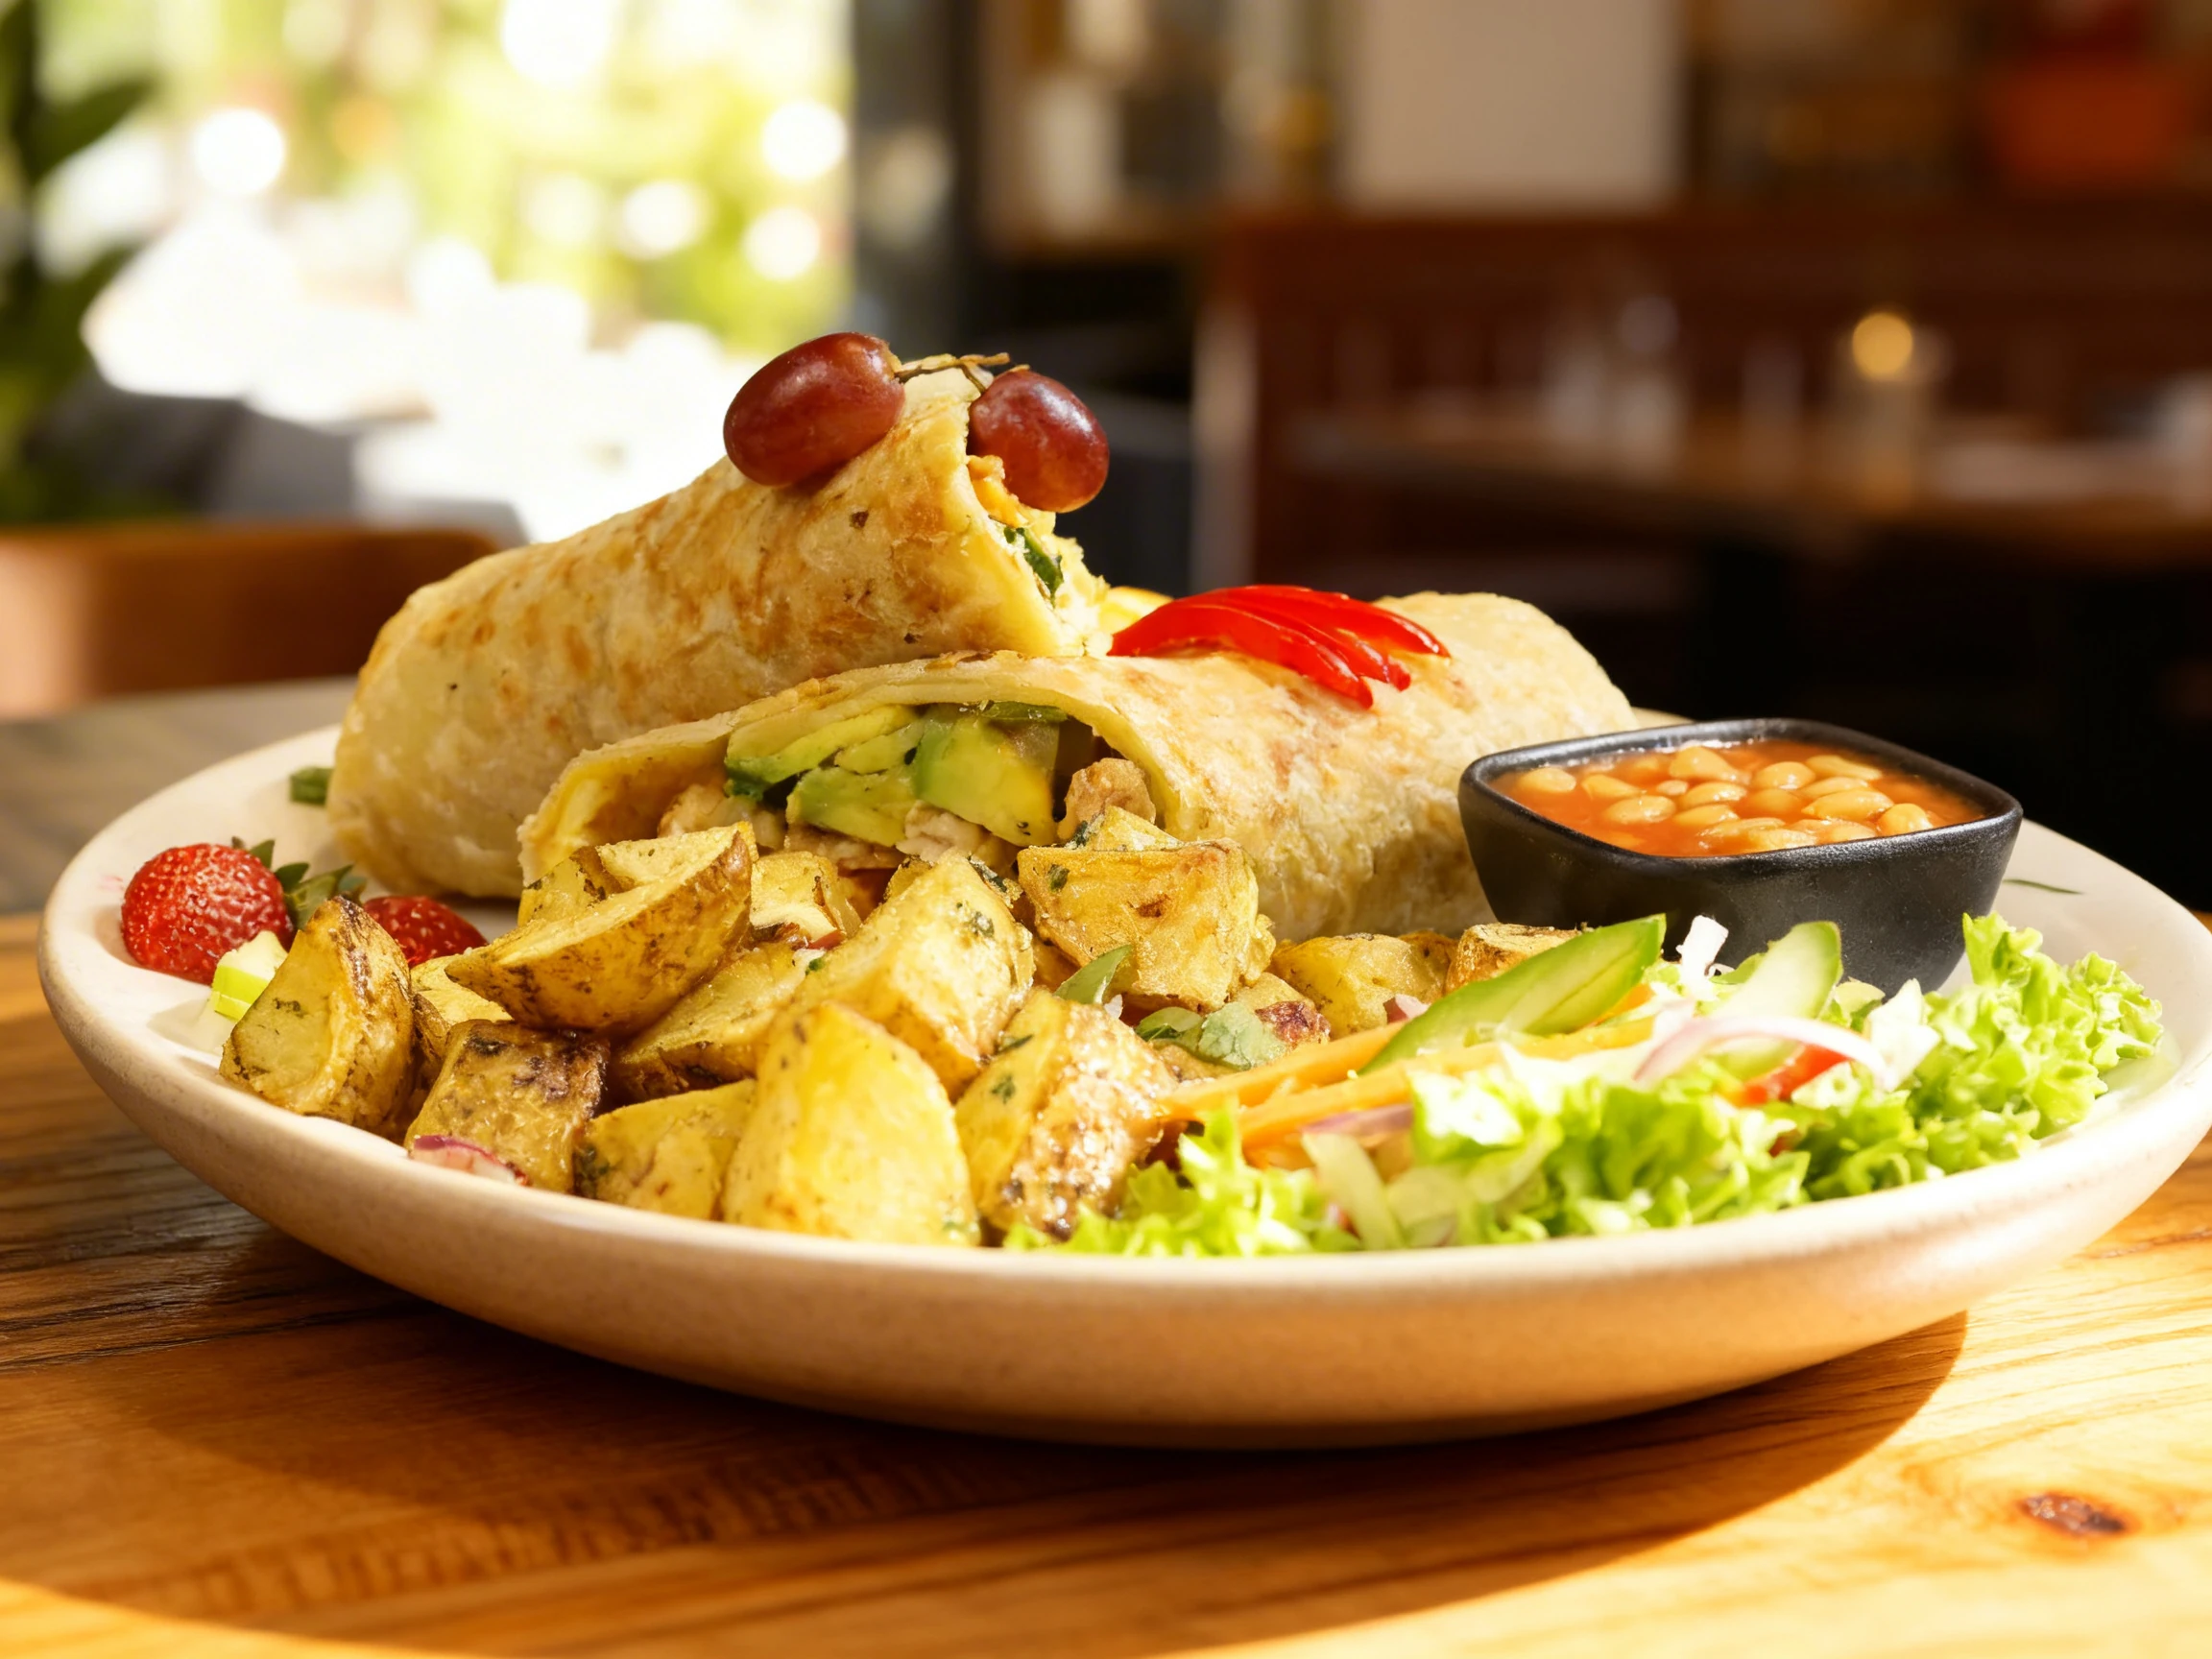
Eggs benedict hollandaise breaks and yolks set within a 4-minute window after plating.
Primary Angle
Overhead
Lighting
Bright airy natural morning light
Read time
~8 min
Brunch food photography occupies a uniquely joyful lane in the food world. Unlike dinner service photography, where mood and drama reign, brunch demands brightness, warmth, and an almost aspirational sense of ease. The dishes - eggs benedict with trembling hollandaise, stacked pancakes glistening with maple syrup, avocado toast fanned on sourdough, vibrant acai bowls crowned with fresh fruit - are inherently photogenic, but they are also brutally time-sensitive. Hollandaise breaks. Yolks set. Butter melts and then congeals. Pancake stacks lean and collapse. Smoothie bowls go from glossy to matte in minutes under studio lights. Brunch photography rewards a photographer who arrives prepared: mise en place fully staged, camera settings dialed, and a concrete understanding of which element will degrade first on any given plate. This guide covers specific dishes, timing windows, lighting setups, and platform-specific framing strategies to help you capture brunch at its absolute peak.
What Makes Brunch Challenging to Photograph
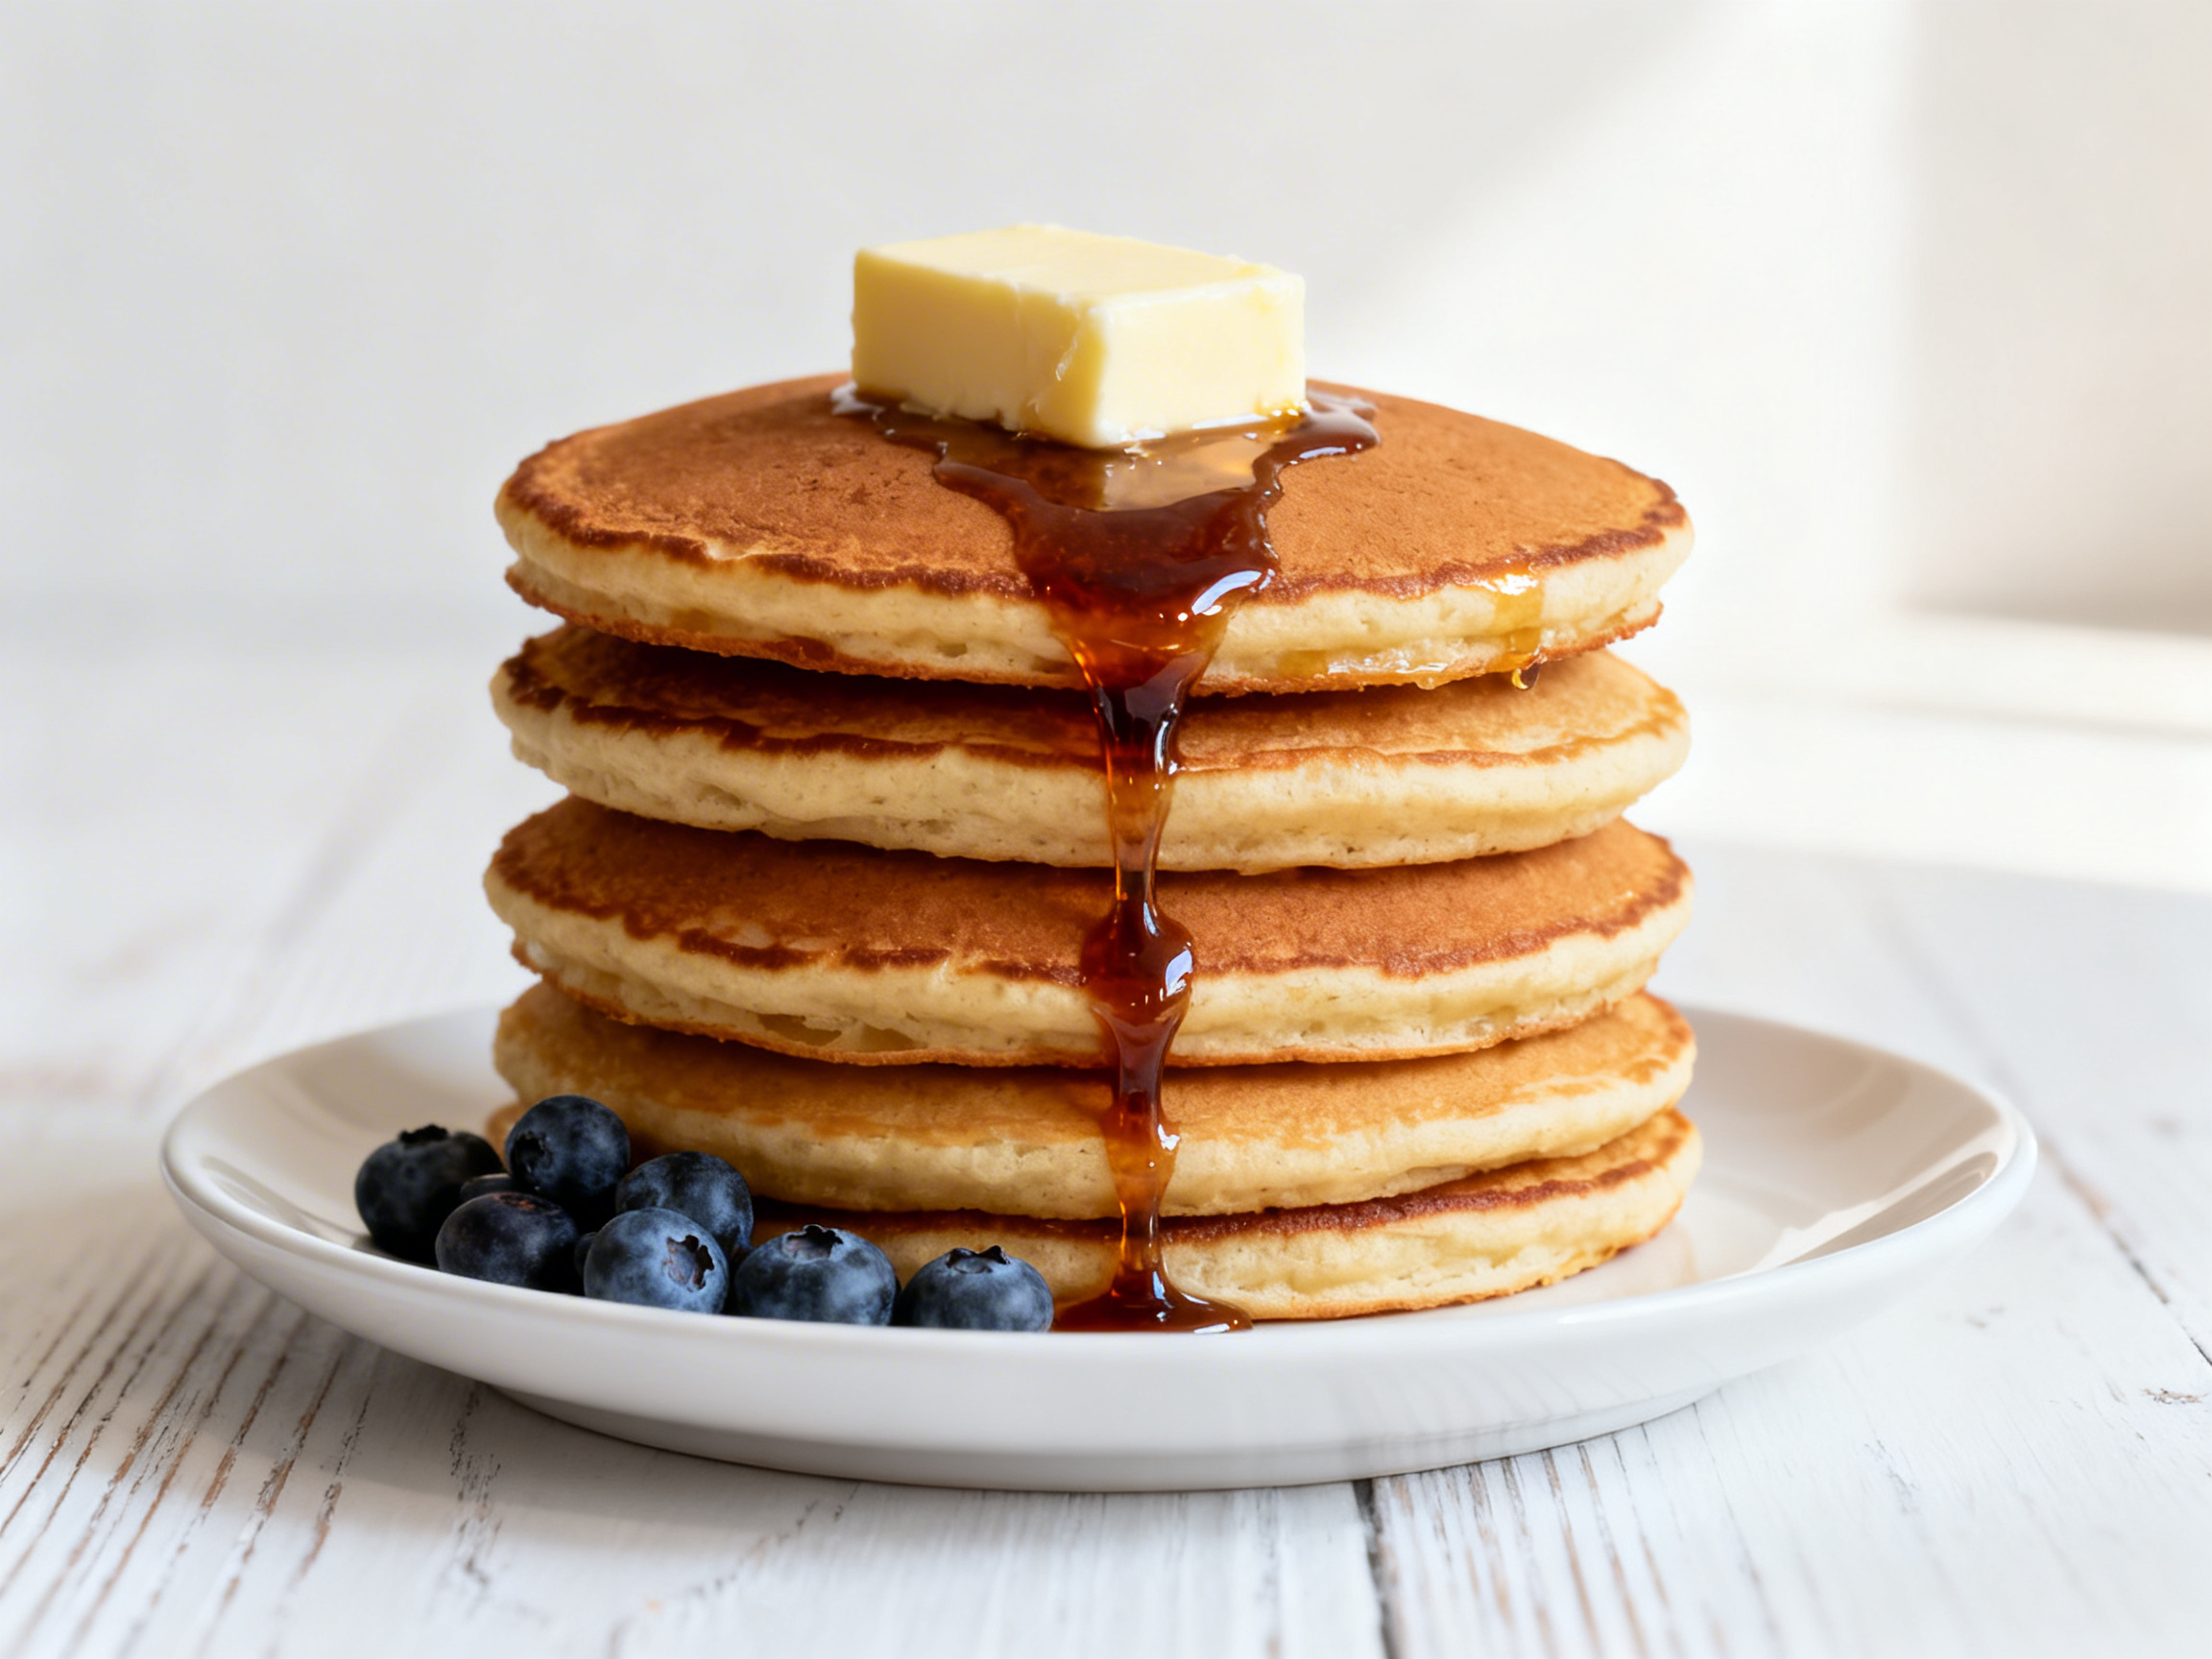
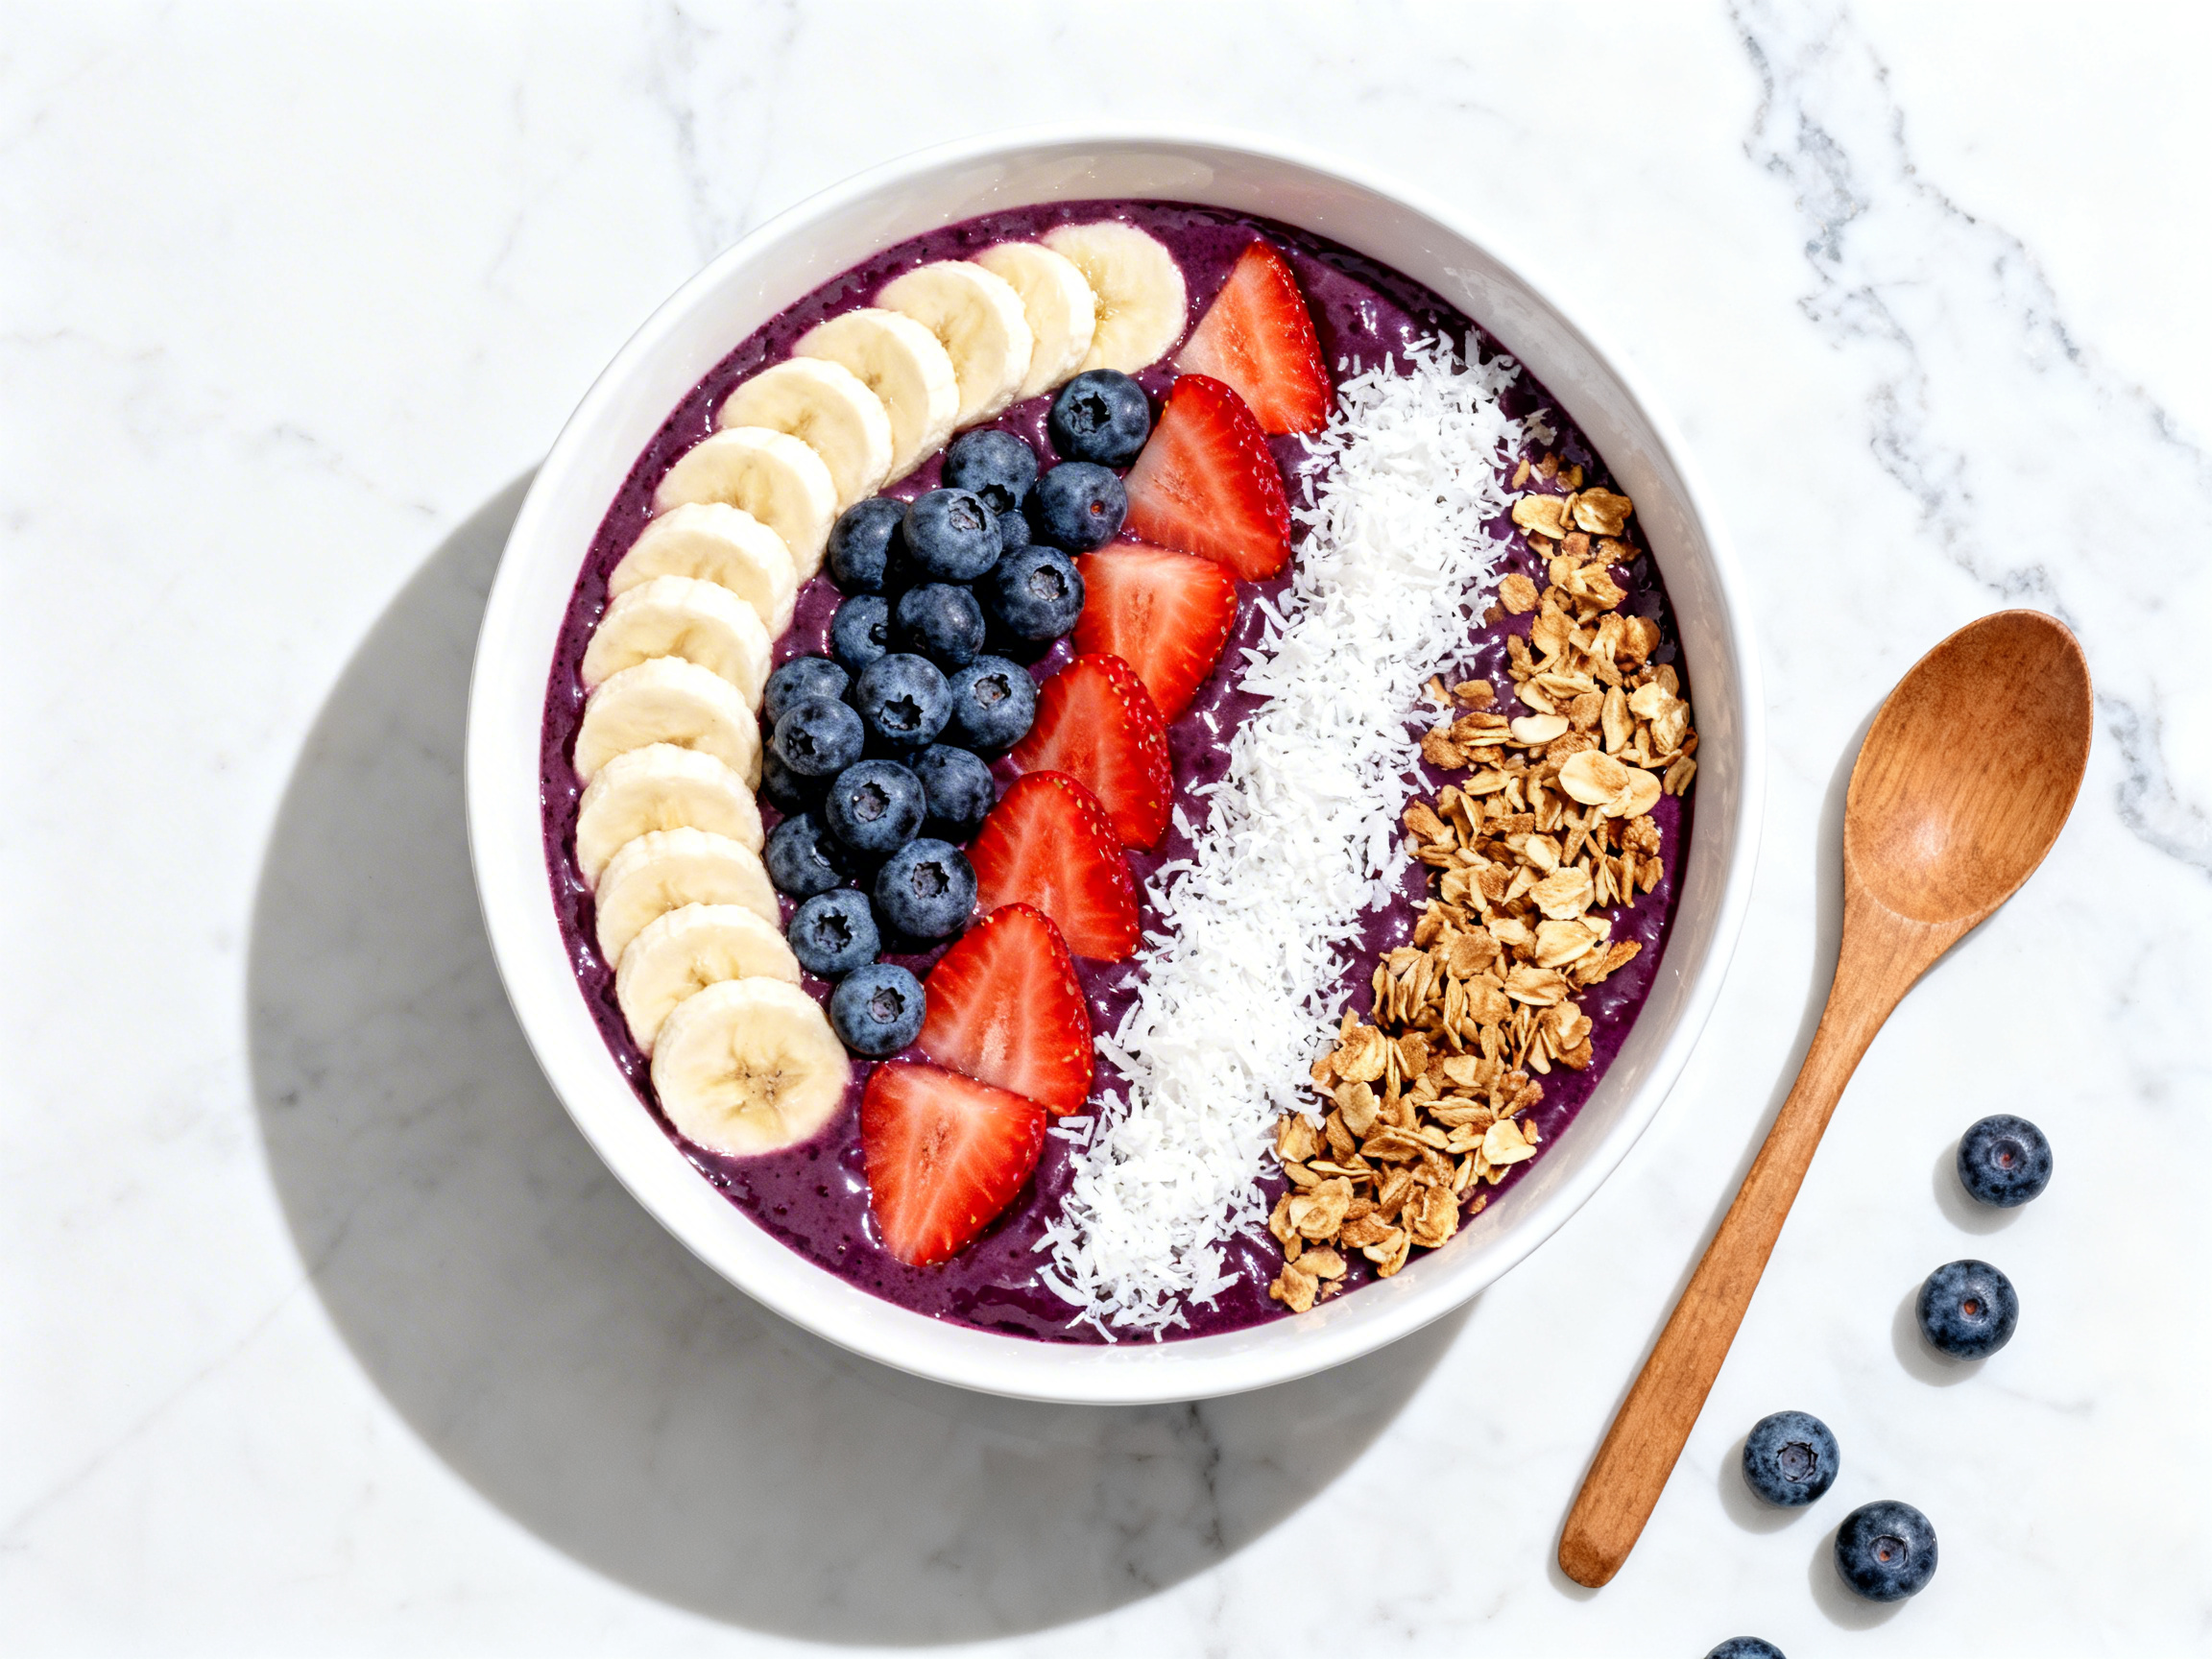
The central technical challenge in brunch photography is the simultaneous degradation of multiple elements on a single plate. Eggs benedict is the canonical example: the hollandaise sauce - an emulsion of egg yolk, butter, and lemon - begins to break the moment it is plated, while the poached egg beneath continues cooking from residual heat, with the yolk firming from a liquid center to a set texture in approximately four minutes. This creates a hard deadline. To photograph the yolk-break moment - where you pierce the poached egg and capture the golden stream running through the hollandaise - you must be camera-ready before the plate leaves the kitchen. Pancake stacks present a structural challenge: the weight of each cake compresses the stack, and steam trapped between layers accelerates this collapse. Butter placed on top of the stack melts quickly under lights, which can look beautiful in a video but results in an unappealing grease pool in a still shot if not timed precisely. Acai bowls and smoothie bowls melt progressively under any heat source, making them a shoot-it-fast dish. Build your lighting and frame before the bowl arrives.
Best Lighting for Brunch Photography
Brunch is the one cuisine category where the cliche "morning light" rule is genuinely correct. Large north-facing or east-facing windows in the first two to three hours after sunrise produce a soft, directional natural light that is inherently flattering for eggs benedict hollandaise, fruit garnishes, and the glossy surface of maple syrup on pancakes. The light at this time of day is lower in color temperature than midday sun, leaning slightly warm without going amber - exactly right for brunch tones. If shooting at a restaurant during service, position the plate as close to the window as safely possible and use a white foam-core reflector on the opposite side to fill shadows without flattening the image. For studio setups, a large 6×4-foot softbox positioned high and slightly in front of the plate at roughly a 45-degree angle mimics morning window light effectively. Avoid warm amber tungsten-style lighting entirely - it makes hollandaise look yellowed and old, turns the whites of poached eggs gray, and dulls the green of avocado. Cool-to-neutral daylight color balance (5500–6000K) is the target for the vast majority of brunch dishes.
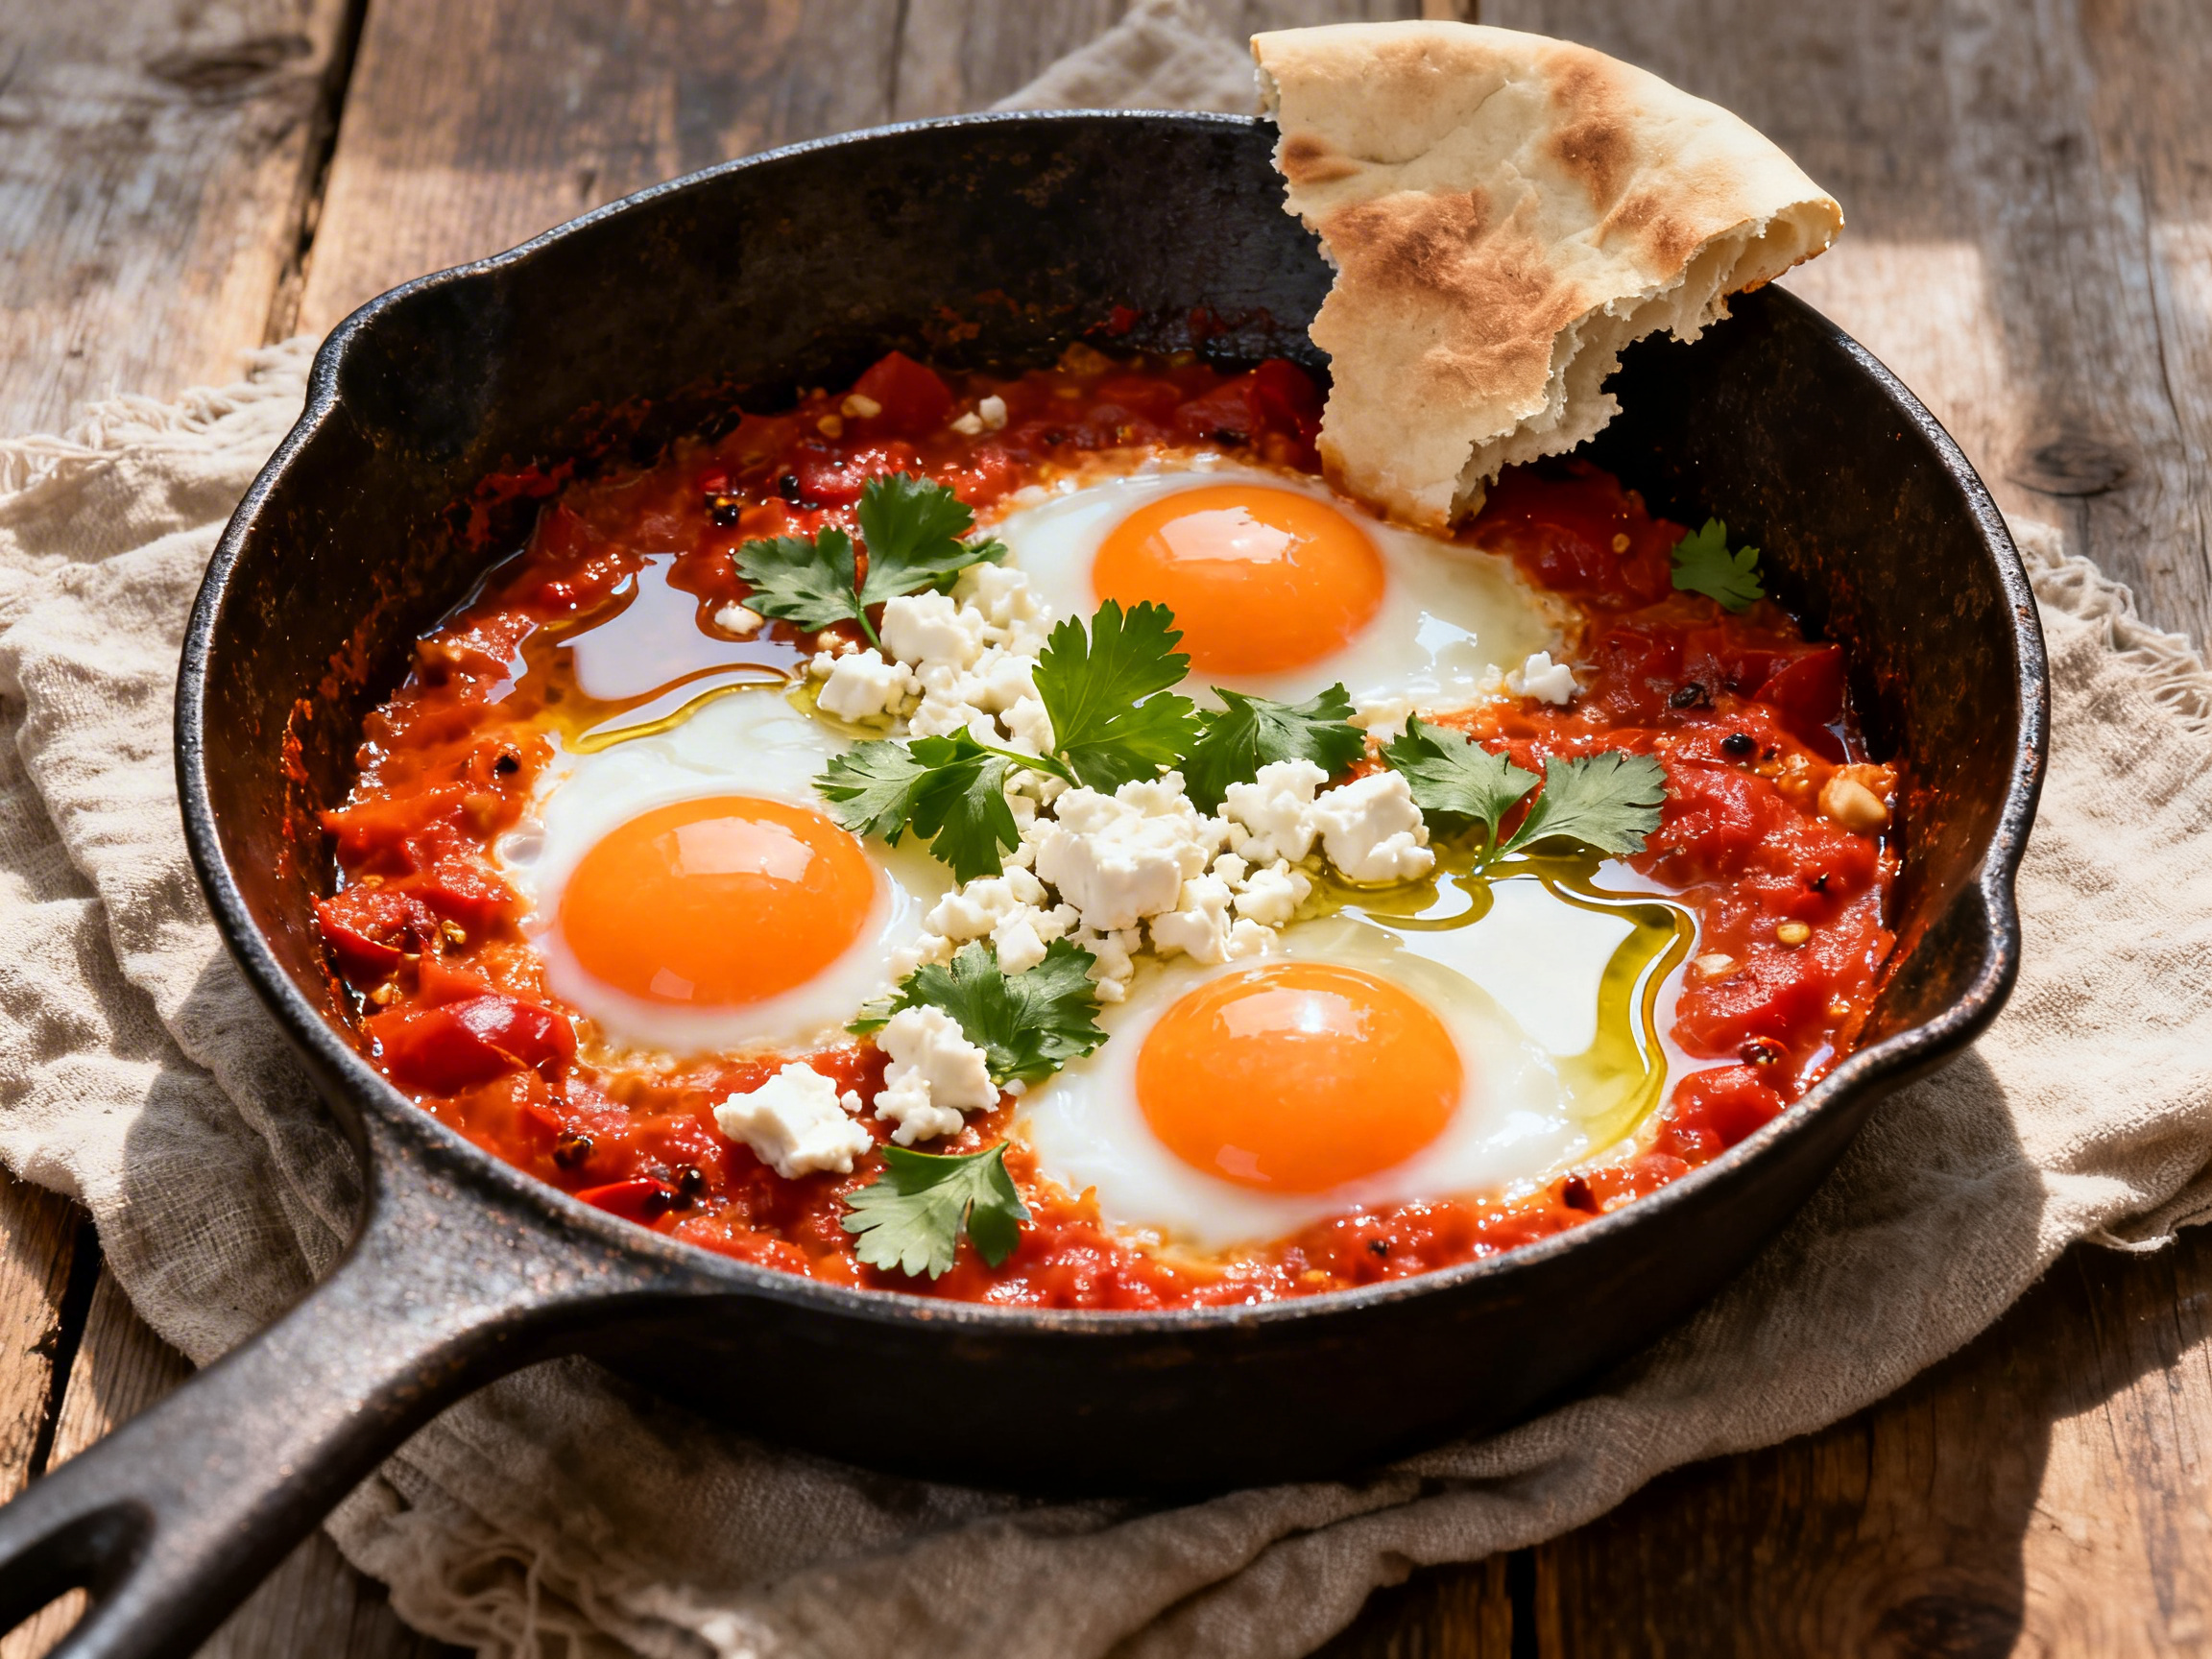
Camera Angles for Brunch
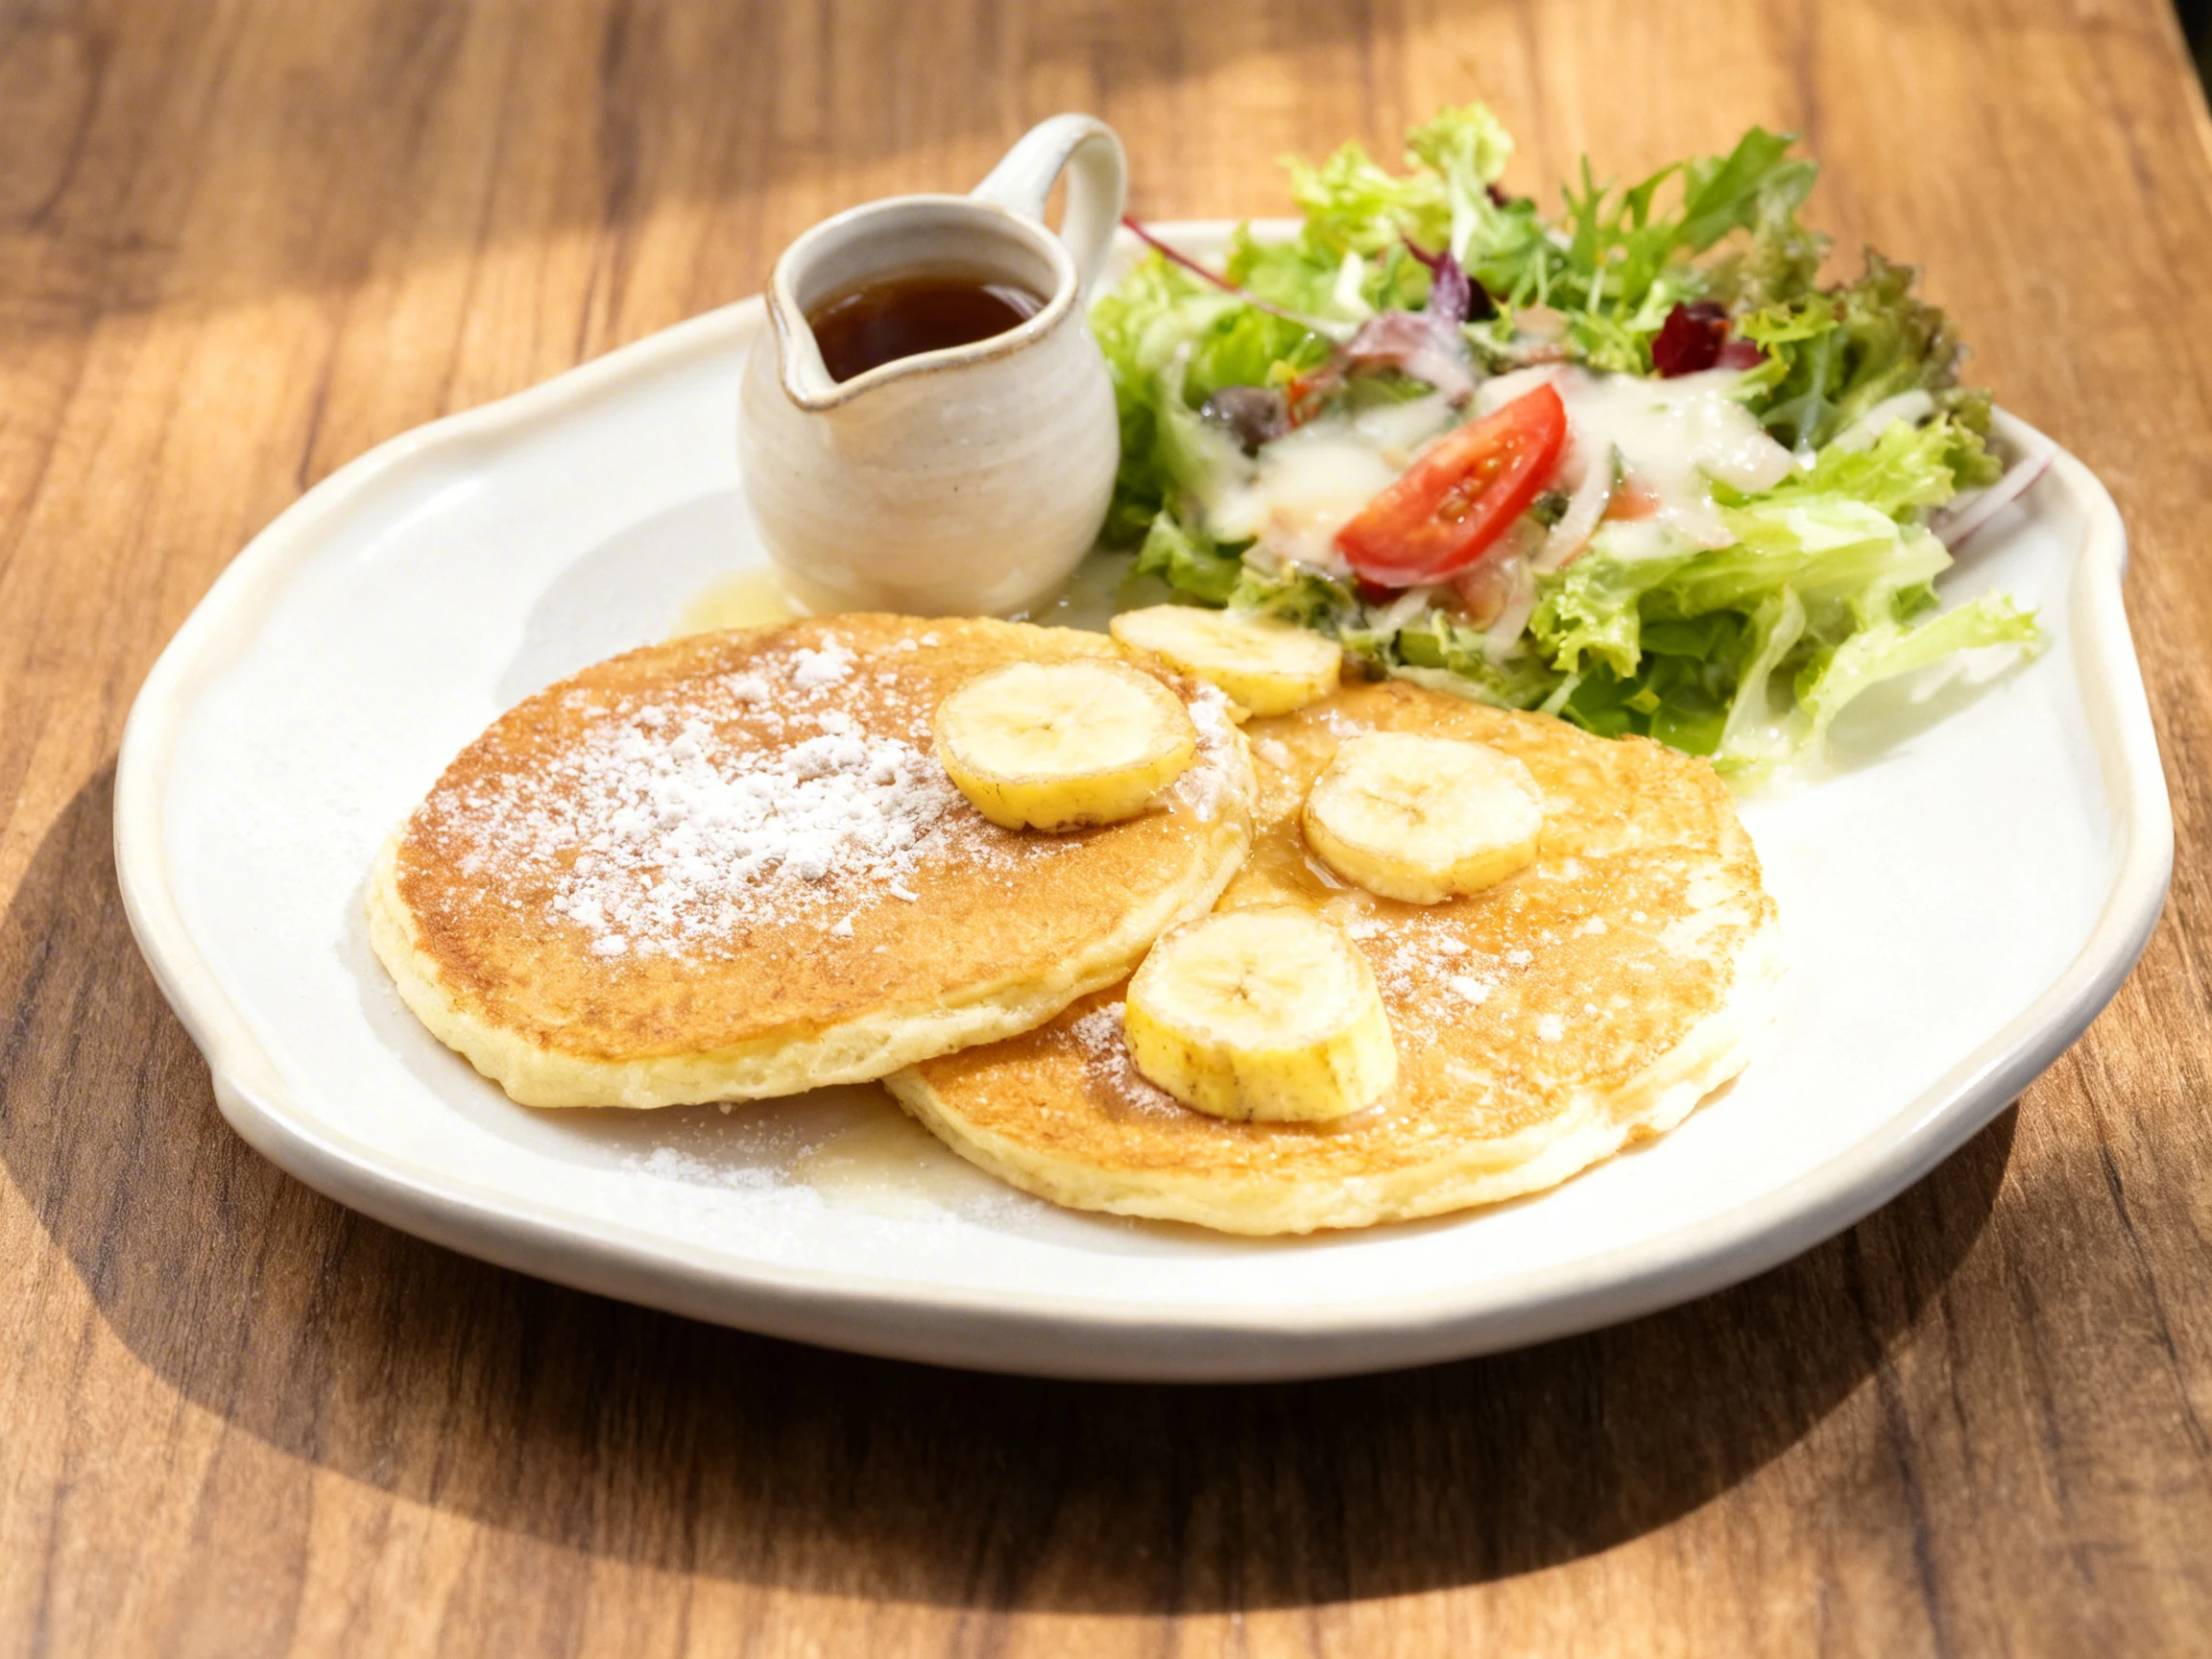
Overhead is the defining brunch angle, driven largely by the Instagram era of the 2010s transforming avocado toast and acai bowls into cultural symbols shot from directly above. For acai bowls, grain bowls, shakshuka (shot in its cast-iron skillet), and flat-lay avocado toast compositions, a true 90-degree overhead on a round white plate or marble surface remains the strongest choice. The overhead angle flattens depth and forces compositions into a graphic, almost illustrative quality that performs extremely well on Instagram and delivery app category tiles. For eggs benedict specifically, a 45-degree angle is almost always more effective than overhead: the angled shot reveals the height of the poached egg above the English muffin, the flow of hollandaise down the side, and the cross-section of Canadian bacon beneath - elements that disappear in a flat top-down view. Pancake stacks are best photographed at true eye-level or just 5–10 degrees above it, framing the full height of the stack with the butter pat and maple syrup visible on top. French toast benefits from a 30–45-degree angle that captures caramelized crust texture.
Food Styling and Props
Brunch styling balances abundance with restraint. The aesthetic is aspirational-casual: beautiful but not fussy. For eggs benedict, place the dish on a round white ceramic plate over a linen napkin with a slight fold at the lower-left corner of frame. A small ramekin of extra hollandaise to the side adds depth and context. A halved lemon or a few capers scattered nearby reinforce freshness without cluttering the plate. For pancake stacks, build height deliberately: use the flattest pancakes on the bottom and the most visually interesting on top. Place a thick-cut pat of butter slightly off-center on top and pour a thin stream of real maple syrup (not pancake syrup, which lacks the amber depth) down the front face of the stack just before the shot. A scattered handful of fresh blueberries or sliced strawberries adds color contrast. For avocado toast, fan the avocado slices instead of mashing - it reads as more premium in photography. Use sourdough for its open crumb structure, which photographs with far more texture than standard bread. Shakshuka benefits from being styled in a well-seasoned cast-iron skillet with a rough linen cloth underneath and a torn piece of pita bread leaning against the pan edge. Mimosas in flute glasses should be filled to two-thirds and styled with a citrus wheel on the rim for color. Acai bowls require strict section composition - each topping in its own zone, granola poured last to preserve crunch texture and color.
Recommended props
Equipment Guide
A full-frame mirrorless camera with a 50mm or 85mm prime lens is the ideal brunch photography setup: the moderate focal length avoids the geometric distortion that wider lenses introduce on overhead shots while rendering the gentle bokeh on background props that defines the brunch aesthetic. For overhead shots, a camera arm or boom stand is essential - shooting handheld directly overhead is unstable and leads to motion blur. A remote shutter release or 2-second timer eliminates camera shake at the moment of capture. Because brunch timing is critical, set your exposure before the food arrives: use aperture priority mode at f/2.8–f/4 with auto-ISO capped at 1600. This allows rapid reframing without fumbling with settings during a four-minute hollandaise window. A small V-flat (a folded foam-core board, white on one side) placed opposite the window provides fill light without the color cast of a silver reflector. Keep a fine-mist spray bottle nearby - a single spritz on a mimosa glass or fruit adds condensation realism that looks far more appealing in print and digital display than a dry surface.
Skip the photoshoot — enhance the brunch photos you already have
The techniques on this page take time to master. MenuPhotoAI applies the same lighting, color, and texture corrections — automatically — to the smartphone photos you already shot. Studio-quality results in 30 seconds.
Try free — 5 credits, no cardCommon Brunch Photography Mistakes
Shooting eggs benedict after the yolk sets
The poached egg yolk firms from liquid to set in approximately four minutes after plating due to residual heat. Once set, the yolk-break money shot is impossible to recreate without a new plate. Arrive with camera ready, frame pre-set, and trigger the shutter within 90 seconds of the plate landing on the set. Never prioritize prop arrangement over this timing window.
Using warm amber lighting on hollandaise
Warm tungsten or amber-gelled lighting shifts hollandaise from its natural golden-ivory tone to a yellow-gray that reads as old or curdled in photography. Brunch lighting must be daylight-balanced (5500–6000K) to render hollandaise, egg whites, and avocado accurately. Warm light works for evening cuisine; it actively undermines brunch food quality signals.
Overcrowding the pancake stack frame
Adding too many props around a pancake stack - multiple sauces, full fruit bowls, coffee cups, flowers - competes with the stack itself and eliminates the bold silhouette that makes the dish immediately recognizable. Shoot the stack with one accent prop maximum: either fresh berries or a maple syrup pour, not both.
Photographing acai bowls under hot lights
Hot continuous lights or a poorly ventilated studio will begin melting an acai bowl within two to three minutes, collapsing the carefully sectioned toppings into a smoothie puddle. Either shoot immediately with pre-set framing, or use cool LED panels rather than tungsten. Build a stand-in bowl for lighting setup and swap to the real bowl only when the camera is ready to fire.
Mashing instead of fanning avocado on toast
Smashed avocado spread uniformly on toast photographs as a green paste with no visual texture or premium signal. Slicing the avocado and fanning it across the bread in overlapping layers reveals the creamy interior gradient from yellow center to bright green edge, dramatically increasing the perceived quality of the dish in both print and digital formats.
Editing Tips
Brunch editing should feel bright and clean, not dark or moody. Start by pulling whites up slightly and recovering any blown highlights in hollandaise or maple syrup - these glossy surfaces tend to clip. Lift shadows minimally to open up dark areas under the pancake stack or beneath herb garnishes, but preserve enough contrast to avoid the flat "food blogger preset" look. Raise clarity by 10–15 points to enhance the texture of sourdough crumb, pancake edges, and granola. For avocado toast and acai bowls, add a small vibrance boost rather than full saturation to keep colors natural. Color grade toward a very faint warm-cool split: warm mid-tones and slightly cooler shadows reinforce the morning-light aesthetic without oversaturating.
Platform-Specific Tips
On DoorDash and Uber Eats, brunch category tiles display at small sizes in a horizontal scroll row. An overhead shot of a full plate or bowl with clear color contrast performs far better than a tight detail crop. The round-plate-on-marble overhead composition is the single highest-converting brunch thumbnail format on delivery platforms. Use a square crop (1:1) for DoorDash category images. For Instagram feed and Reels, the overhead angle remains dominant for bowls and toast, but a 45-degree eggs benedict yolk-break shot or a pancake stack eye-level with steam rising tends to outperform static overheads in Reels and Stories due to its implied motion and drama. Carousel posts work well for brunch: lead with the hero overhead plate, follow with a detail shot (the yolk break, the syrup pour), then close with a lifestyle shot of the full table. For print menus, the 45-degree eggs benedict or a side-view pancake stack prints beautifully in landscape format - these angles read instantly even at small menu sizes.
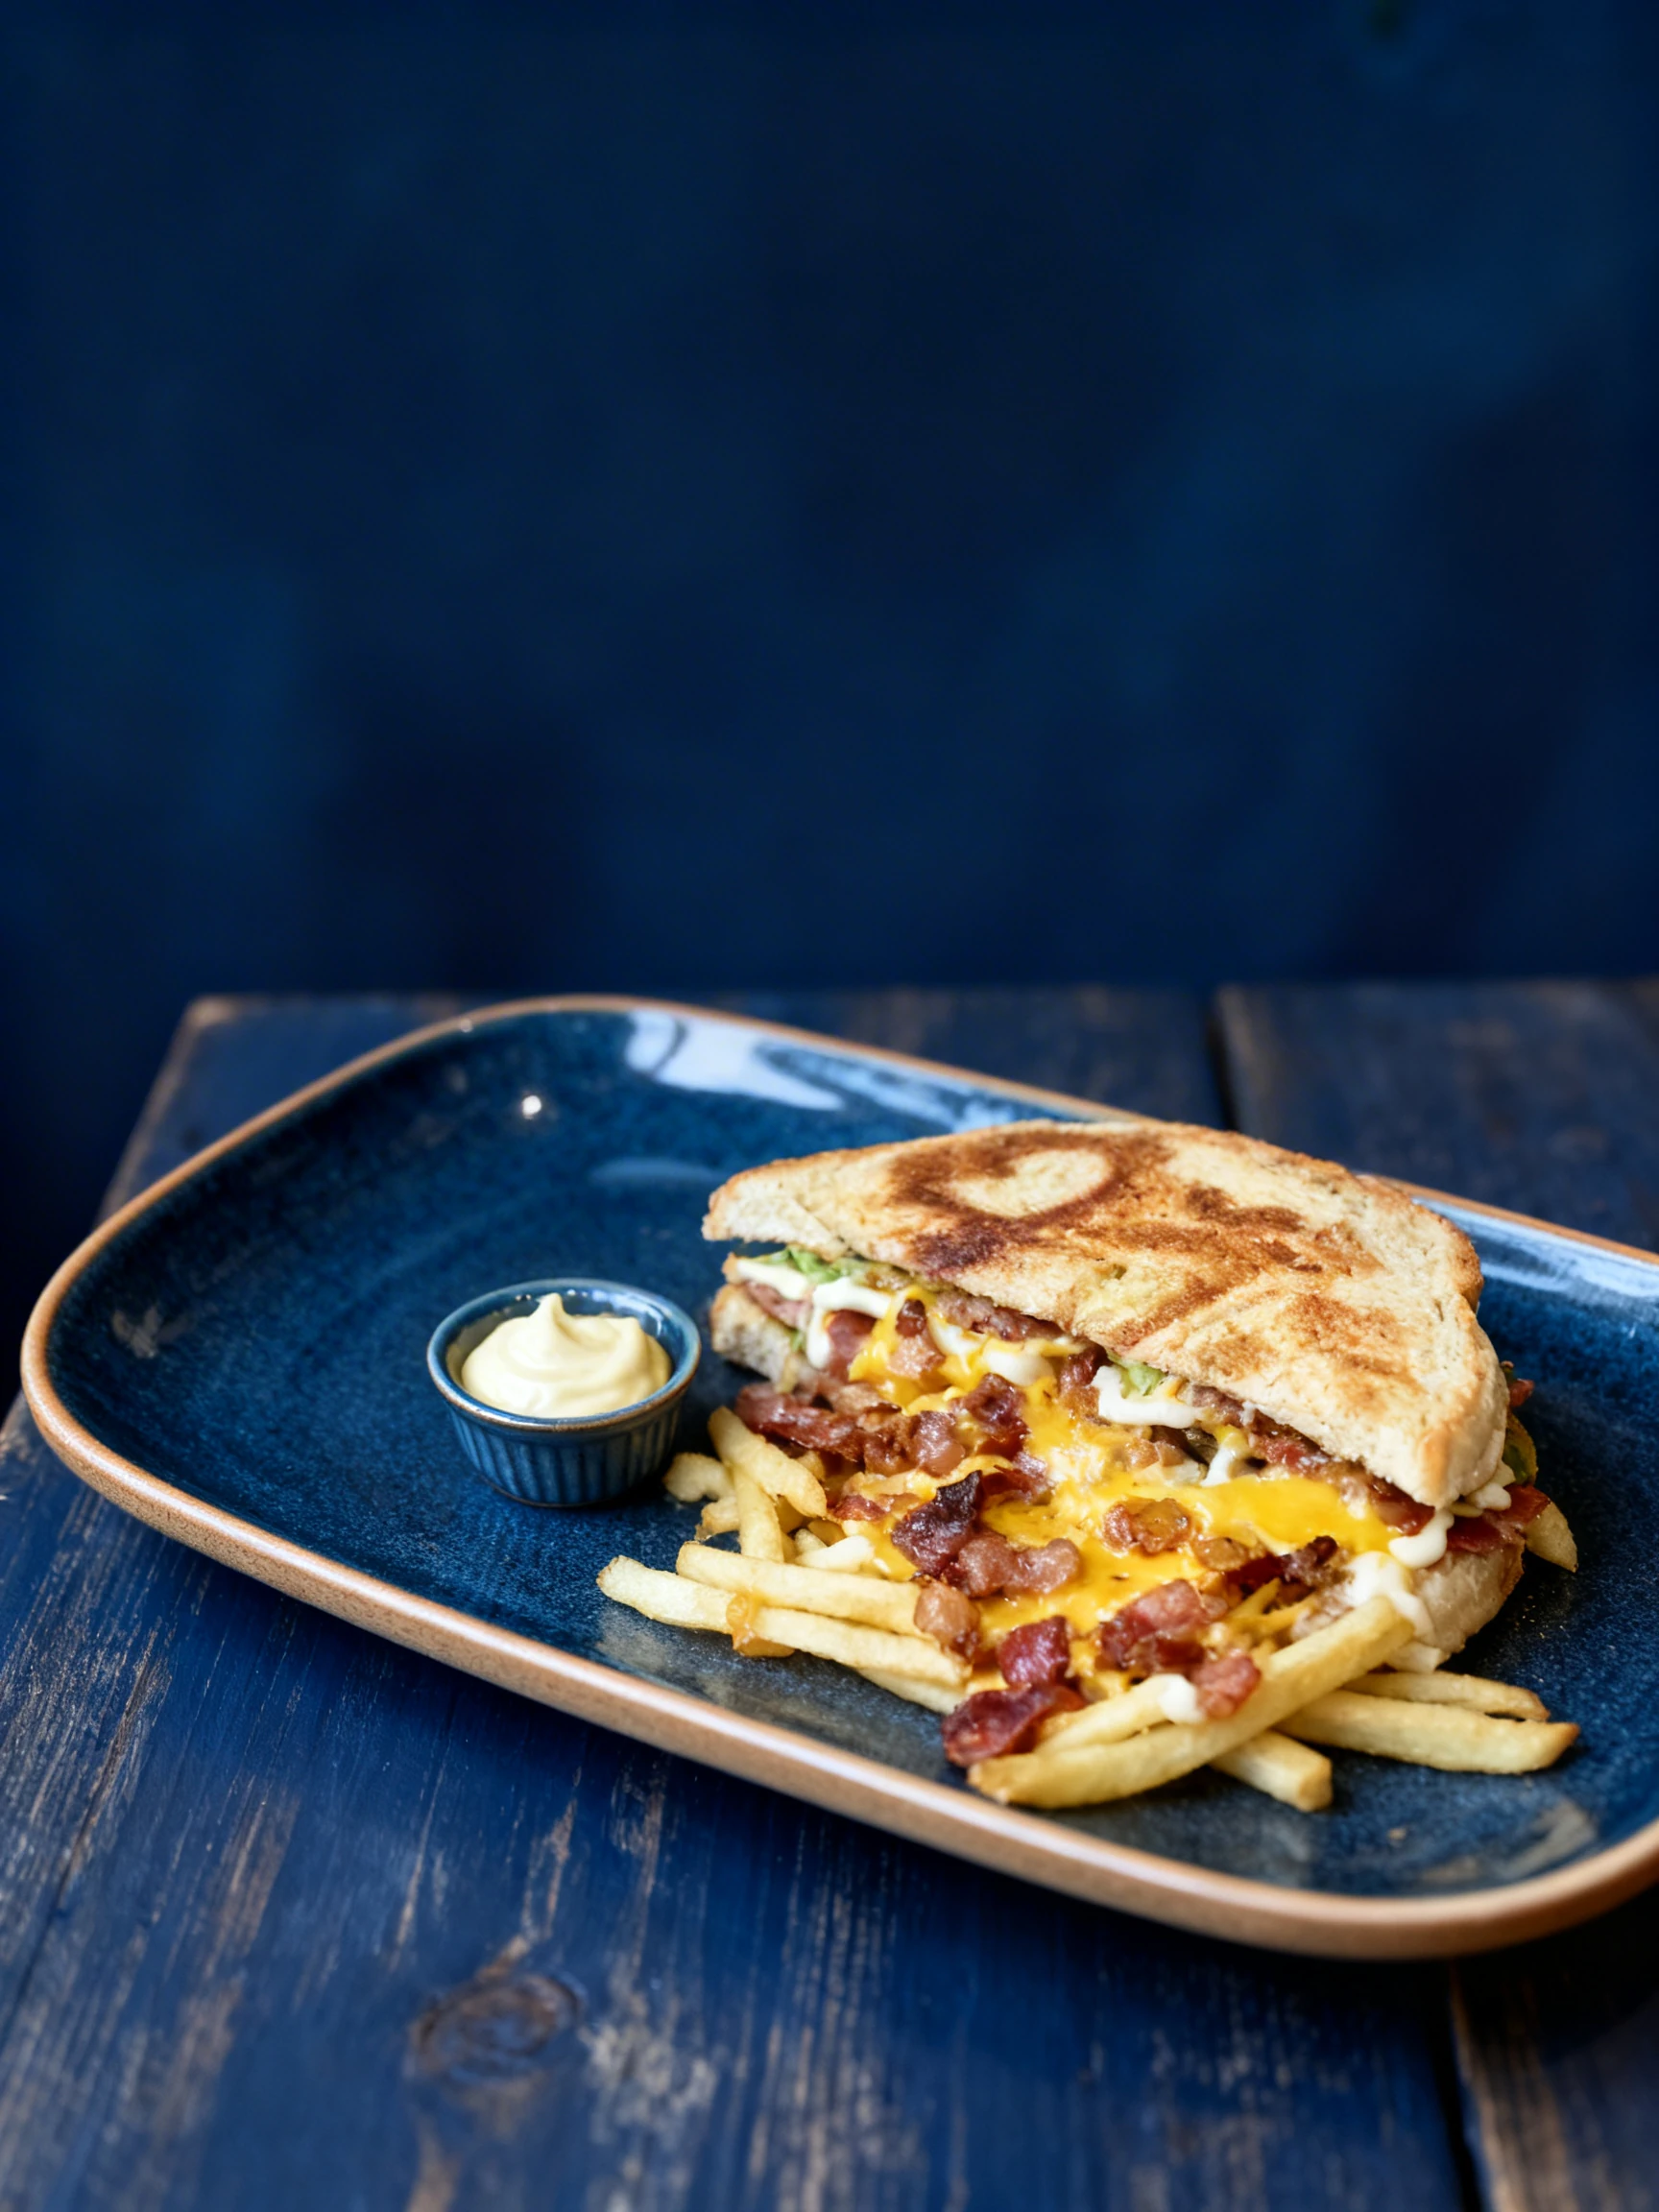
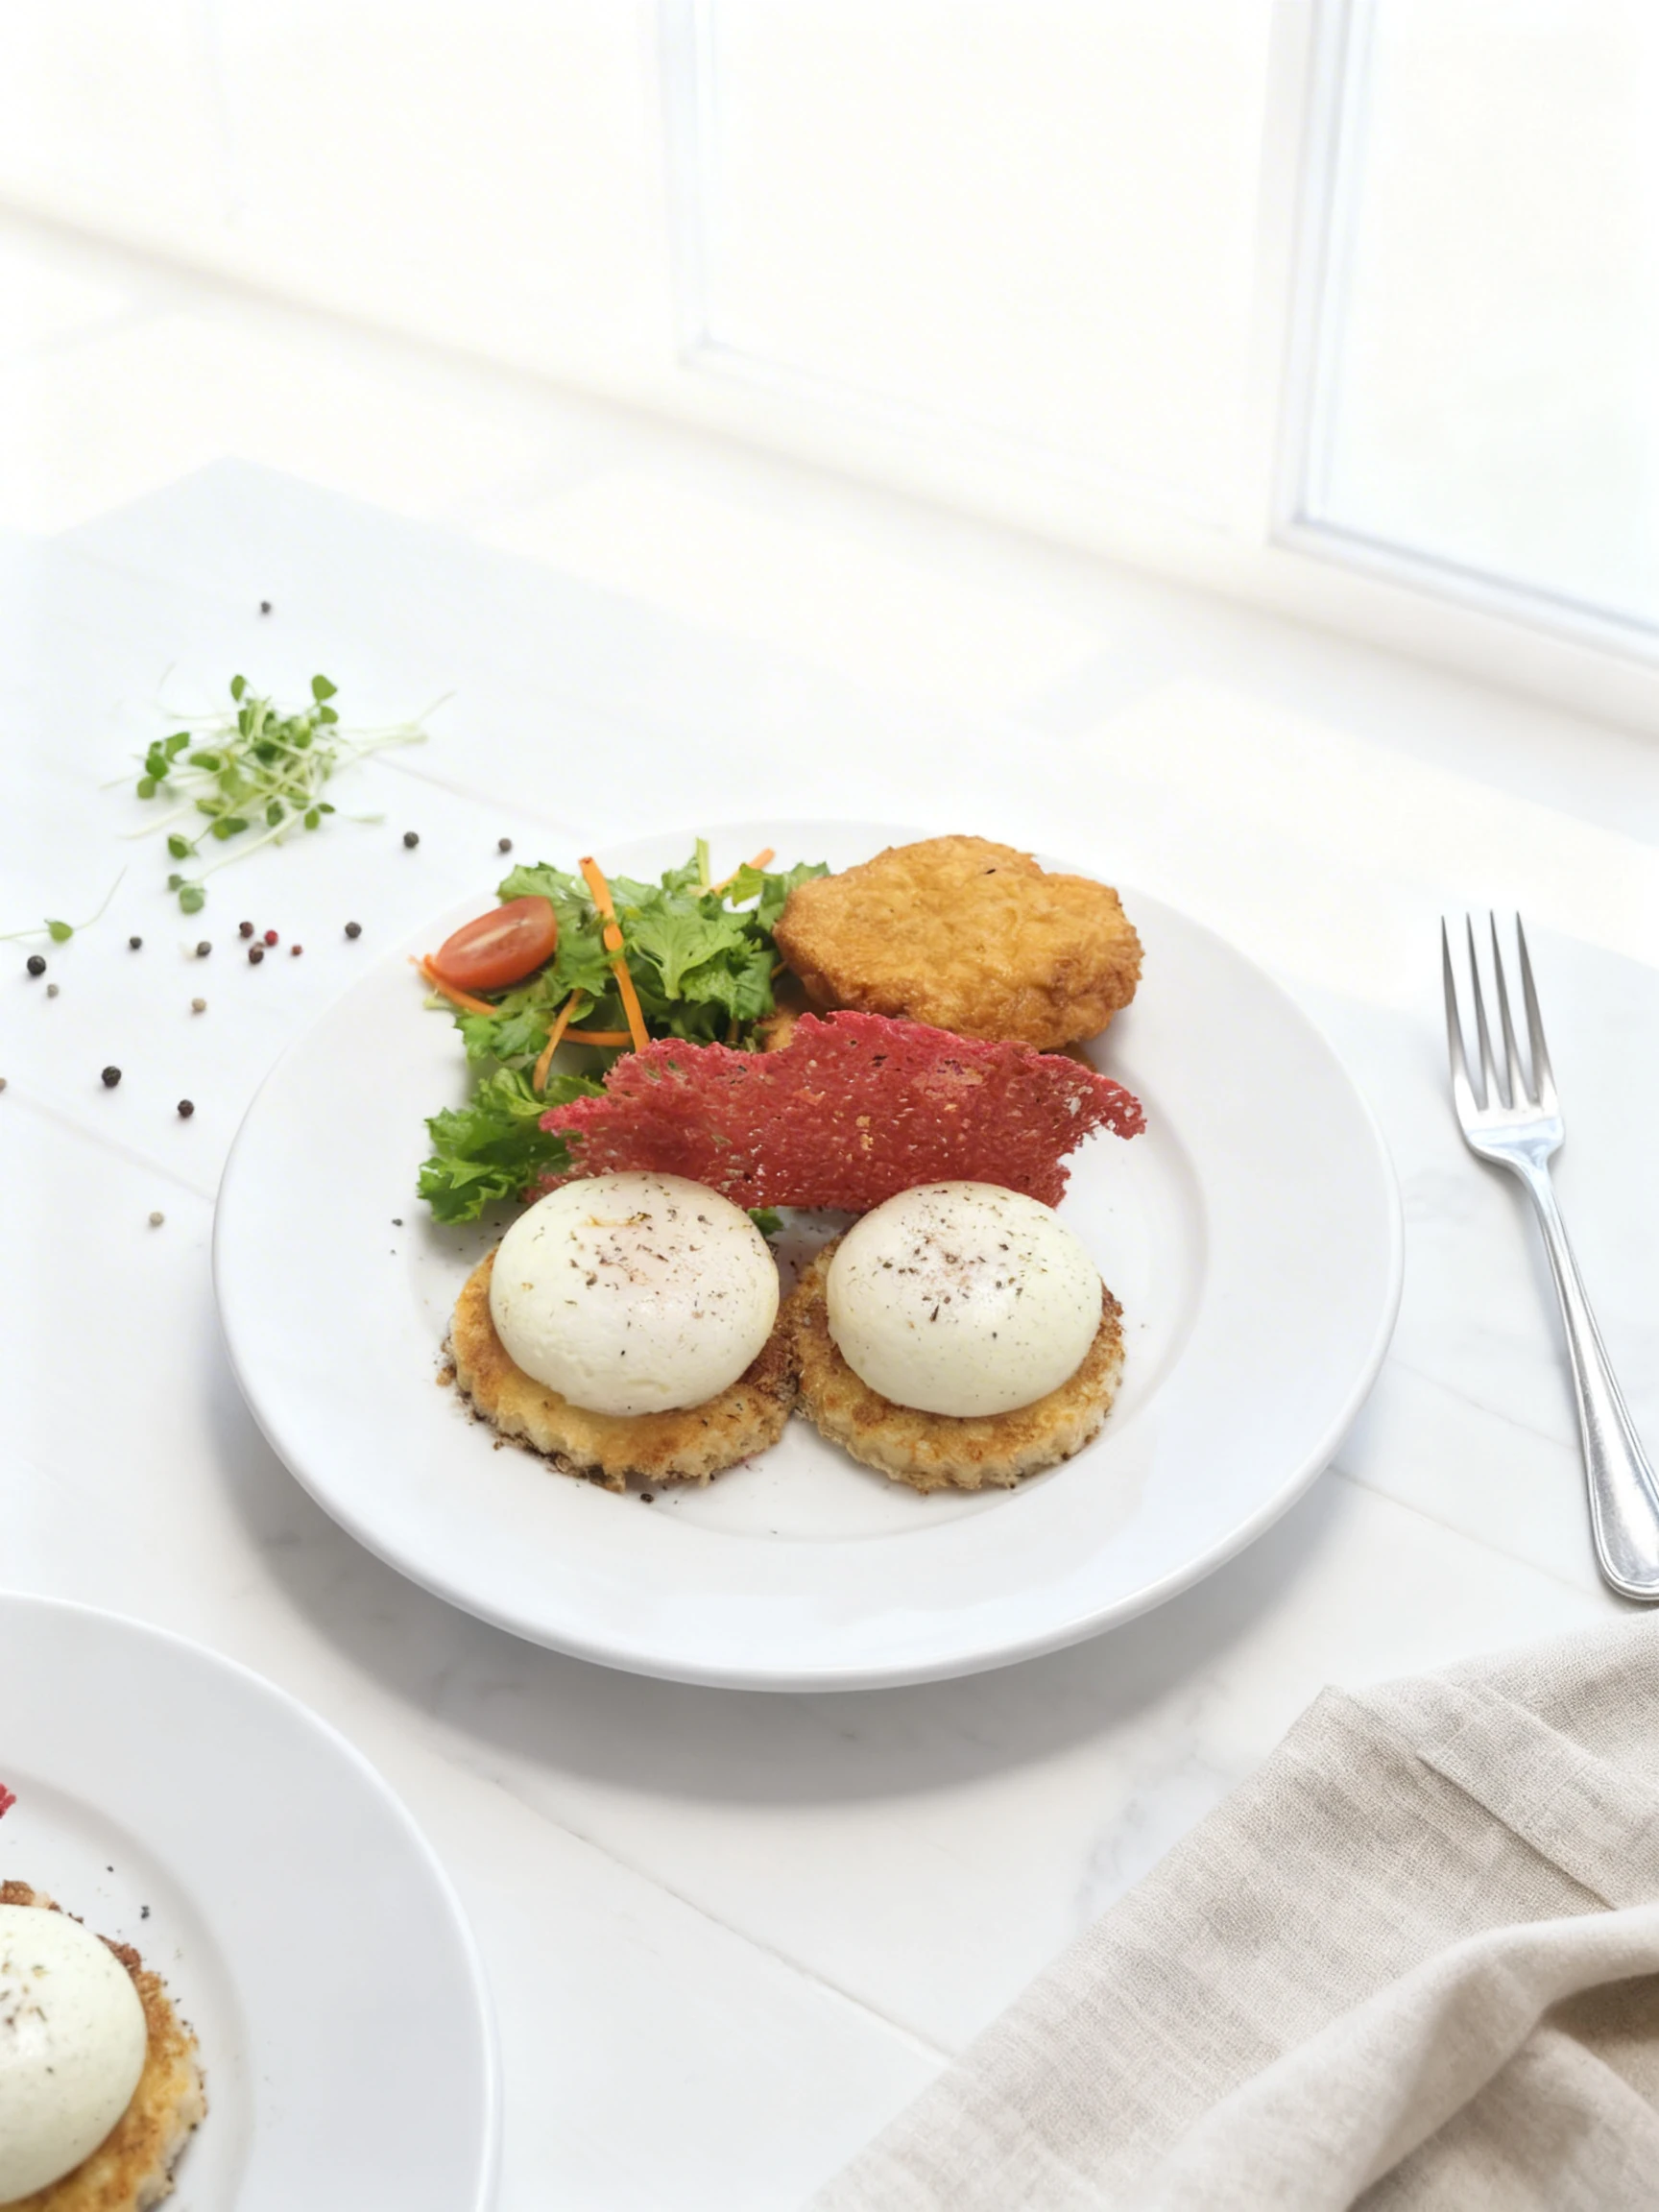
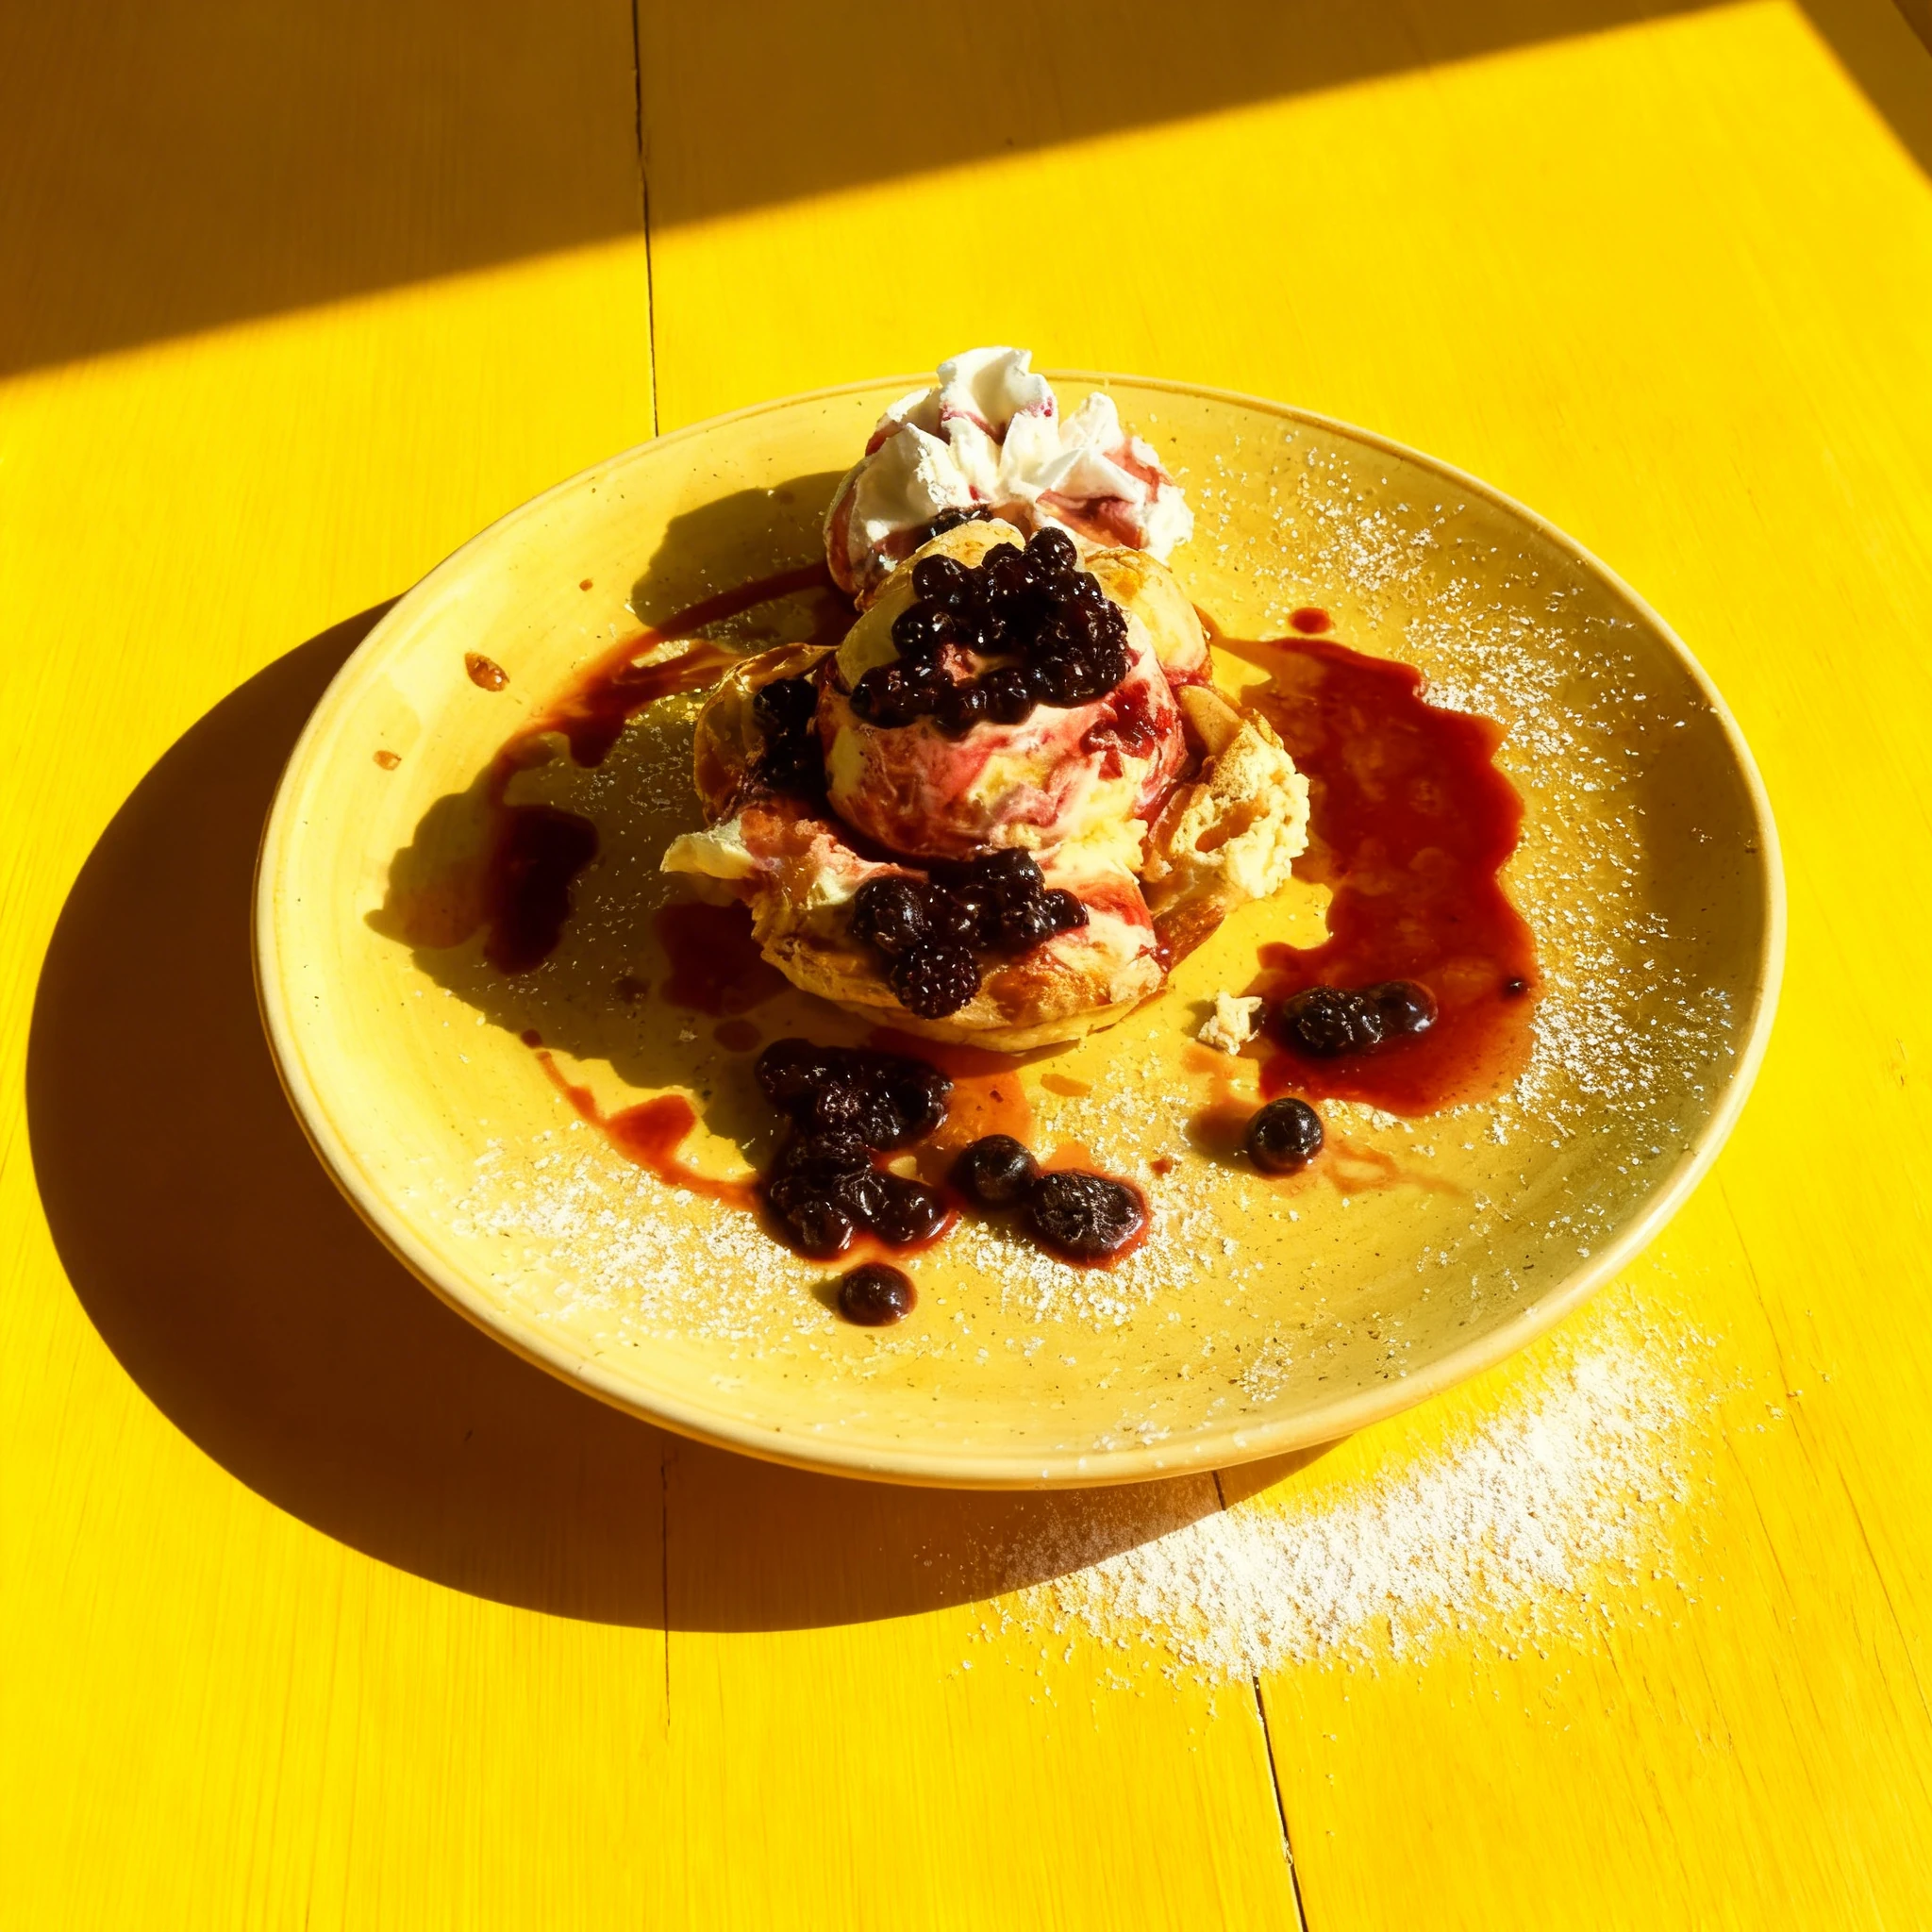
Brunch Photo Examples
Real brunch photos from restaurants using MenuPhotoAI. Tap any category to see the full gallery and the before-and-after view.
Take your Brunch photos further with AI
Once you have a solid shot using the techniques above, MenuPhotoAI can handle the finishing work. Our AI removes distracting backgrounds, corrects exposure and white balance, and applies cuisine-appropriate color grading — turning a good smartphone photo into something you'd be proud to put on your menu or delivery app listing. Start with 5 free photos, no credit card required.
Frequently Asked Questions
Skip the photoshoot — enhance the brunch photos you already have
The techniques on this page take time to master. MenuPhotoAI applies the same lighting, color, and texture corrections — automatically — to the smartphone photos you already shot. Studio-quality results in 30 seconds.
Try free — 5 credits, no cardMore Cuisine Photography Guides
This guide reflects best practices for Brunch food photography as of 2026. Techniques may vary based on specific dishes, equipment, and shooting conditions. MenuPhotoAI is an AI food photo enhancement platform.